
[Project Creation from 0 to 1 Using Spec-kit and Cursor]
Analyze with AI
Get AI-powered insights from this Mad Devs tech article:
There's a new concept that's getting a lot of attention lately: SDD (Spec-Driven Development).
There are plenty of discussions about the pros and cons of how SDD is implemented in tools like Spec-kit, Kiro, Tessl, and Openspec. I'm sure these debates will eventually lead to workflows that make using specs for AI engineering so effective that we’ll stop writing code manually at all; code writing itself will become the domain of LLMs.
But until that day comes, we can try using these spec tools for vibe-coders, people who like small projects and quick creation, to go from 0 to 1 (what's usually called greenfield development).
The real problem SDD tools solve
What SDD tools really solve is increasing your chances of getting what you actually want when starting a small project from scratch.
Instead of prompting your chat assistant in Cursor dozens of times until something finally works, you create a spec that reflects your intent, and that’s enough to get started. You can also describe the desired behavior of the model that will generate the code, like which stack and practices it should follow. That's the core.
To make it even clearer: you don't need to write the full spec manually. You just define your intent, see what the tool produces, then approve or adjust it. So the workflow looks like this:
You describe your intent → Spec-kit creates the spec → Cursor generates the code.
I tested this on a simple task, and below I’ll walk through the entire process.
Step 1: Getting started with Spec-kit
Imagine you're just a regular vibe-coder who wants to make life easier and quickly spin up a small project without shooting yourself in the foot. Start by checking out Spec-kit on GitHub and installing it on your machine:
uv tool install specify-cli --from git+https://github.com/github/spec-kit.gitNow you have the specify-cli tool.
You'll use it to create your new project. The CLI will ask where you want to generate code for your project, and you’ll get a list of supported generators (essentially IDEs with integrated LLMs). We'll choose Cursor, and then the tool will do what it was made for: it will create IDE commands so you can manage specs directly from inside it.
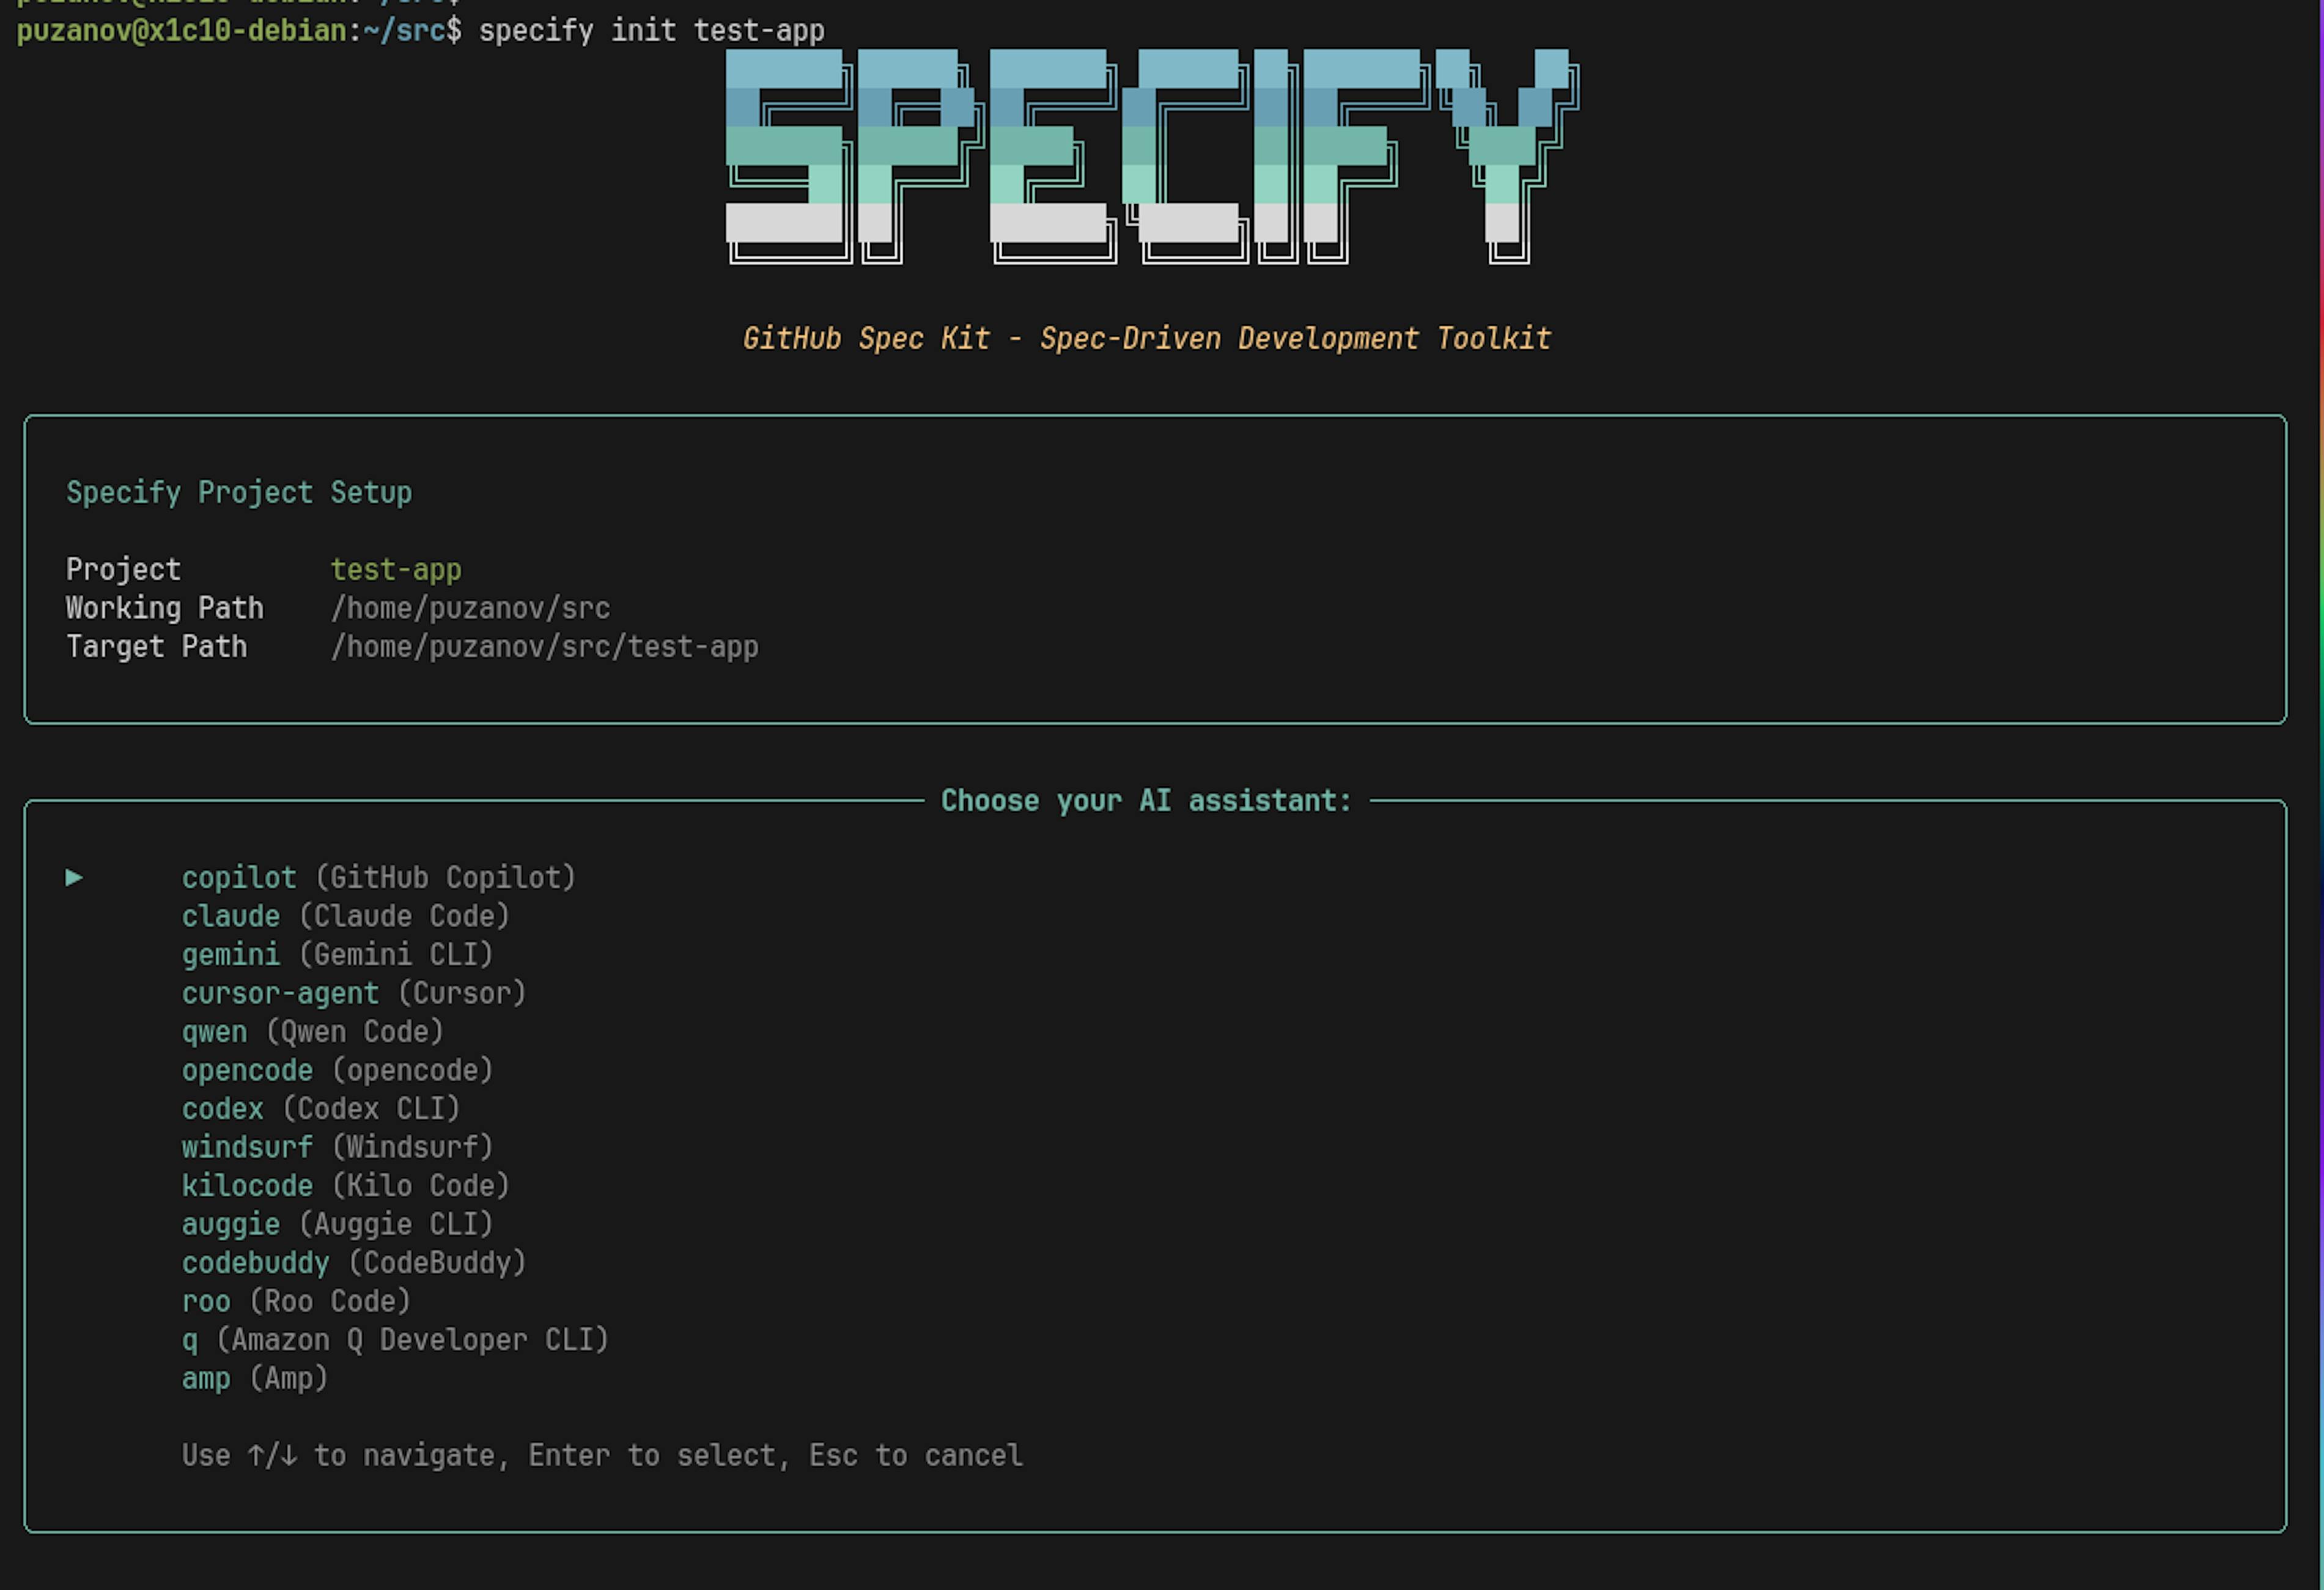
Step 2: Choosing an IDE and first un
After selecting your IDE (Cursor in our case), the tool scaffolds the initial project structure.
Then you just open it in Cursor, and from now on you'll mostly work there; the CLI itself is no longer needed. Cursor now provides these commands:
/speckit.specify
/speckit.plan
/speckit.implement
…and others. Typically, you'd start with:
/speckit.constitutionThis command defines your code generation rules: how to form libraries, how to write tests, how to format documentation, etc.
➡️ The motivation behind this approach is well explained here: Spec-kit: Constitutional Foundation
But for the sake of this experiment, we’ll skip that and go straight to expressing our intent; we'll specify constraints and behavior preferences later, during the planning stage.

Step 3: Defining the intent
Important: at this stage, we're not writing a specification; we're describing our intention.
The tool will generate the spec by itself: we’ll just validate, edit, or approve it. Spec-kit includes templates for every stage of spec generation, and how it forces IDE tools to gather the right context is done beautifully. We run this command:
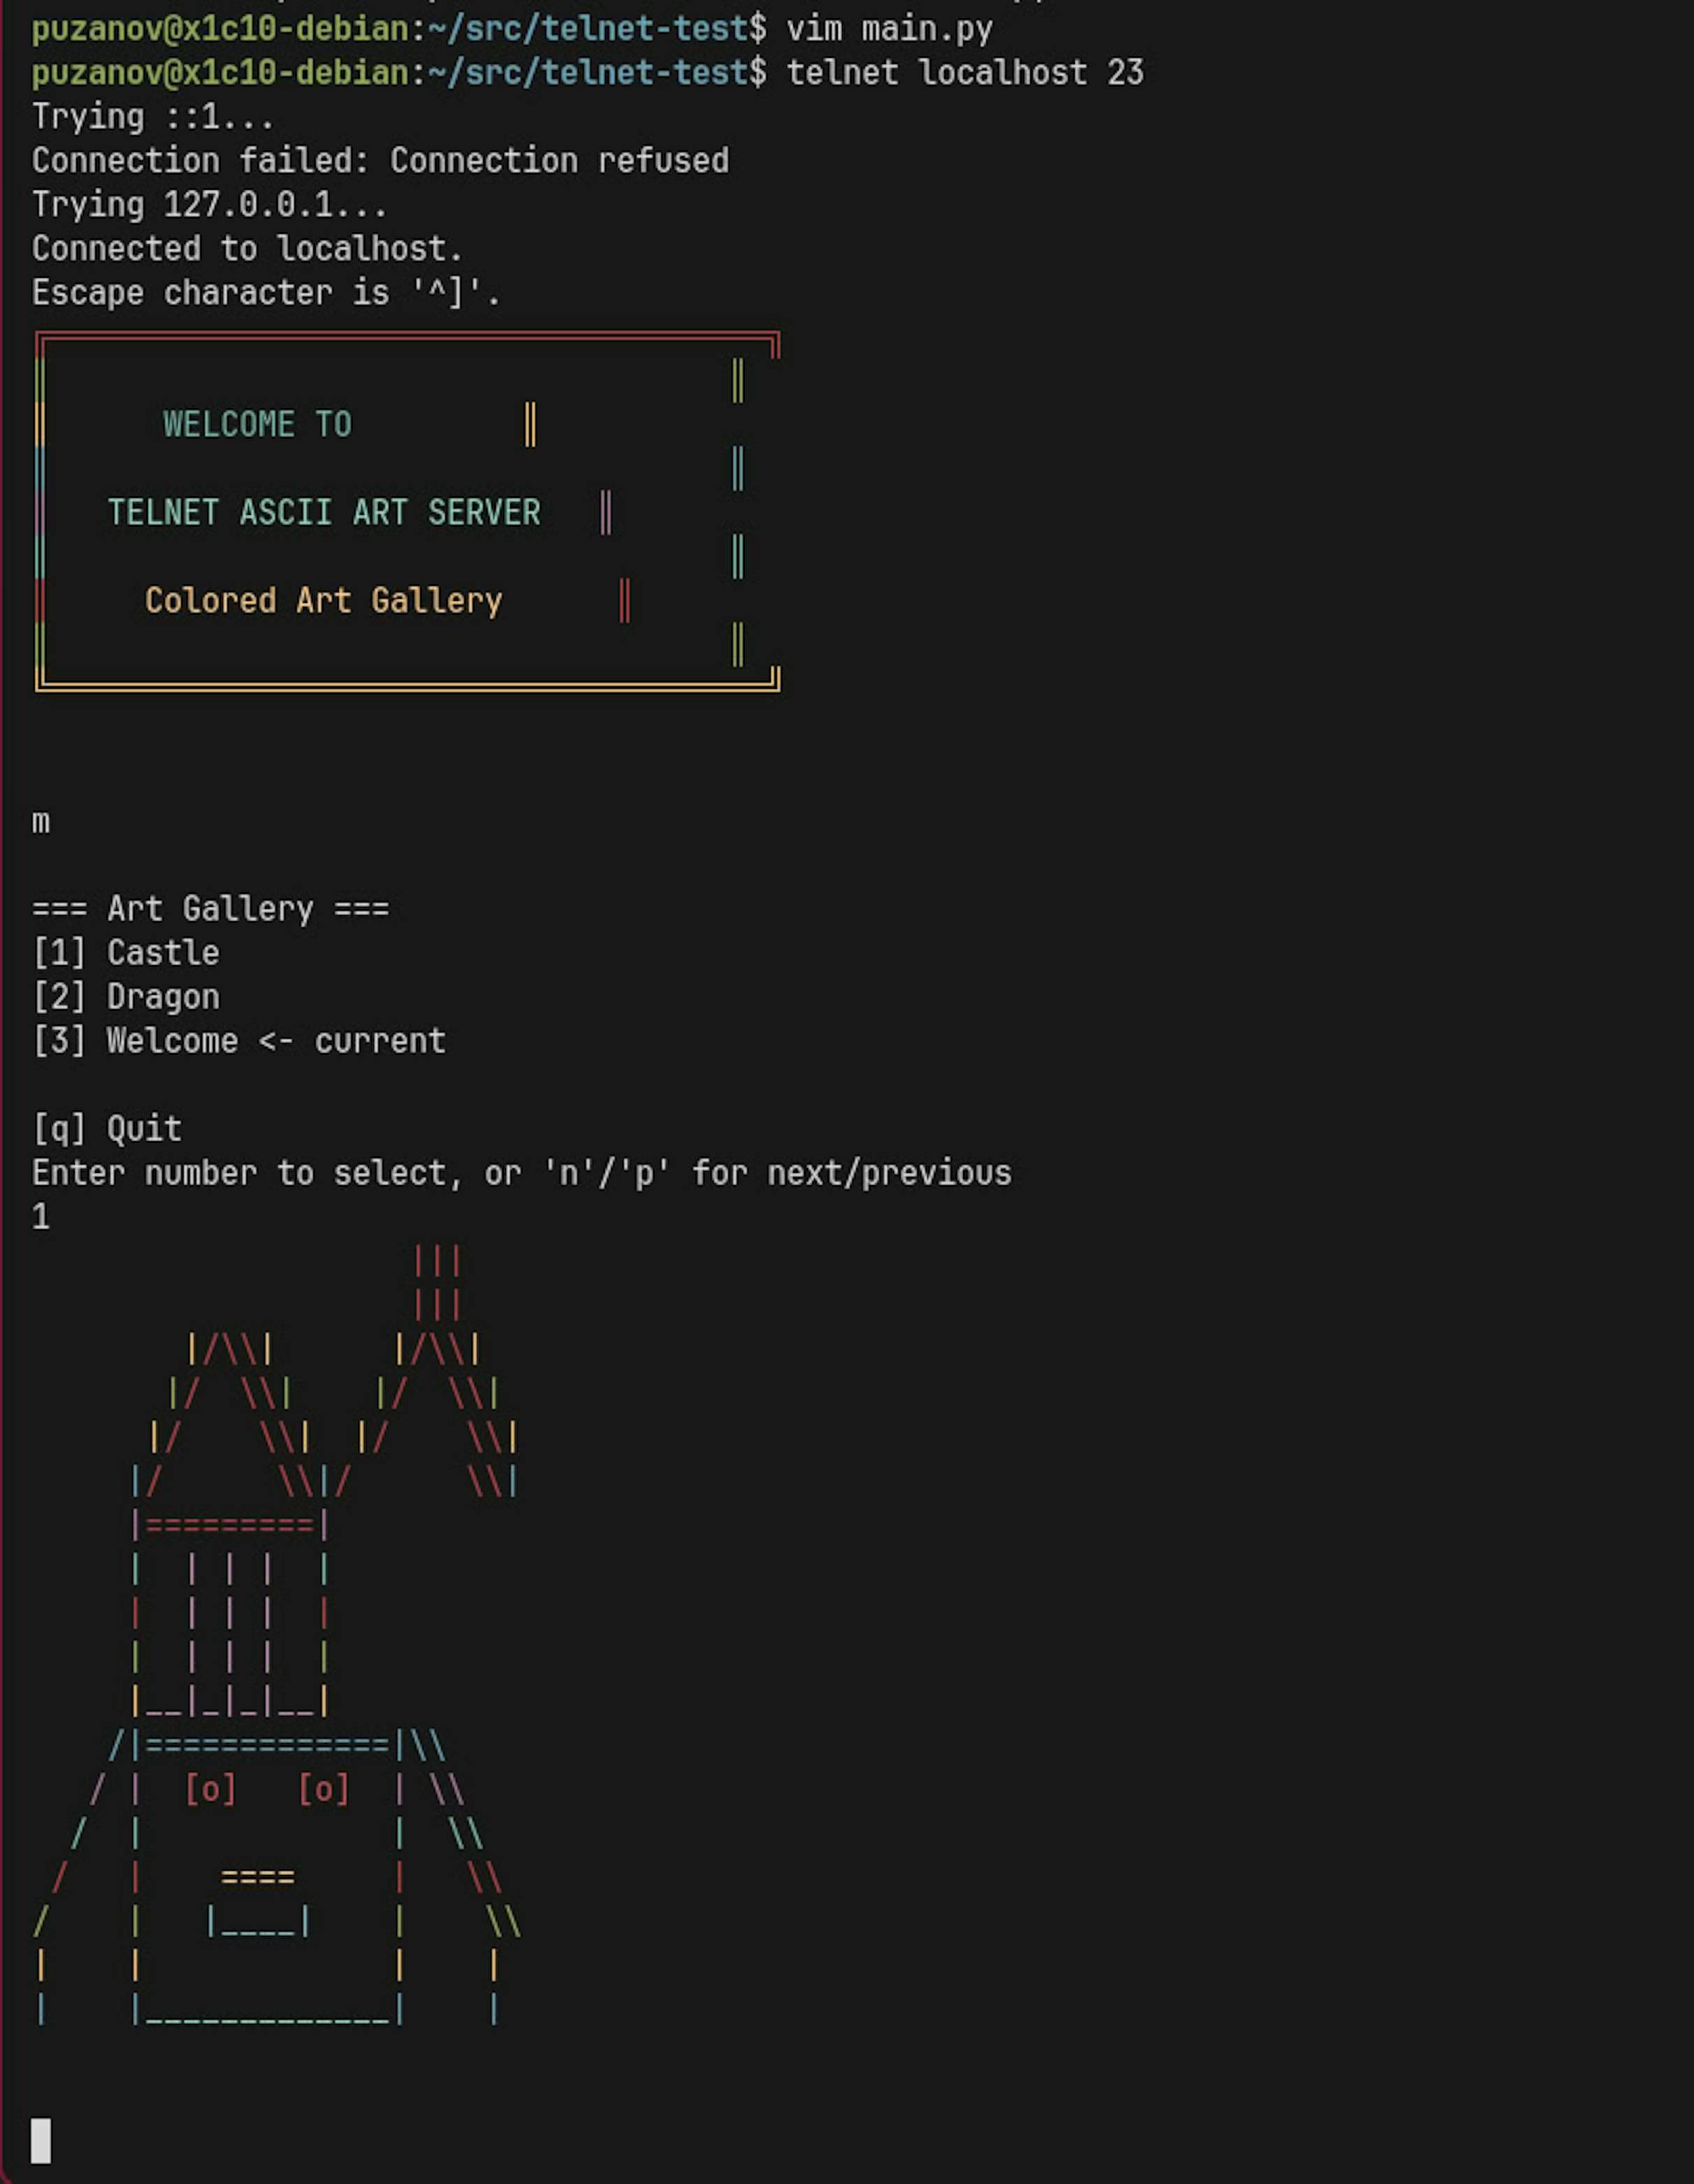
.specify/scripts/bash/create-new-feature.sh --json "I want to create an application that listens on a Telnet port, accepts a client connection, and displays beautiful ASCII art. The key difference from competitors is that the art is colorful." --number 1 --short-name "telnet-art" "Create telnet ASCII art server with colored output"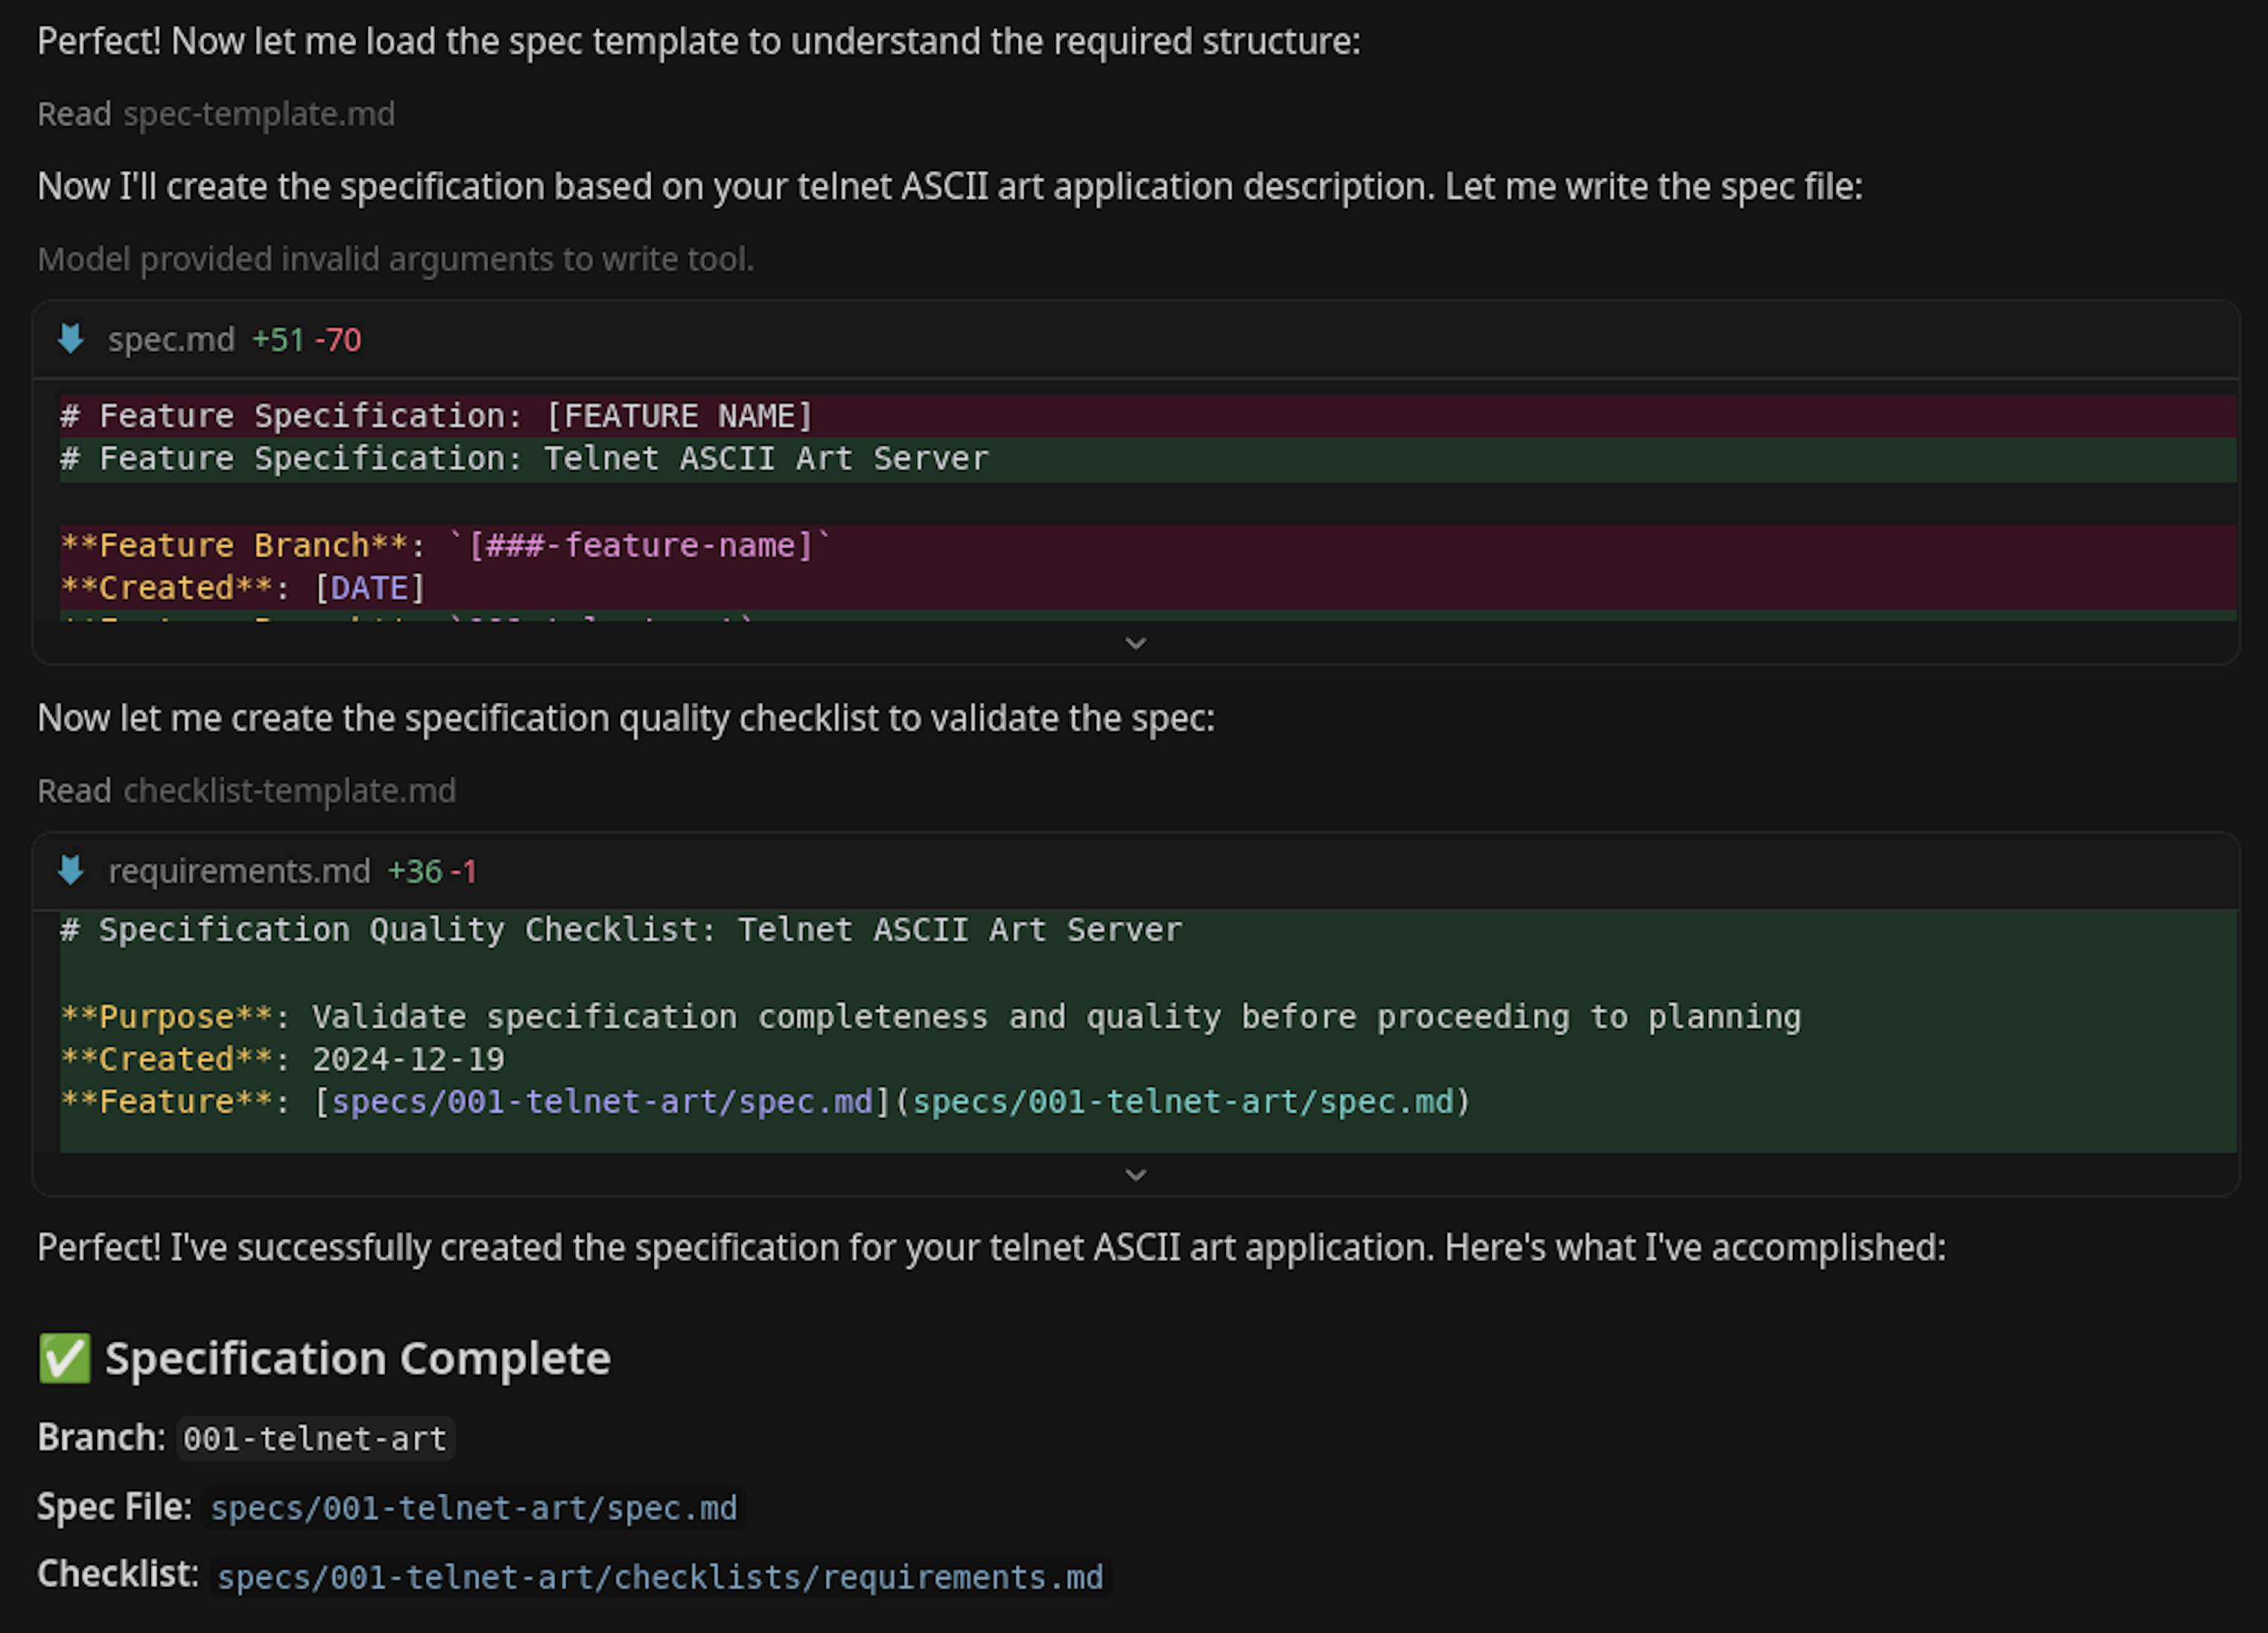
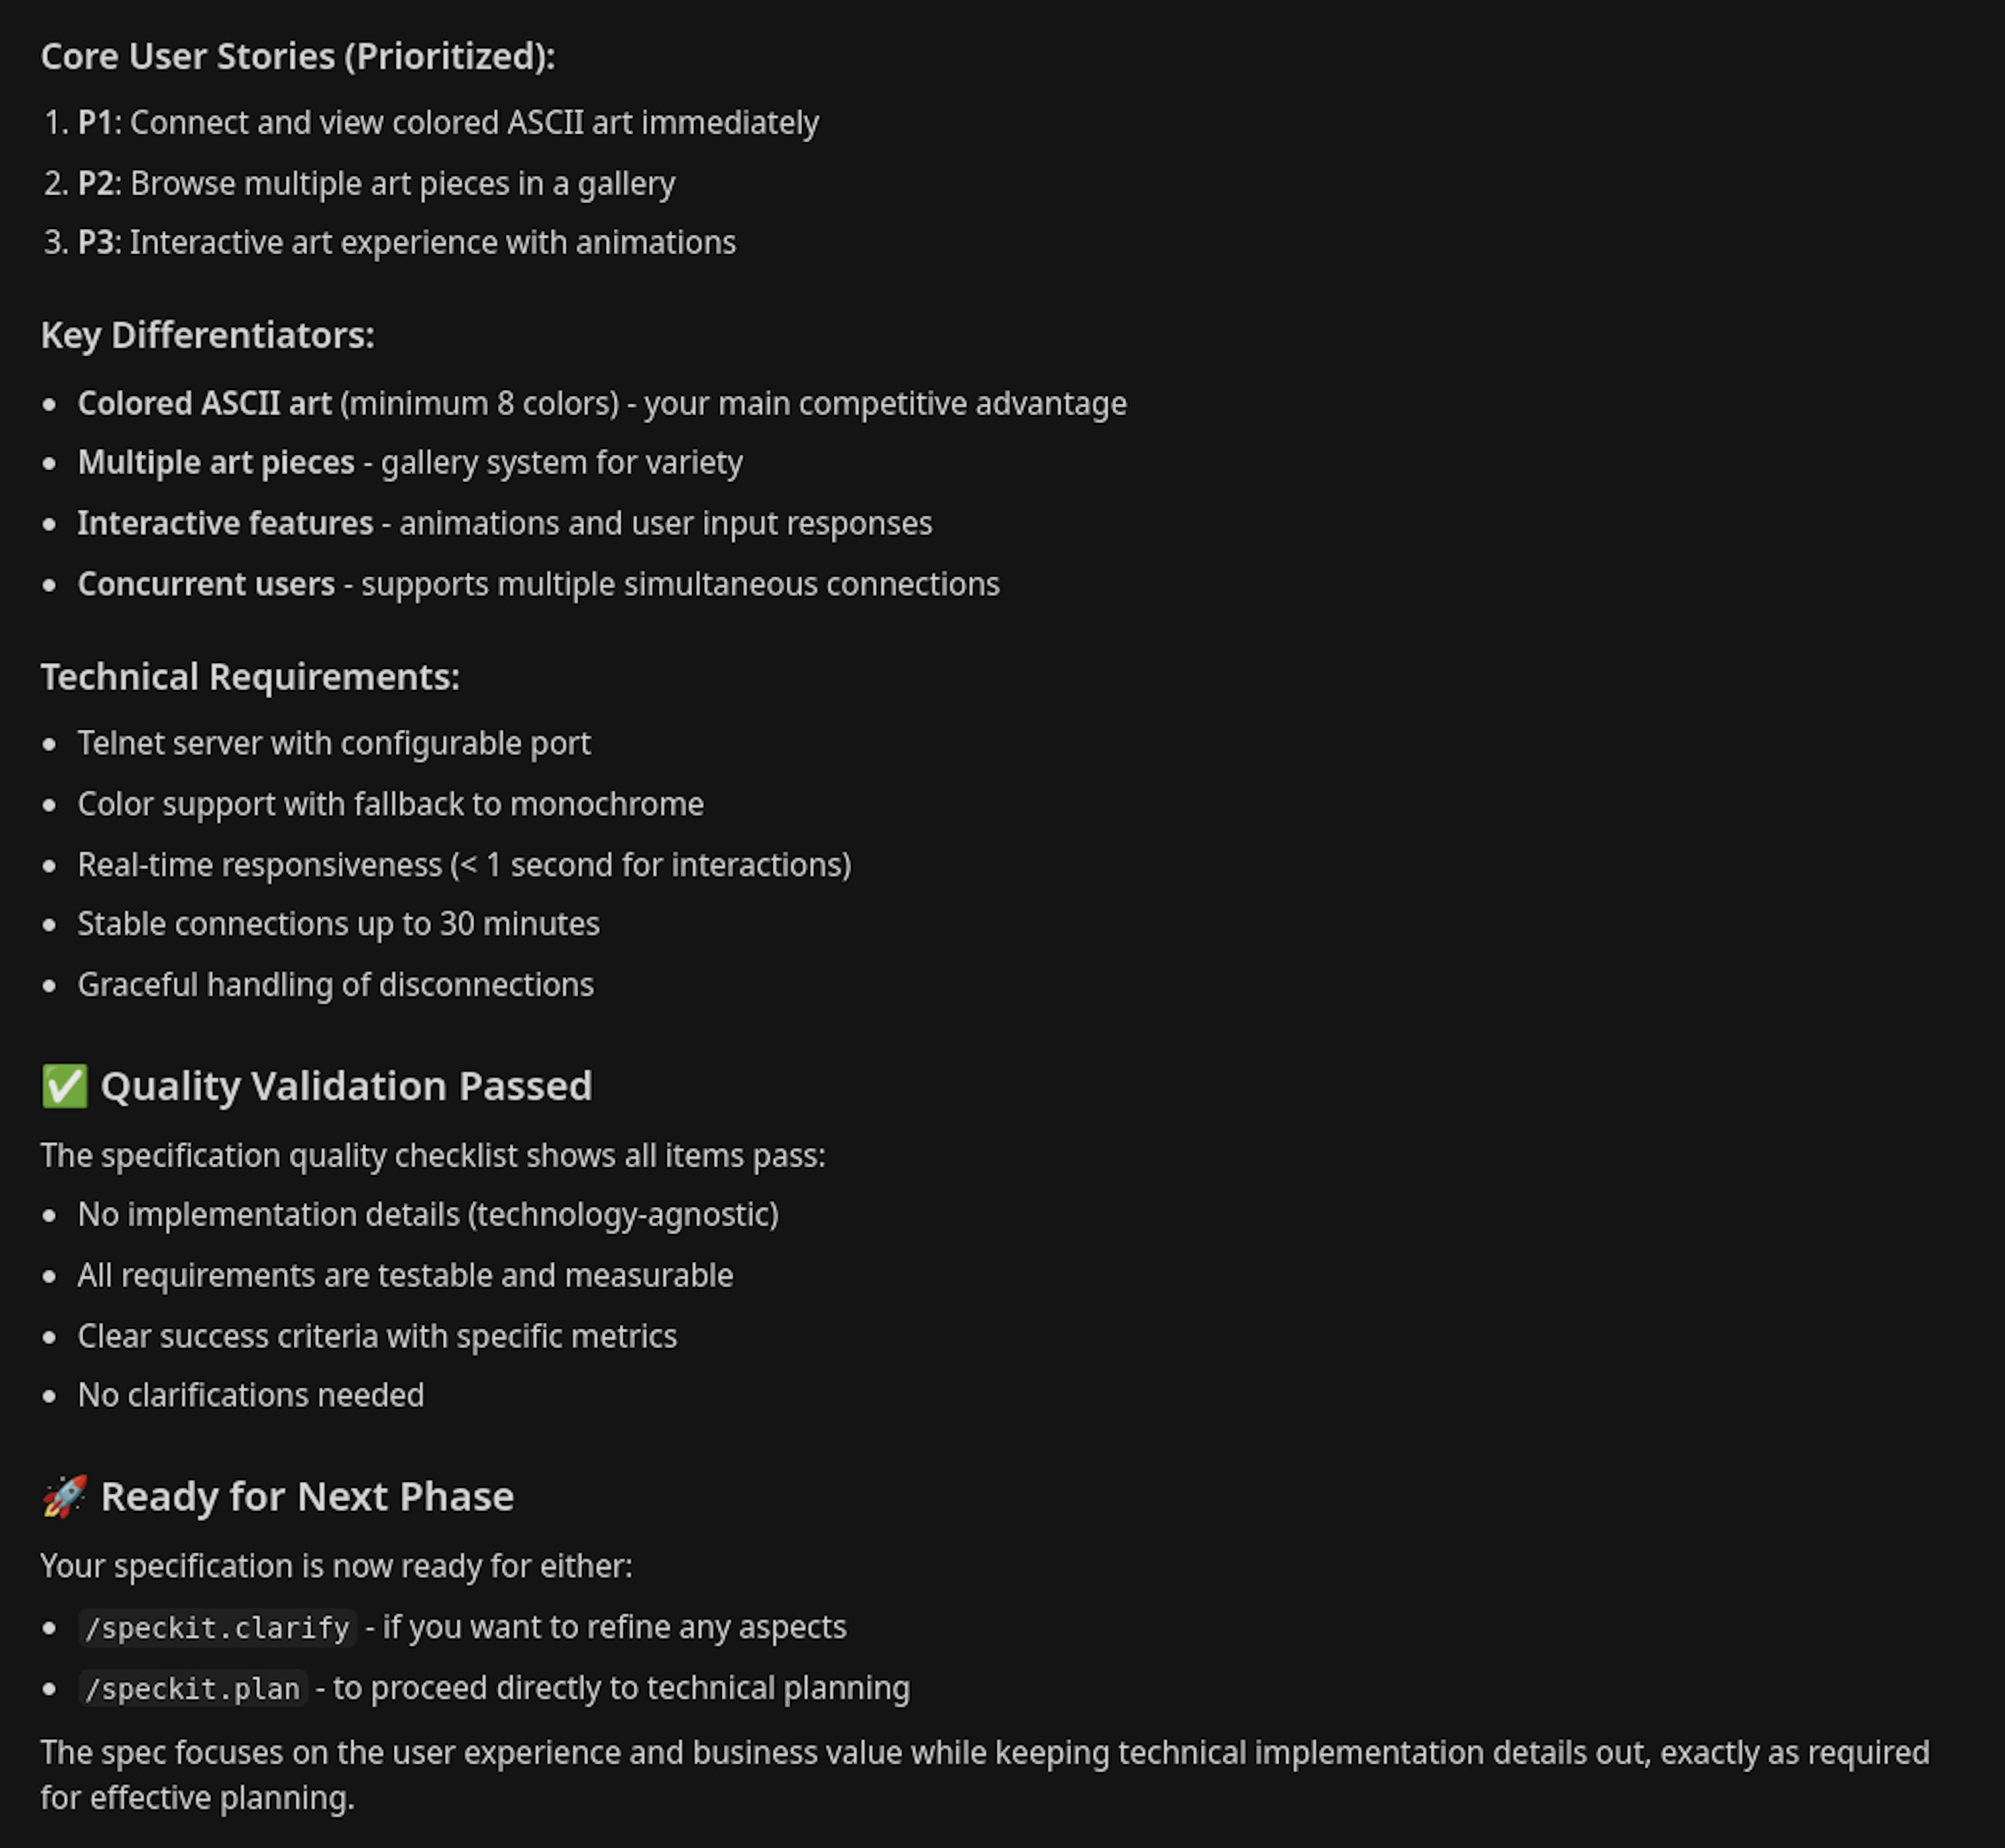
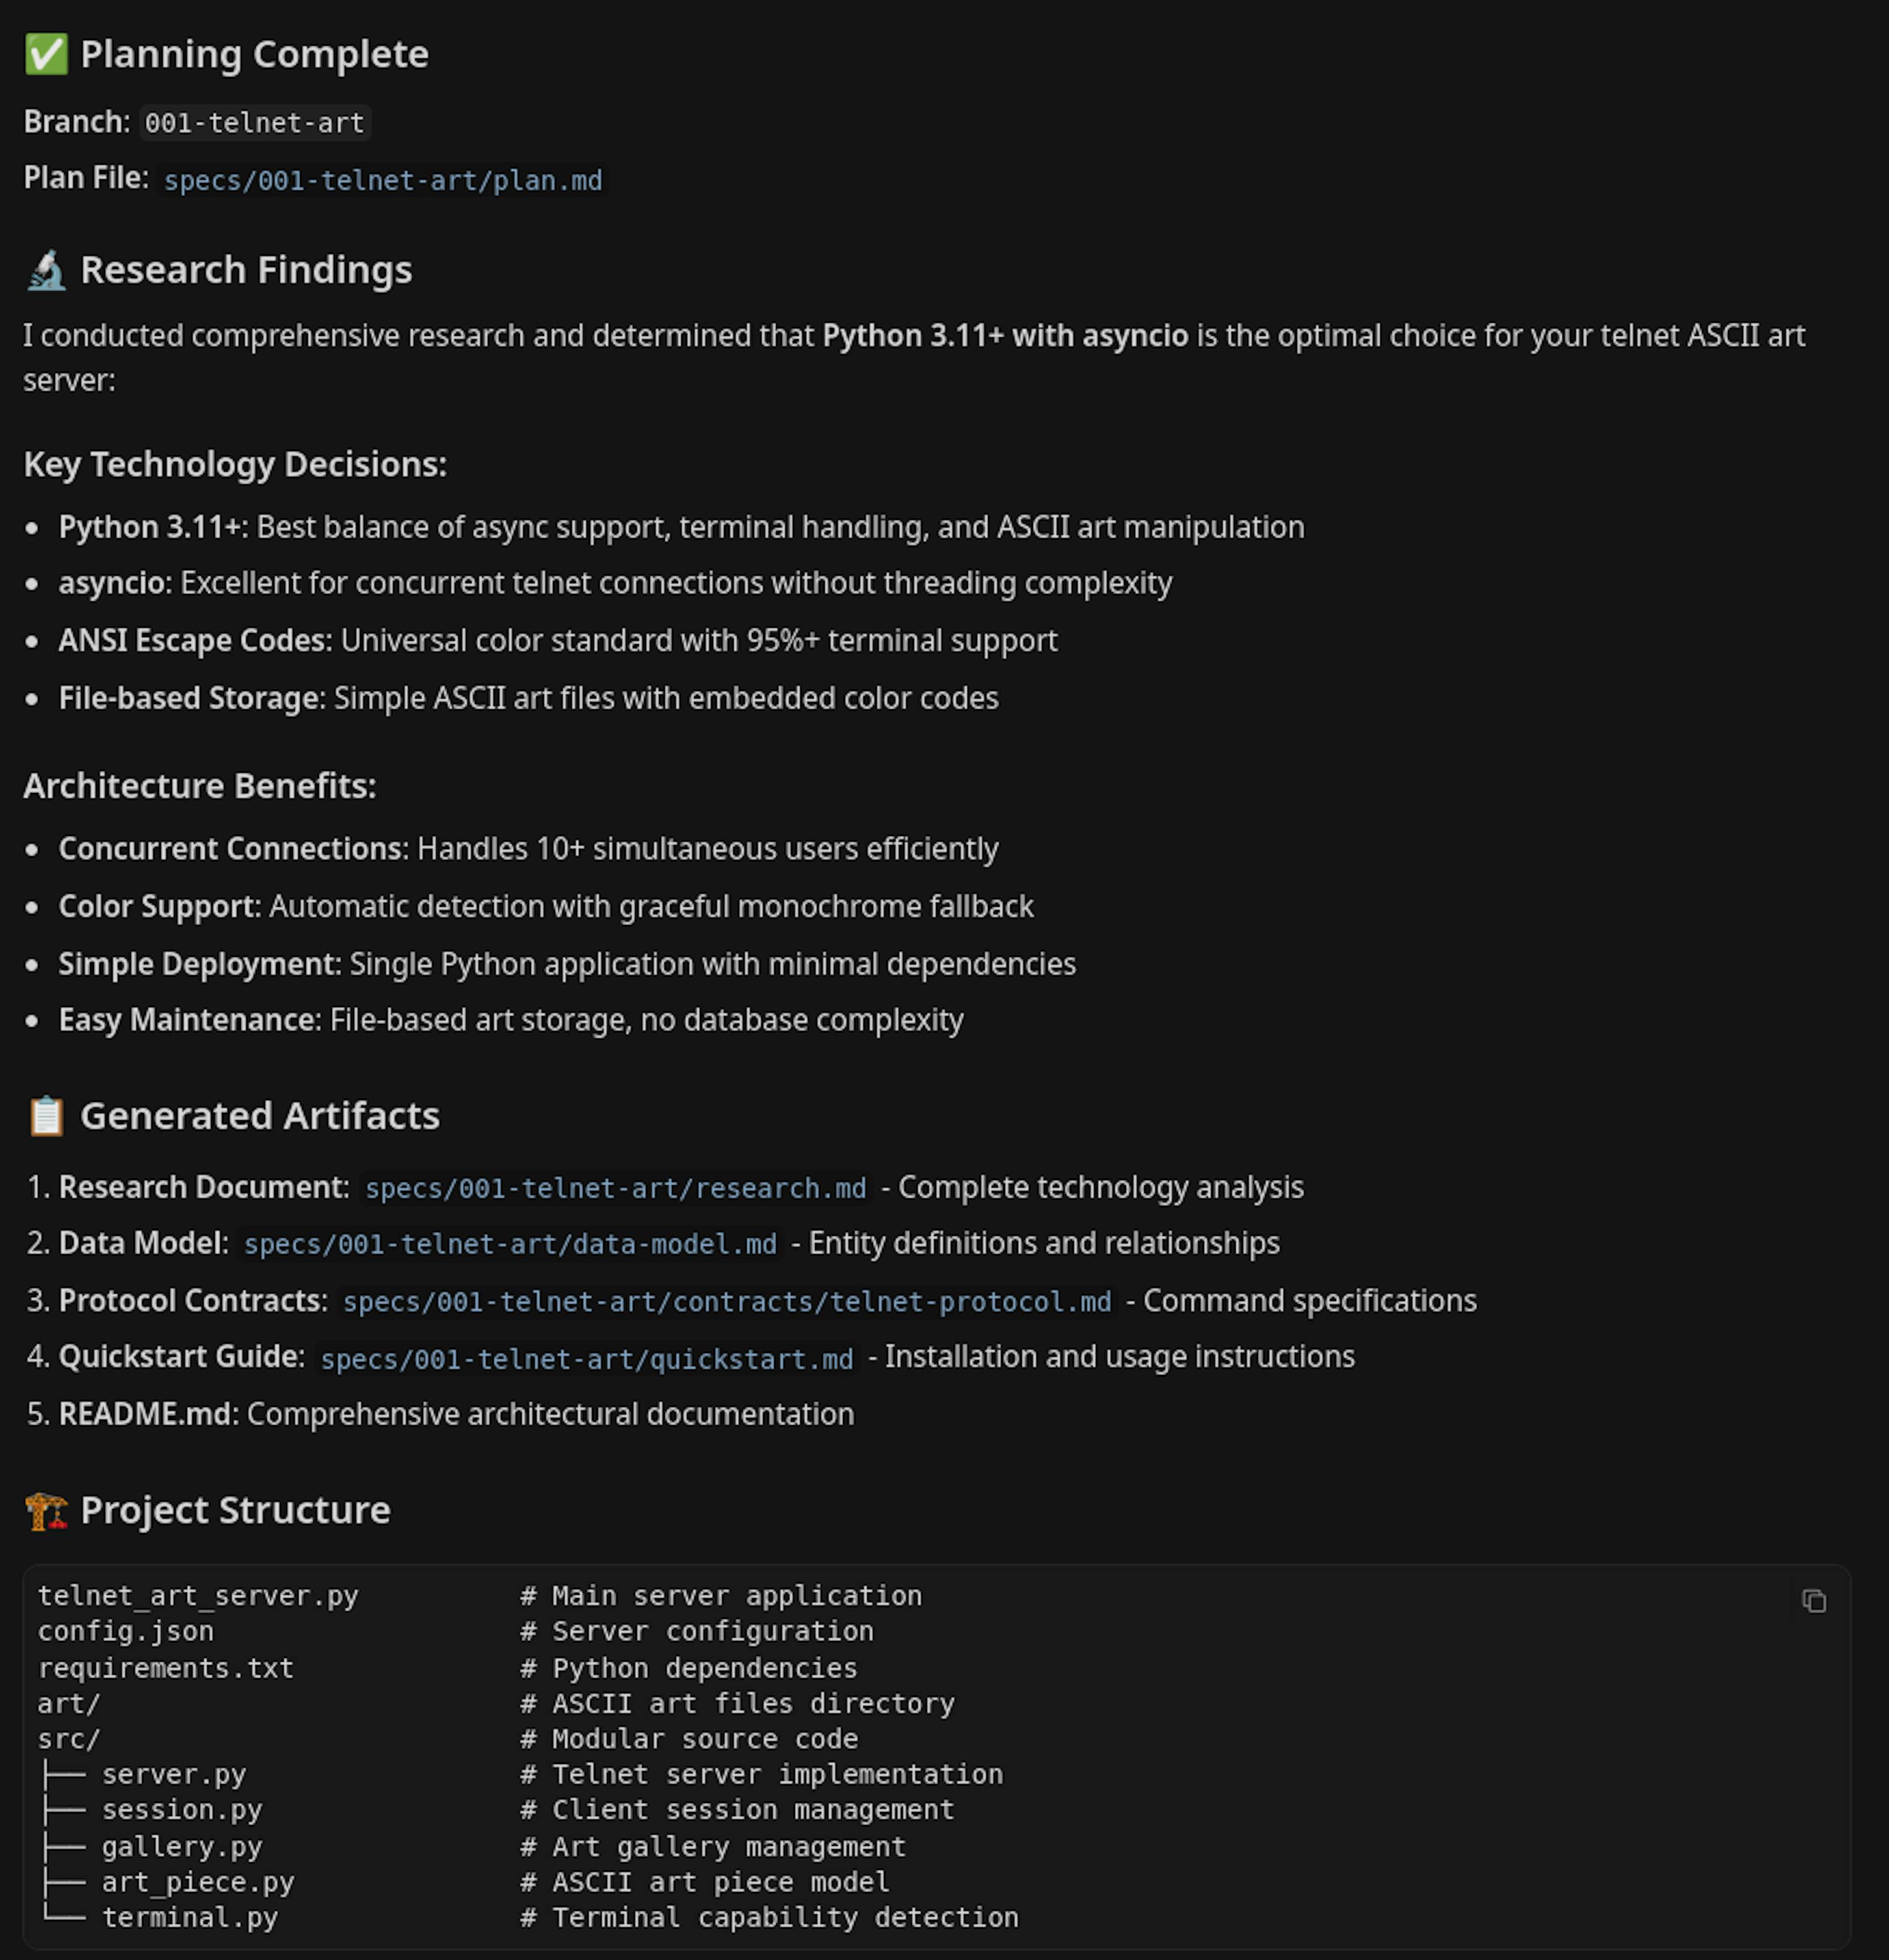
What we get below is just a summary, but it's clear that the generated spec captured our intent perfectly. It's like an experienced architect understood your idea and handed back a complete, elegant spec.
Step 4: Planning the project
Now that we've defined all high-level requirements, we can move to planning.
You can simply run /speckit.plan, or you can give the model some hints on how you want it to plan things. Remember: planning is also done by the model, but now it's based on the large spec document it previously created. You can add a bit more context or highlight preferences you want reflected in the plan. Example:
/speckit.plan First, do some research to find out which language is best for building a Telnet server that can display colorful ASCII art. If it's possible to do it well in Python, then use Python. If not, choose any other language that works better. You don't need to write automated tests or code comments. In the README, describe all the architecture decisions you made.To be honest, this isn't the perfect way to use the planning command.
Some of this should have gone into /speckit.constitution, and part of the research should have been done before writing the constitution. Still, it turned out fine; Cursor researched similar products, found that it's possible to implement in Python, figured out which libraries to use, and included all of that in the plan. It also included our constraints (no tests, no comments, and an architecture section in the README).
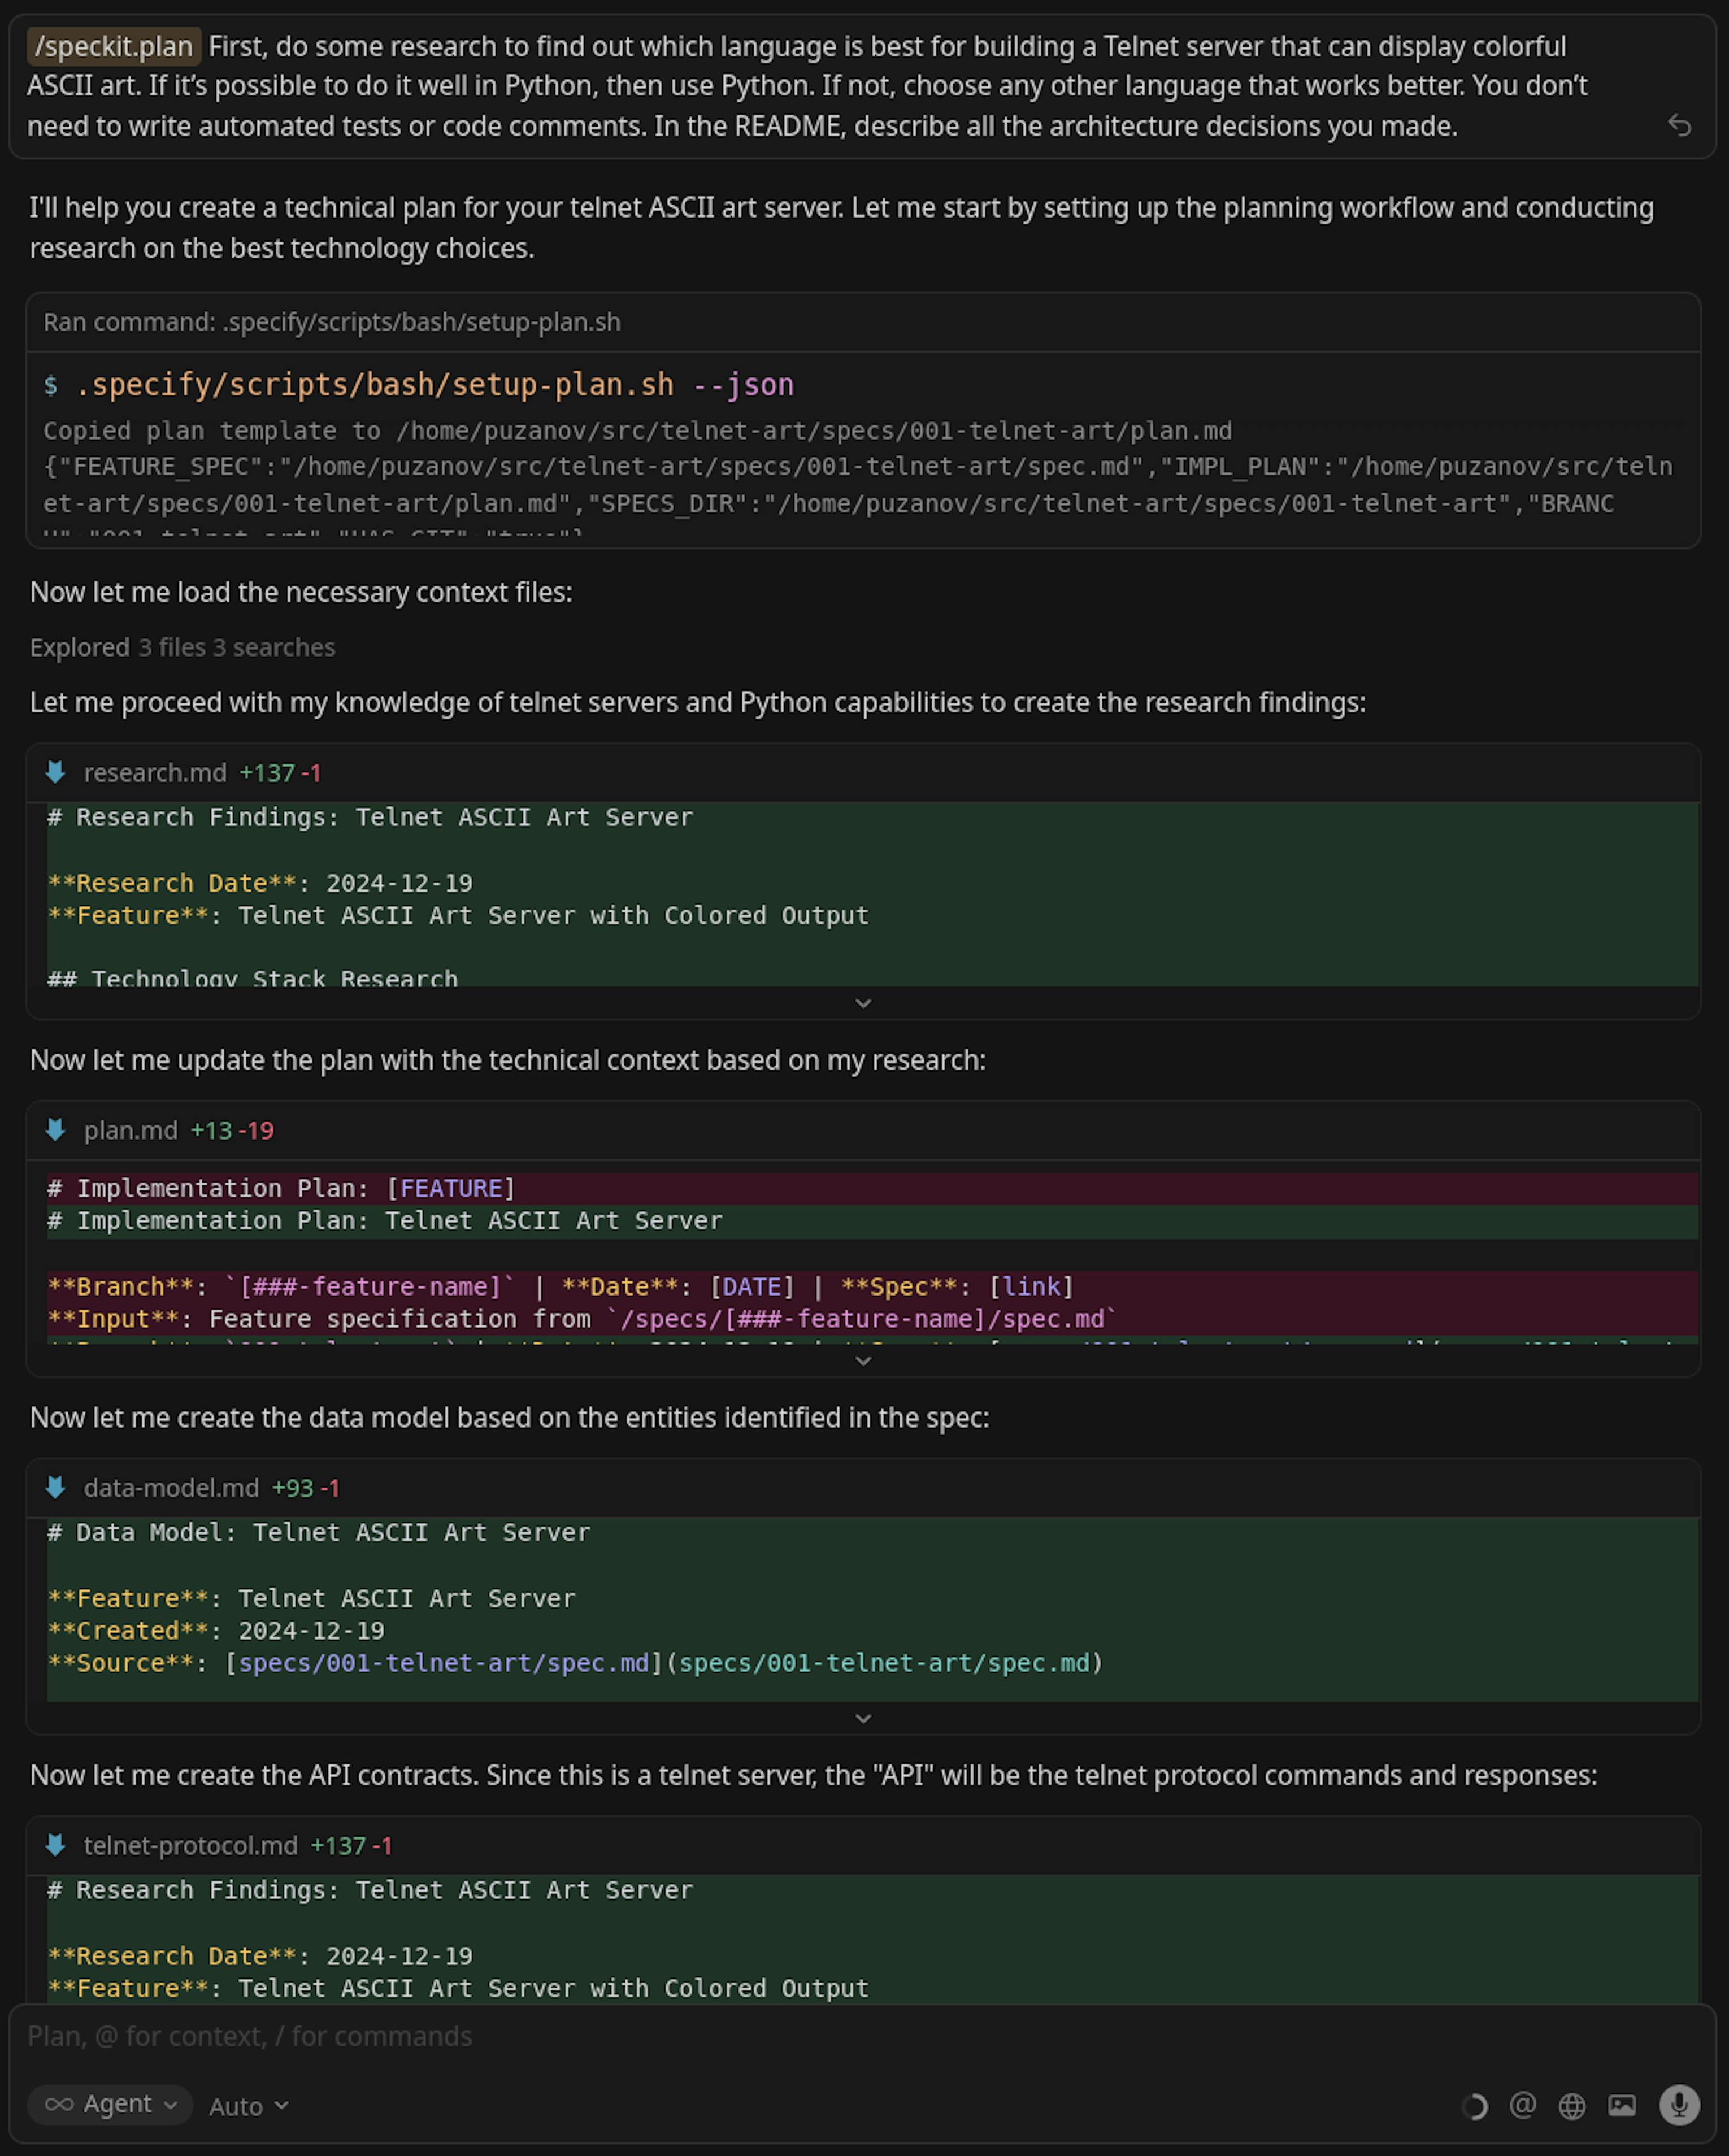
The planning is completed, and Cursor has written the plan:
Step 5: Checking the generated files
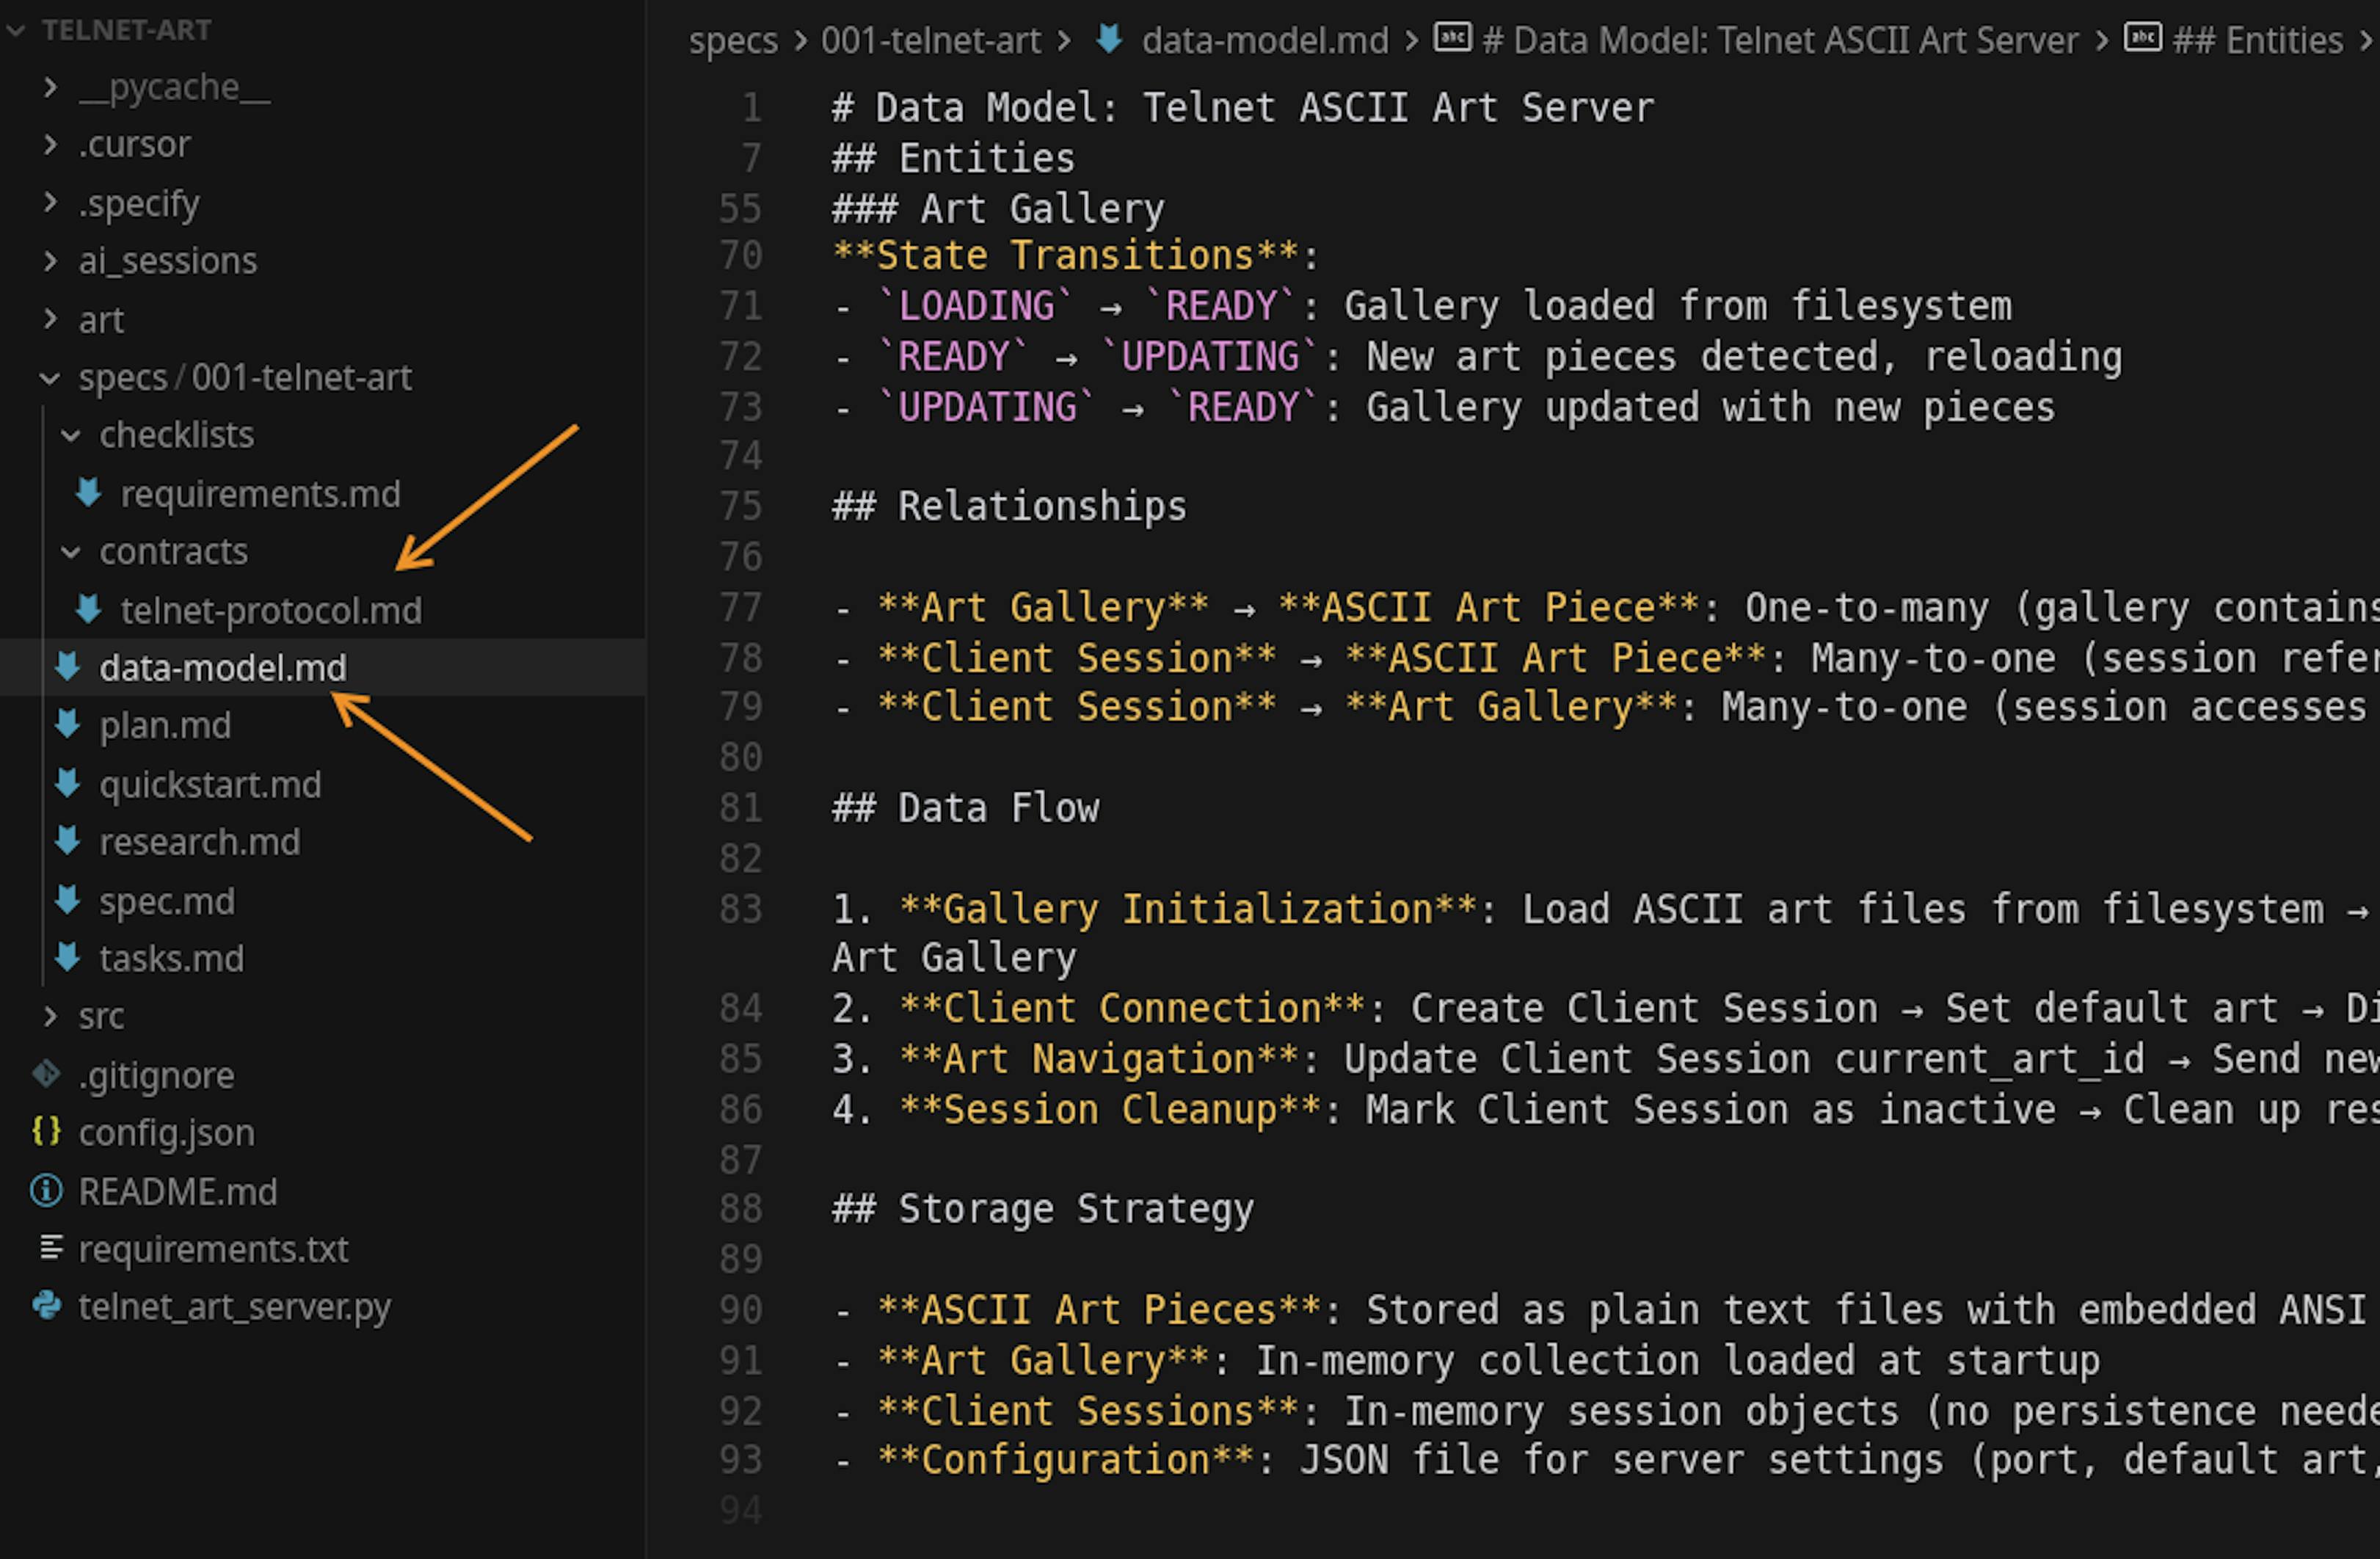
All generated files are saved inside the specs directory of the project. Make sure to keep this in your repository. This becomes part of your source code and is arguably more important than the actual code itself. Spec-kit generated several files:
- research.md: the results of the research query we mentioned earlier
- data-model.md: the data model for our system
- contracts/telnet-protocol.md: defines how the system interacts with data (contracts)
When specs become source code, check whether they still match the repo.
Enji Guard monitors whether your repo, tests, dependencies, and AI-agent instructions stay in sync as the project grows.
Connect GitHub and get a readiness report.

Step 6: Creating tasks
Next, we ask Spec-kit to generate tasks: /speckit.tasks
You can always add more details to any stage, but for now, that’s enough. What's interesting is how the tasks look. They form a sequence of precise actions, leaving no gaps.
When we assign tasks to ourselves or teammates, we often fall into the "Curse of Knowledge," assuming everyone already knows some context and leaving things implicit. The model doesn't have that bias, so the generated tasks are granular, describing every small step. And the more granular your tasks, the more precisely the model executes them.
Writing such granular tasks manually is hard and time-consuming, but asking the model to write tasks for the model works perfectly. We just need to check that everything looks correct.
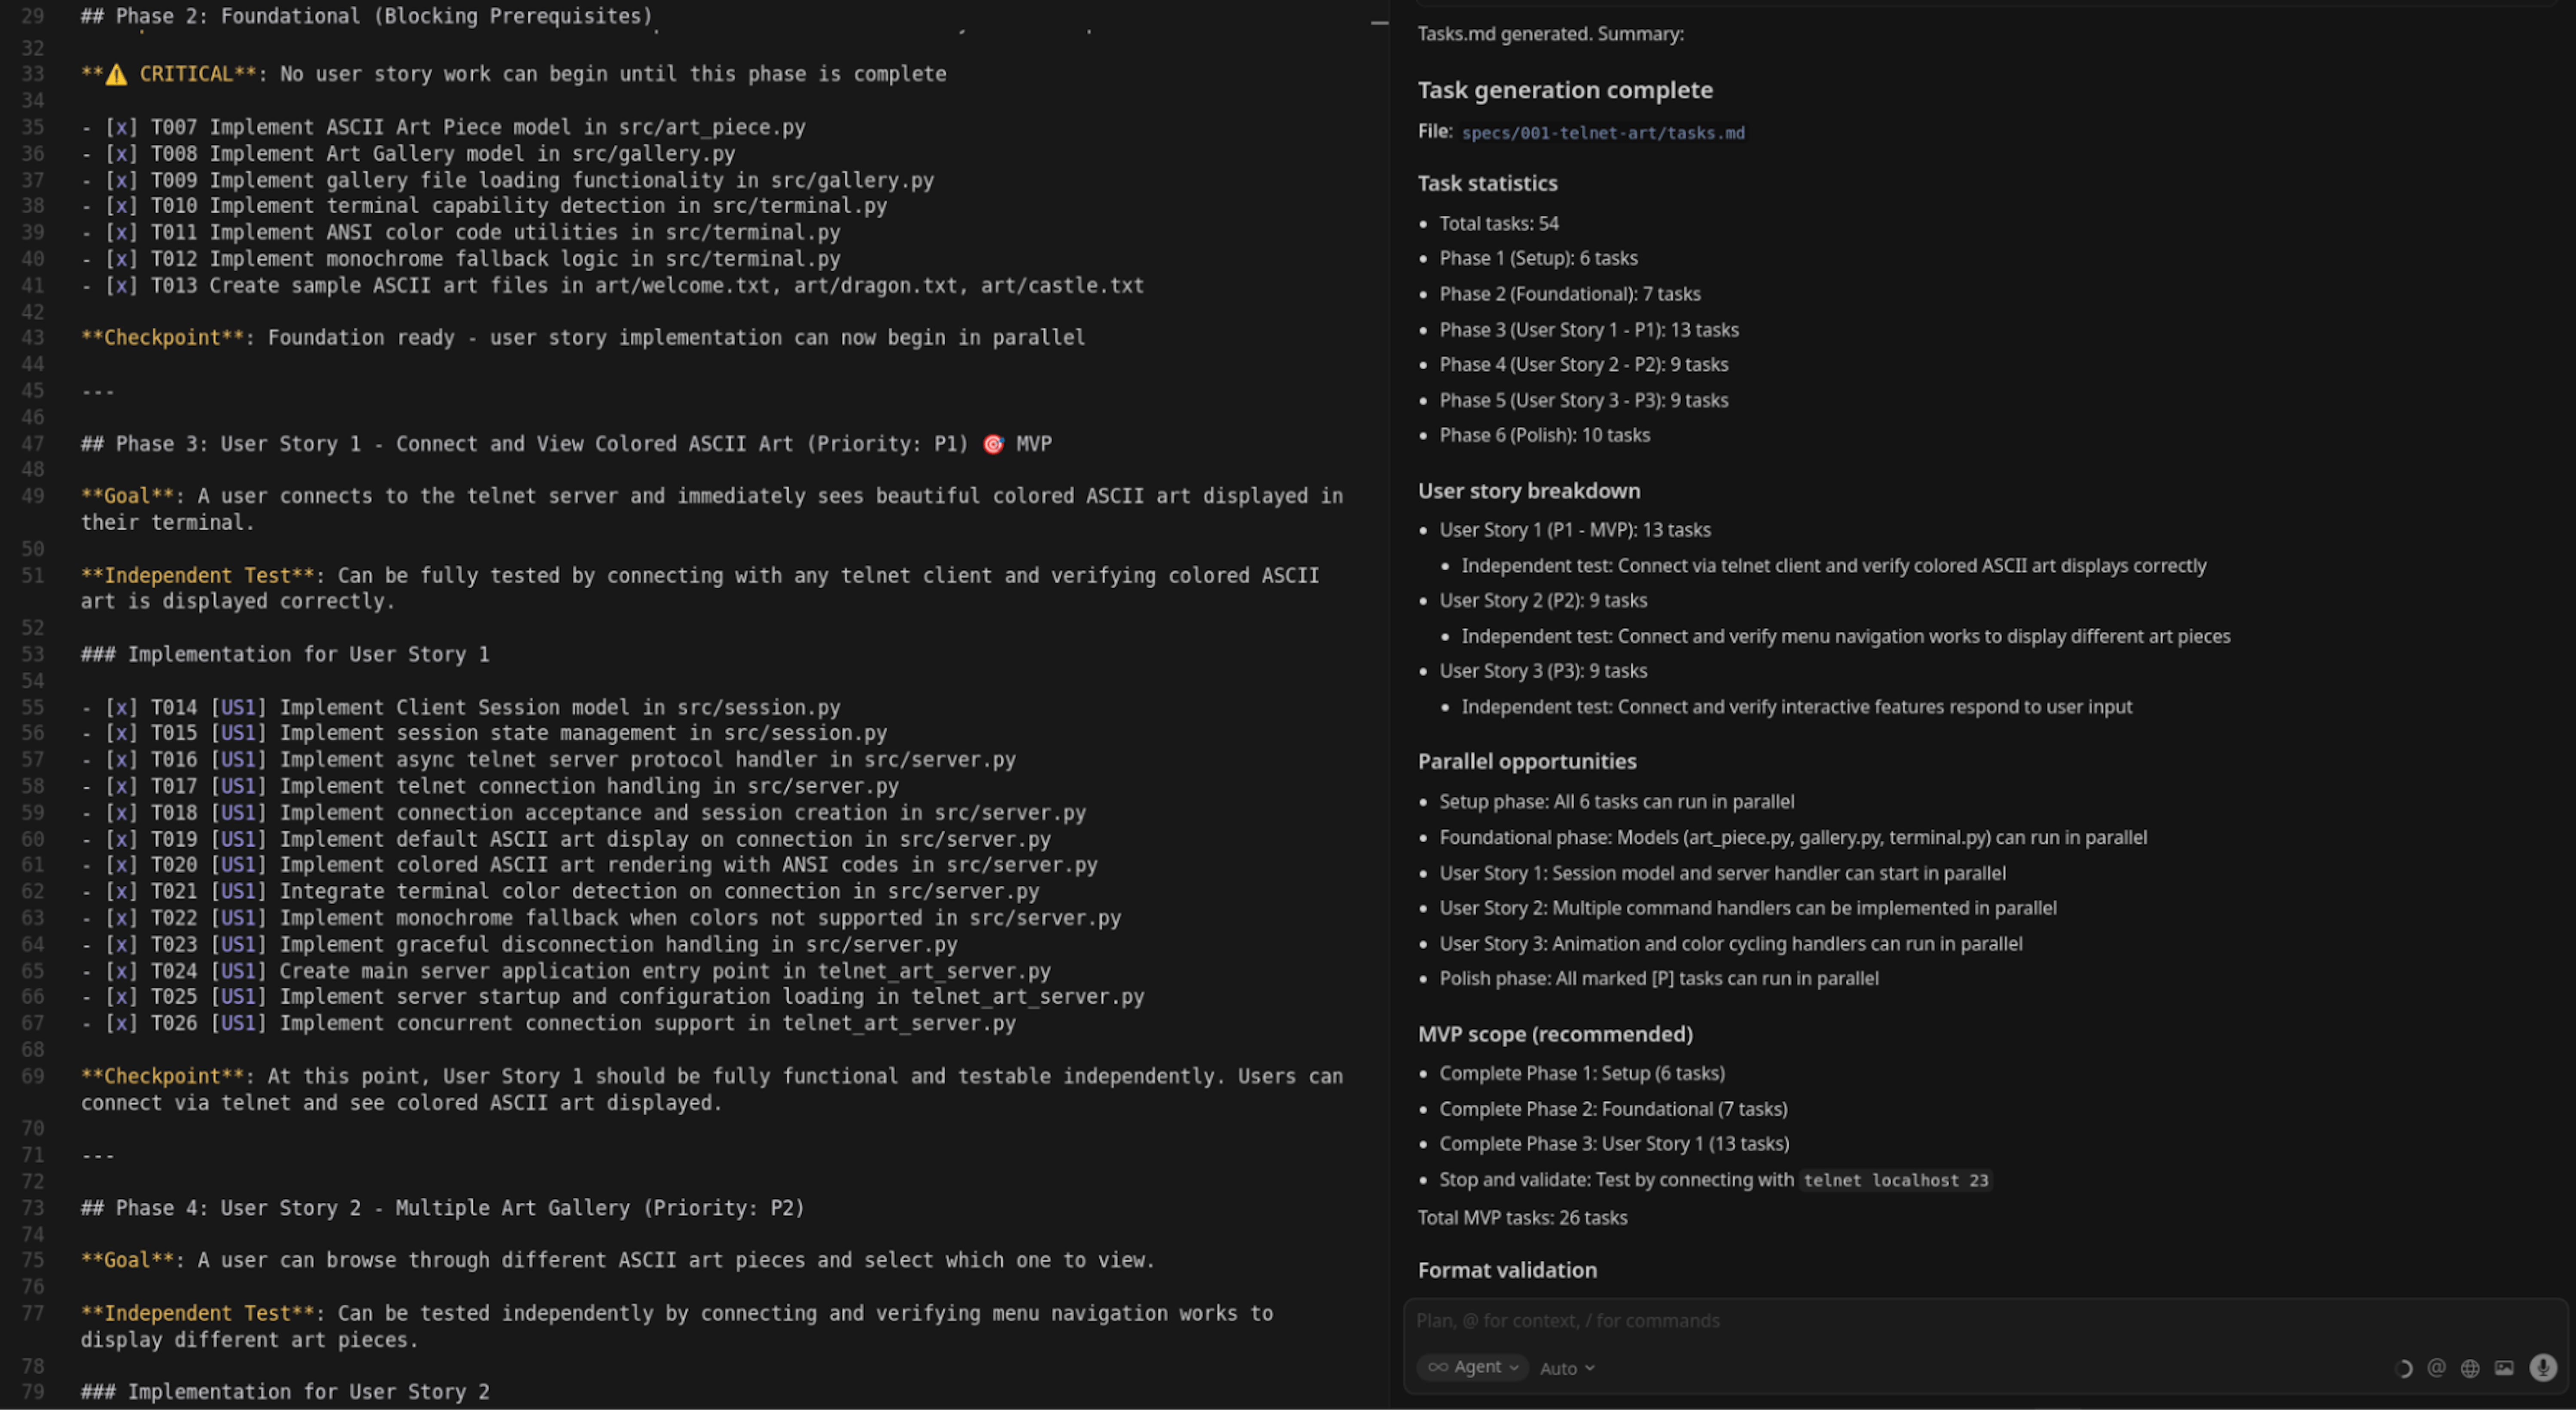
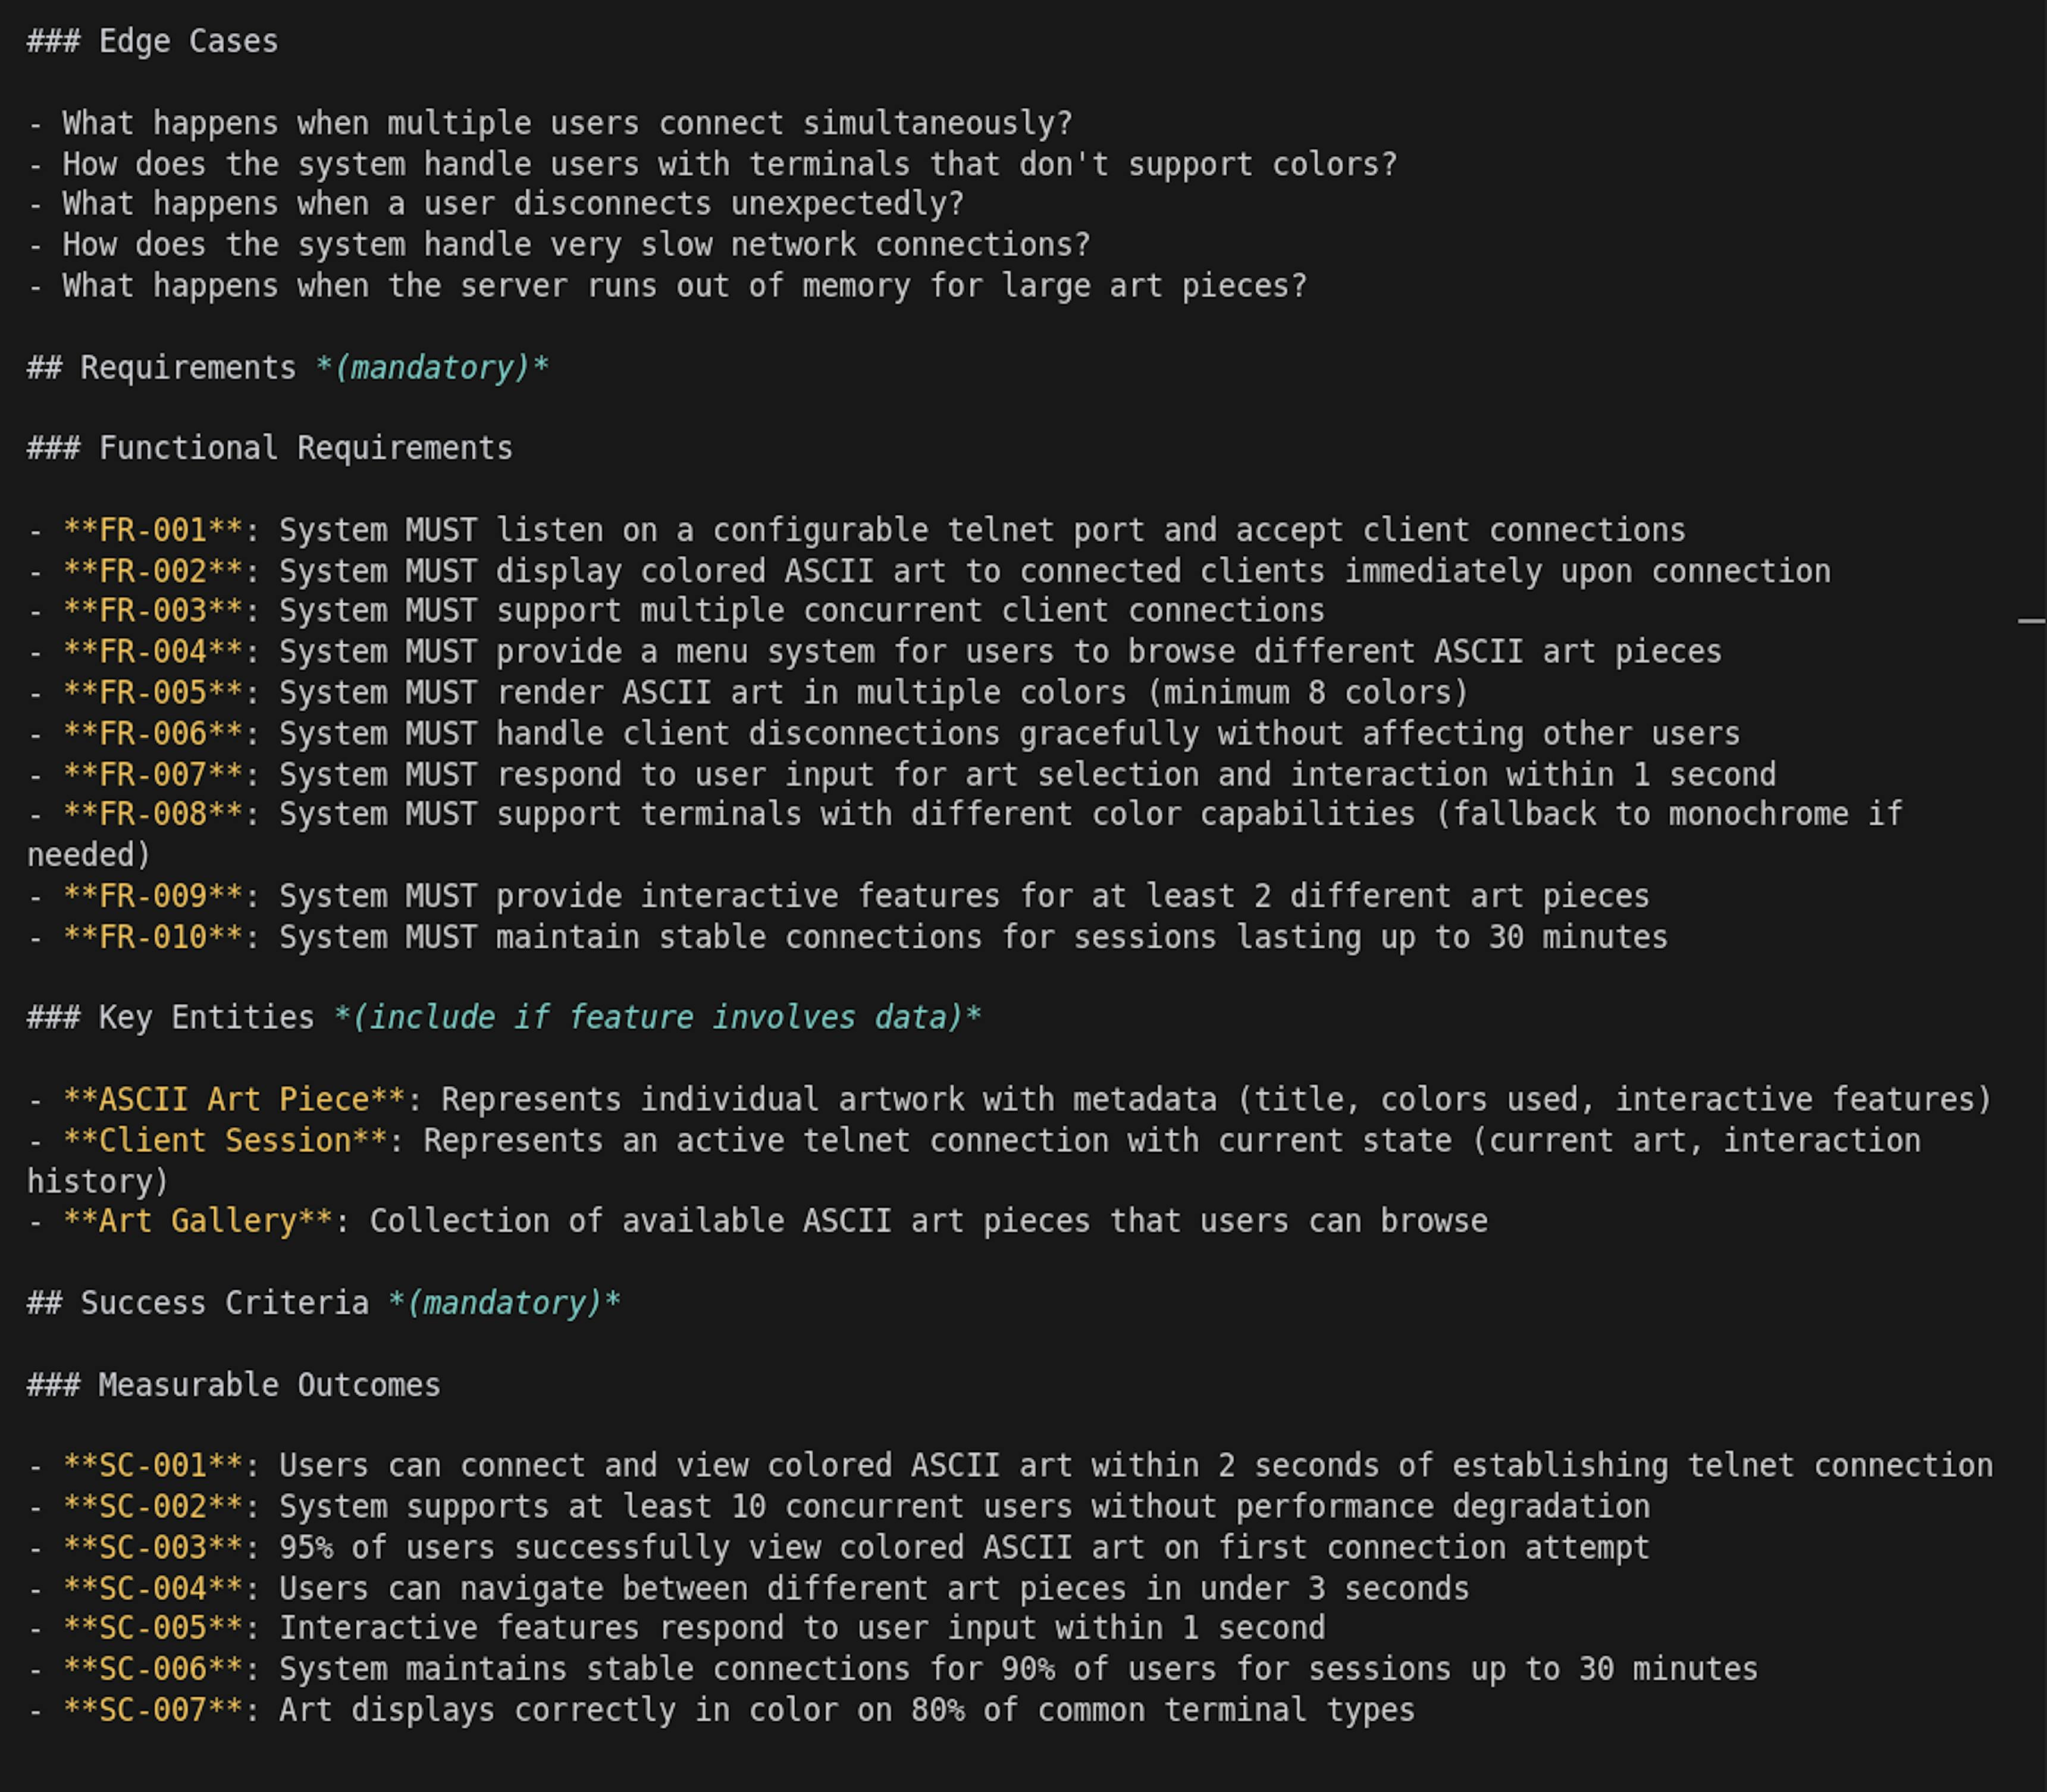
You'll also notice that Spec-kit includes things we'd normally skip: edge cases, functional requirements, and acceptance criteria. These are details developers often forget when they're deep in architecture or code. Even if you don’t want to fully work with specs, asking Spec-kit to "specify" your idea can be a great exercise to clarify what you’re building, for whom, and how you'll know it's done.
Step 7: Working with phases
If you look inside the generated tasks and specs, you'll notice the structure includes phases, allowing you to build the product incrementally. After generating code for one phase, you can test it manually and check if everything is moving in the right direction.

Step 8: Generating the code
Let's ask it to generate code for the first few phases only:
/speckit.implement create code from Phase 1 to Phase 3 (do not do anything from Phase 4)The result: a working product where you can connect via Telnet, as specified in these phases. Now let's generate the remaining code:
/speckit.implement now make all phases left till the endThen I tested it; it worked, except the ASCII art wasn't colorful. We fixed that bug directly in Cursor via chat prompts (outside of the spec). Overall, a great result for a first run.
Who can benefit the most
SDD tools are most useful for:
- Those who quickly prototype features to show ideas to teammates.
- People building small automation tools for themselves: sysadmins, smart-home tinkerers, productivity nerds.
- Developers maintain internal software (for schools, hospitals, car services, shops, and any small internal system).
In these cases, working "from 0 to 1" using specs is much easier than starting from a blank chat or typing code manually.
When it's less useful
SDD isn't ideal (yet) for:
- Large existing projects: specs are hard to integrate retroactively.
- Long, complex, or ambiguous projects that go into production with many users: specs will change often, and models don't always generate code 100% in sync with them.
Eventually, developers might end up reading Markdown specs more than writing code, and let's be honest, writing code is more fun than reading Markdown.
This is the point where a generated prototype needs repo-level guardrails.
Shipping a Spec-kit/Cursor project beyond the prototype?
Enji Guard connects to your GitHub repo and keeps checking whether specs, agent instructions, tests, dependencies, and generated code stay in sync.
Schedule recurring AI-readiness, code quality, security, and runtime checks, then get reviewable issues or pull requests when the project starts drifting.
Connect GitHub and get a reviewable readiness report.

The future
Still, we'll soon find a balance where both specs and hand-edited code can coexist, or at least we'll learn (with the help of better tooling) when to update the spec and when to just patch the code.
References
- Quick start guide for the Tessl Framework | Tessl Docs – it's currently in closed beta
- spec-kit/spec-driven.md at main · github/spec-kit – a very important text for understanding
- Evolving specs · github spec-kit · Discussion #152 – a big discussion about how to expand specs over the project's lifecycle
- Spec-driven development with AI: Get started with a new open source toolkit
- Understanding Spec-Driven-Development: Kiro, spec-kit, and Tessl – the best article for sobriety around SDD