

Analyze with AI
Get AI-powered insights from this Mad Devs article:
What is application modularization?
Modularization is the process of splitting a codebase into separate modules in order to reuse code and/or separate work across different teams.
When an application grows, there is always the problem of project build time, working in a large team, pull request conflicts, etc. Modularization helps solve these problems.
But is it worth waiting until the application grows to monstrous proportions? Or still make a multi-module application template to make life easier for yourself and your business in the future?
This article will provide step-by-step instructions for creating a multi-module application.
How to create the main module
It all starts with creating a new project.

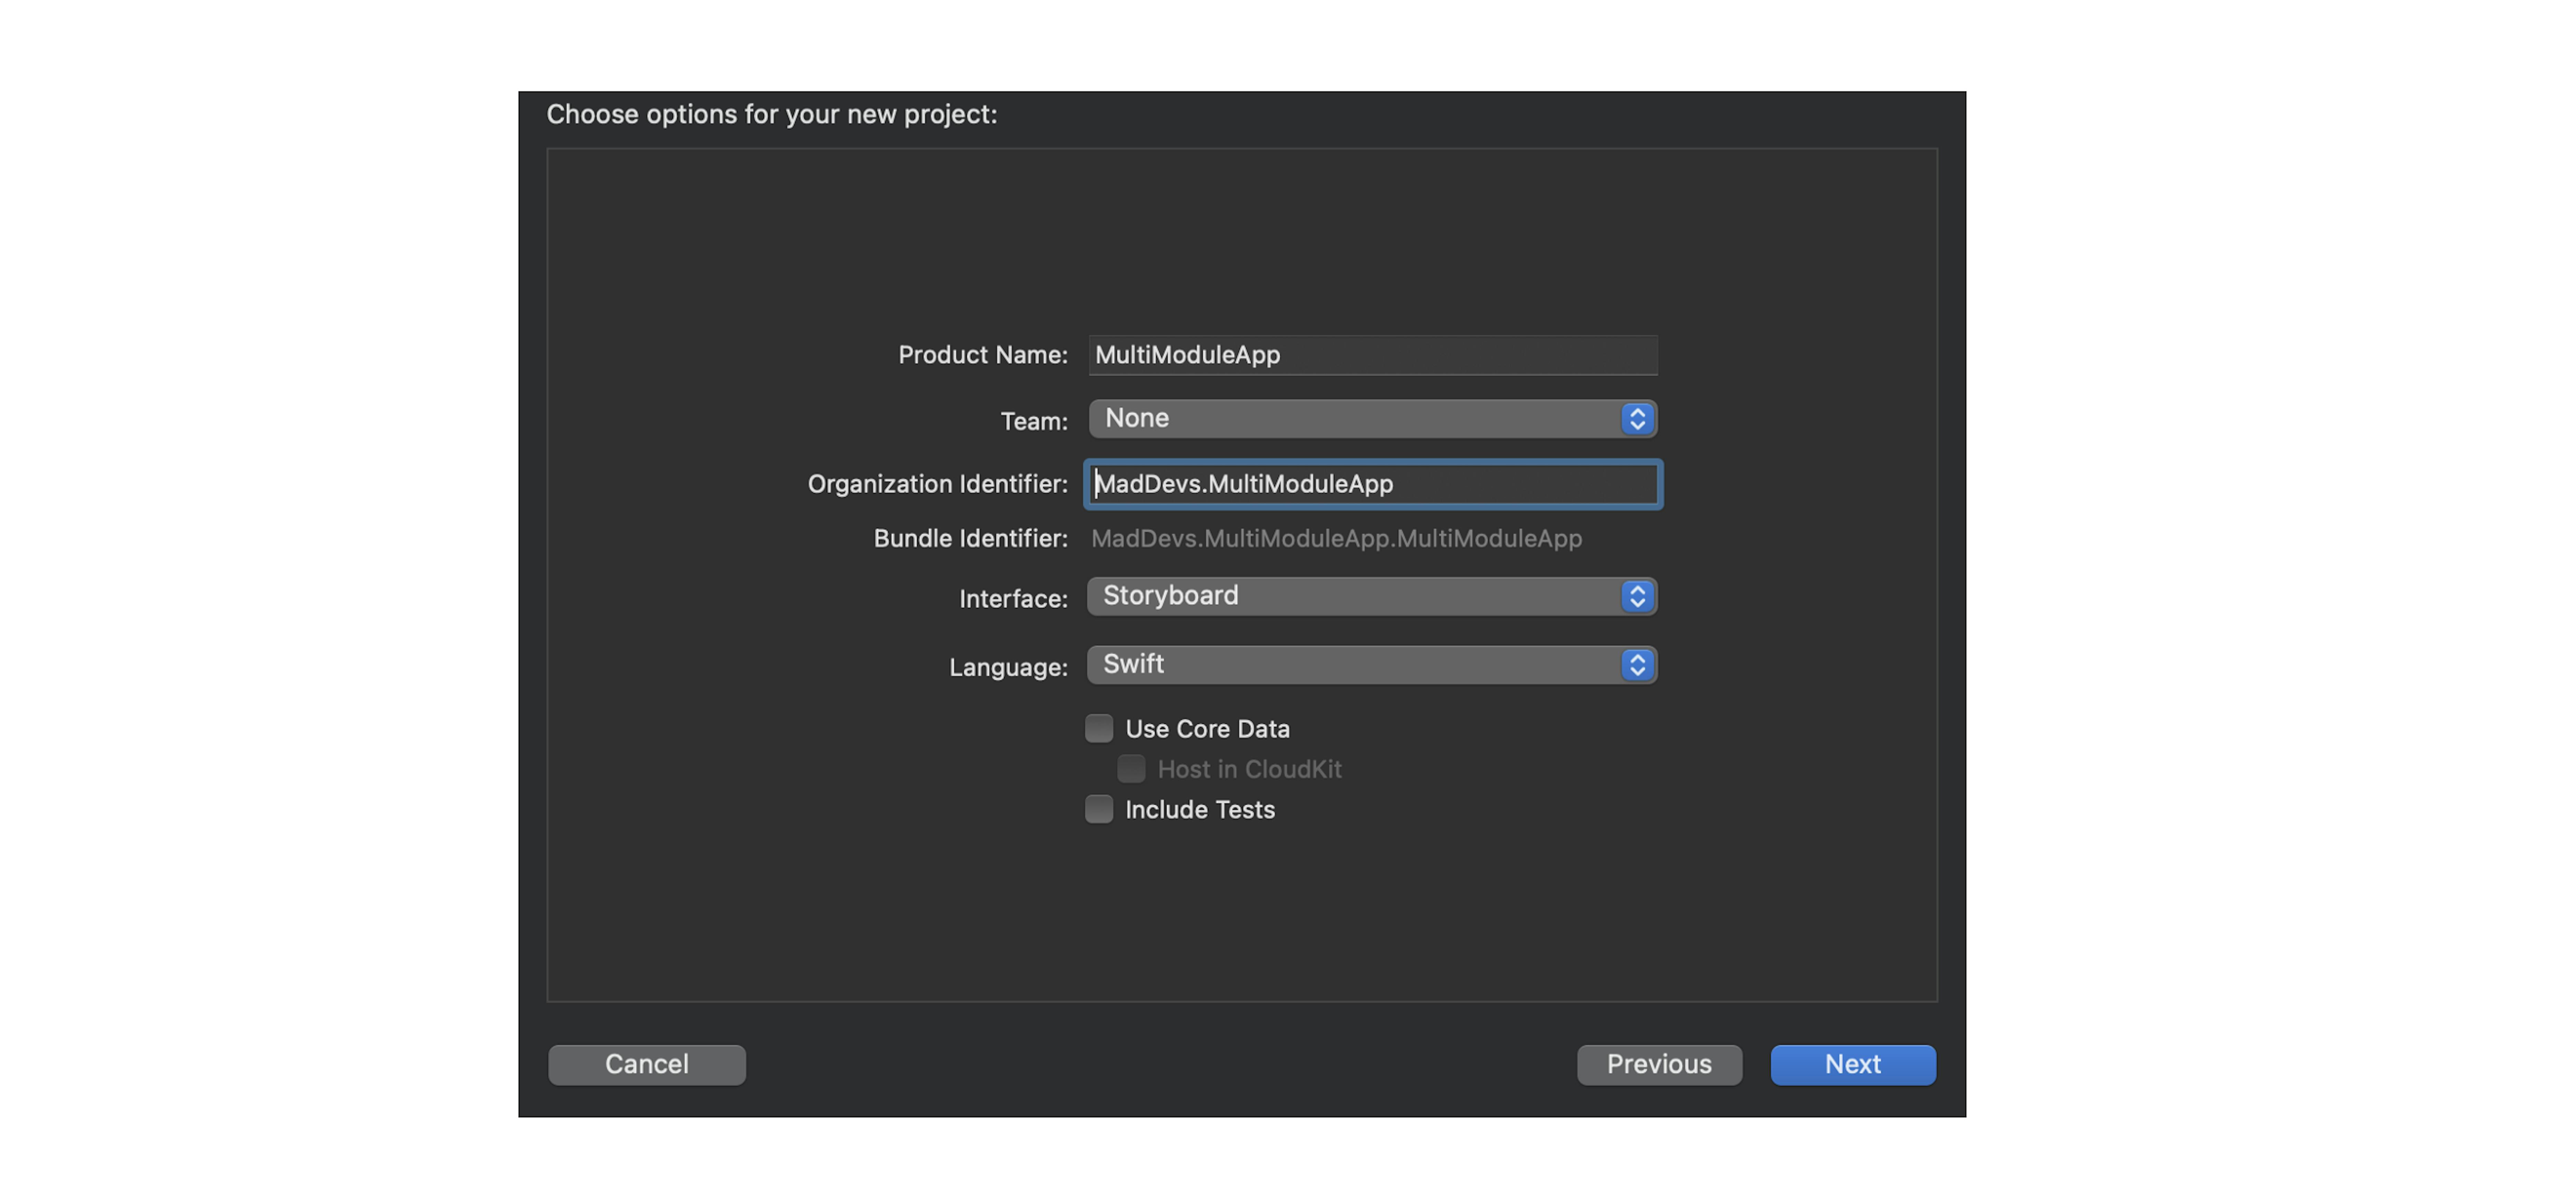
We create the project inside the folder where the multi-module application will be located.
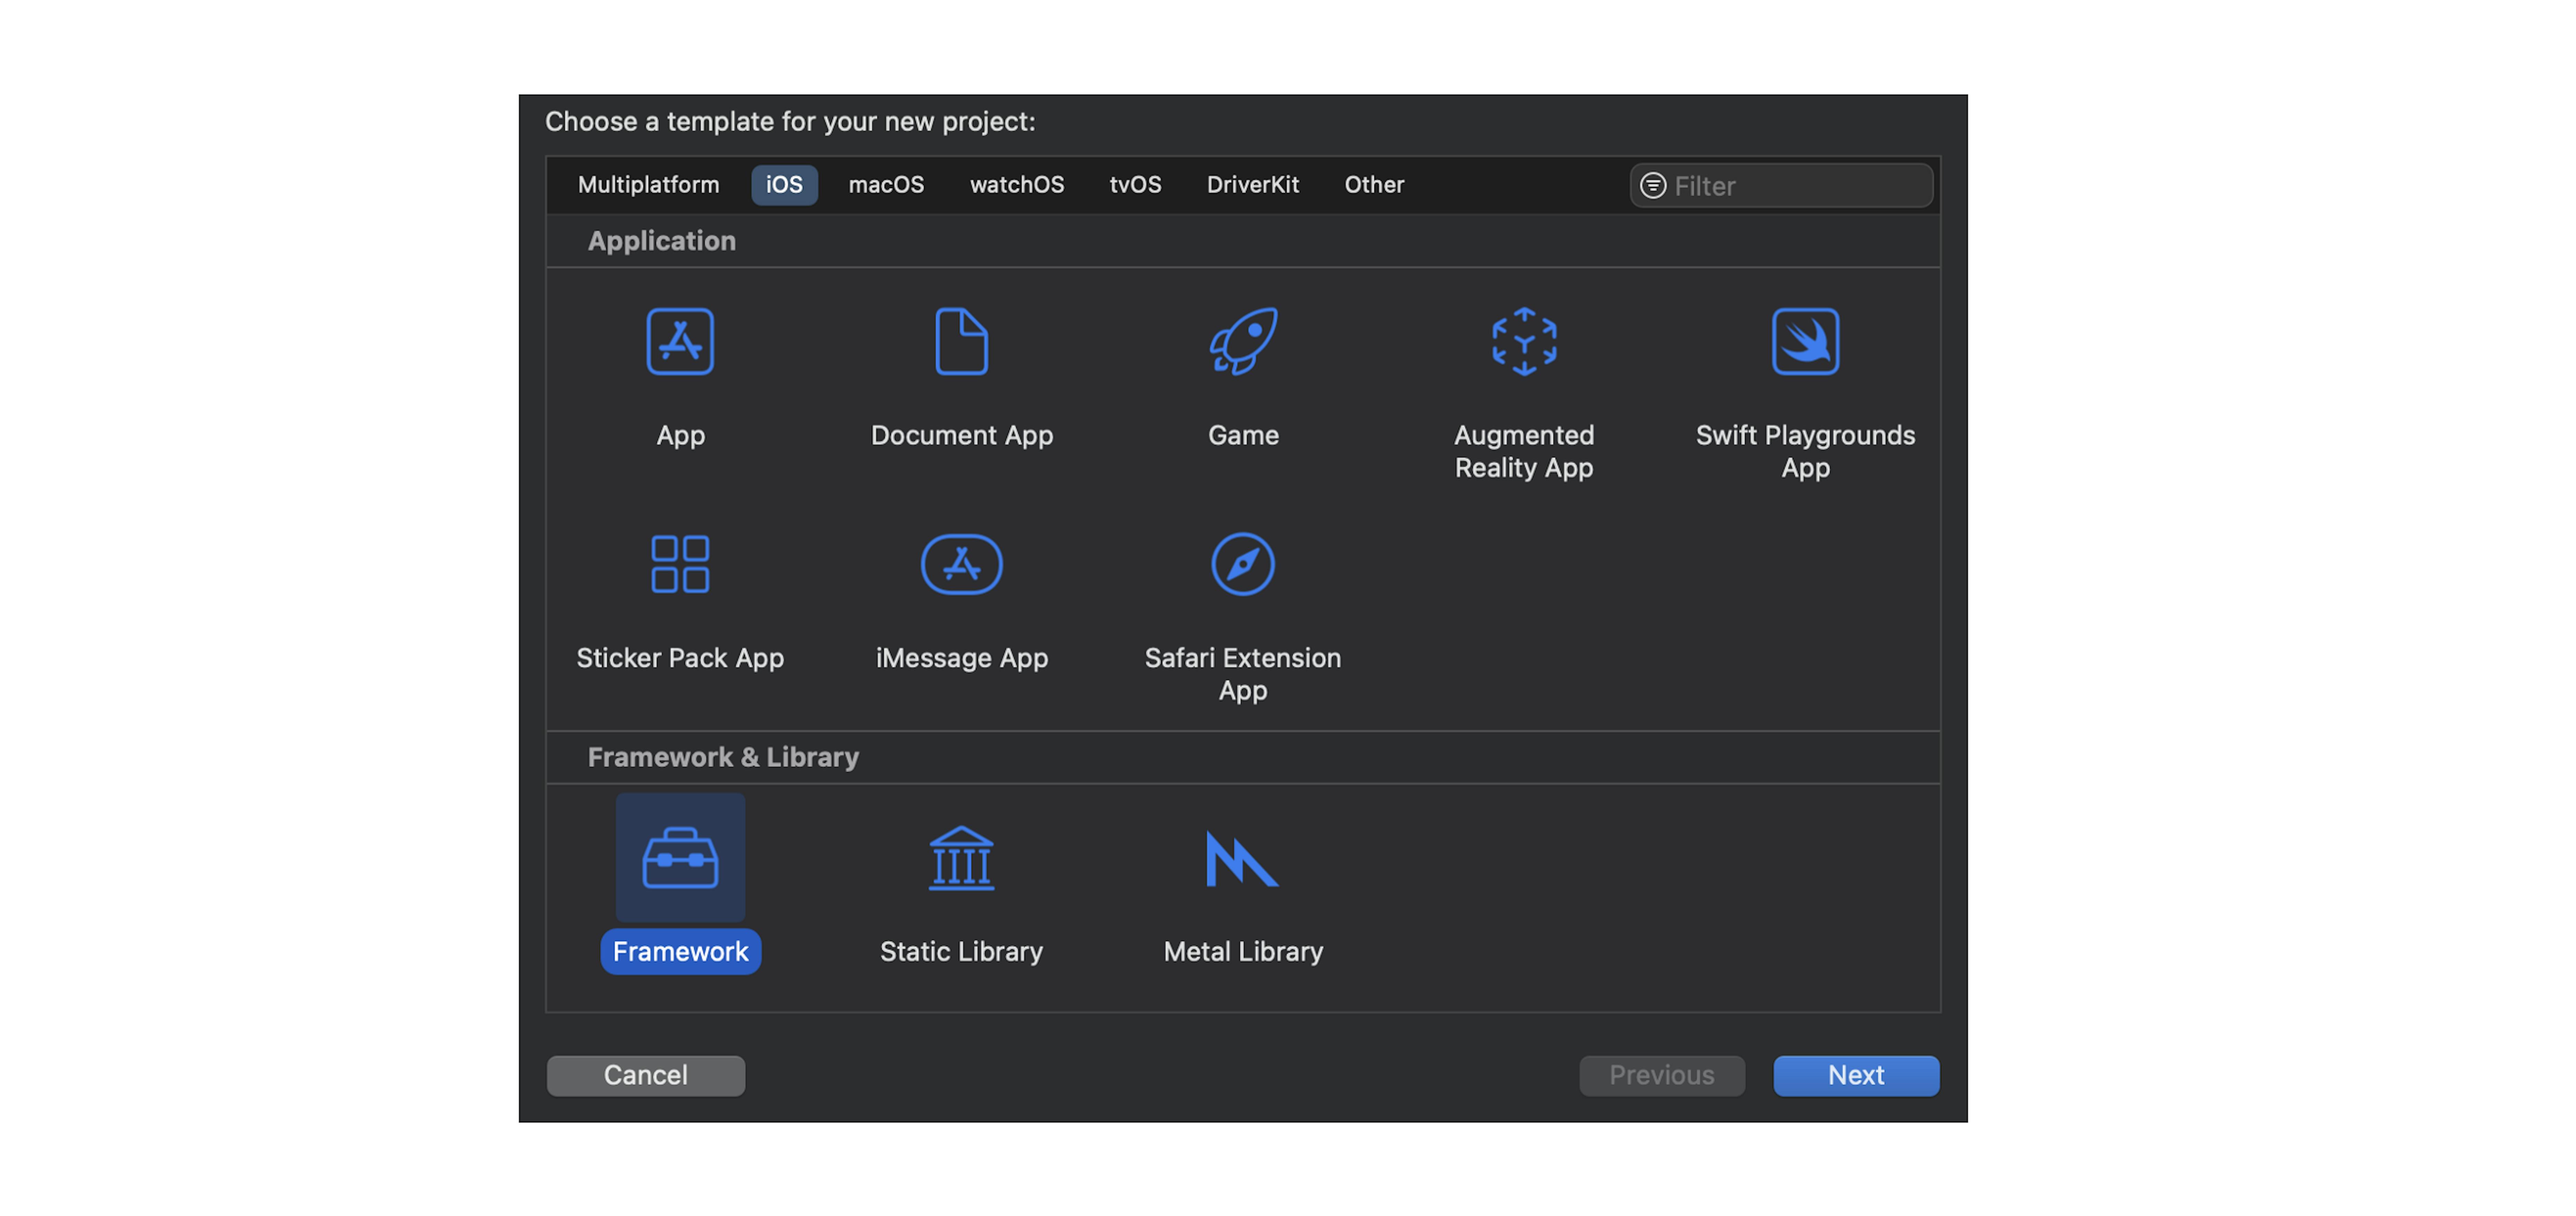
Select App as a template:

Choose options:
We now have an empty project that will be our main module.
The main module is the module that contains all the other modules and is essentially the entry point to our application.
How to create auxiliary modules
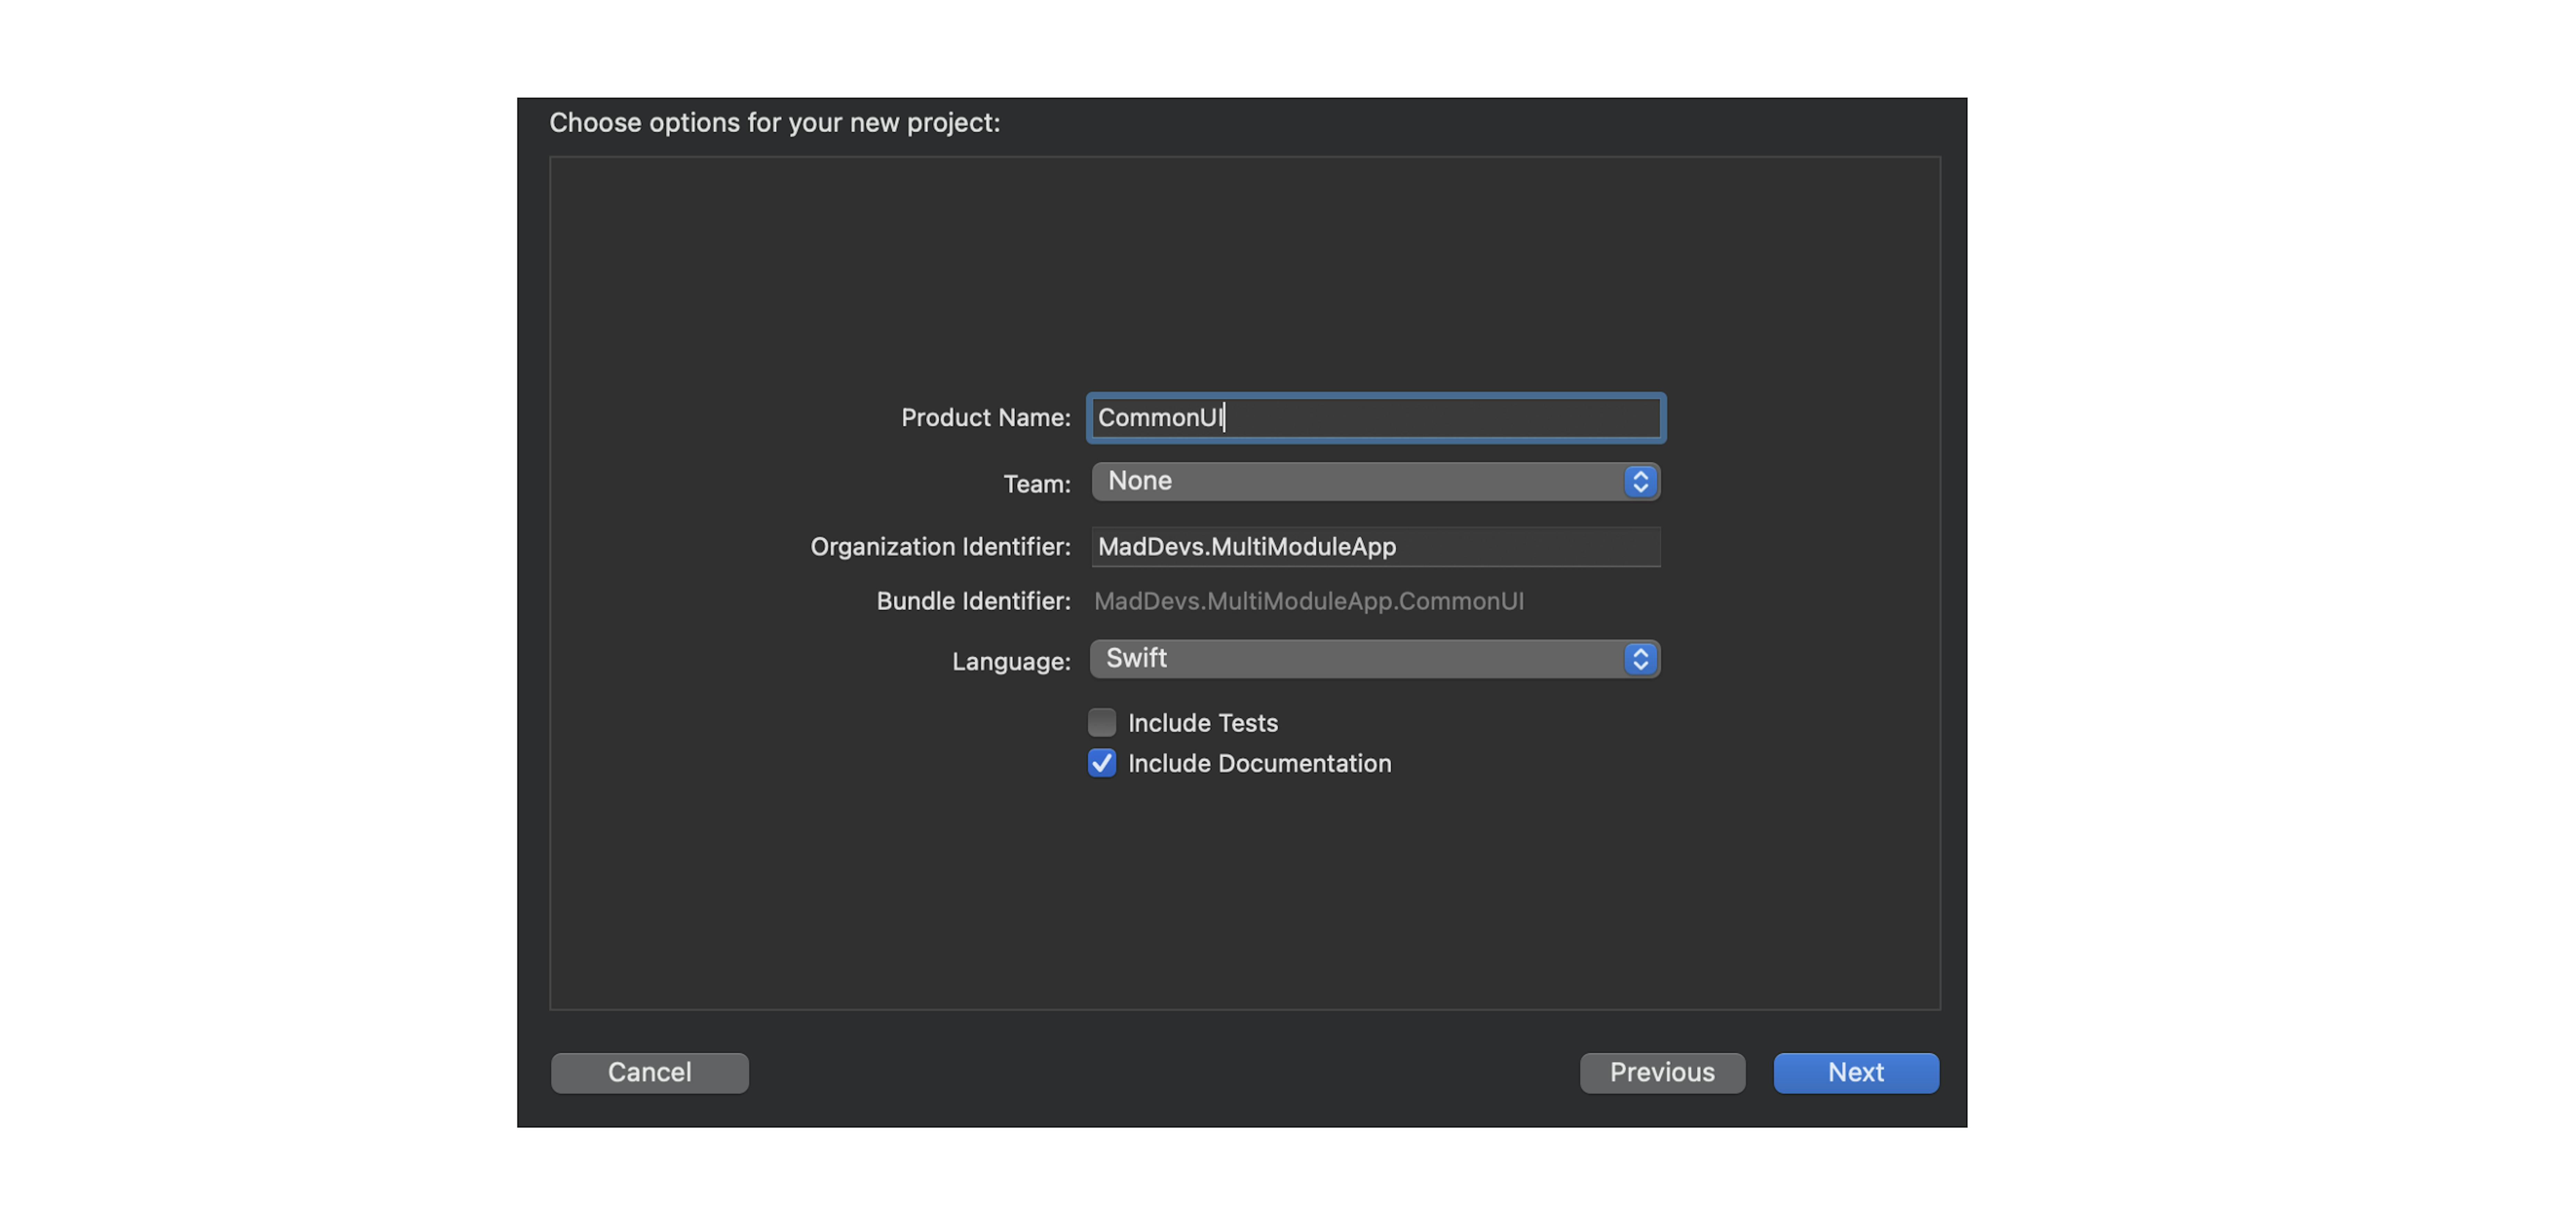
Now let's create auxiliary modules: Utilities and CommonUI. The first one will serve for various syntactic sugar and extensions, the second one — for UI components that will be reused throughout the application.
Just like when creating the main module, we create a new project, but instead of the App template, we select the Framework template. The entry point in our application will be in only one module.
Choose options for modules:
Auxiliary modules must be placed in the same directory as our main module, but not inside the main module — this is necessary to avoid confusion.
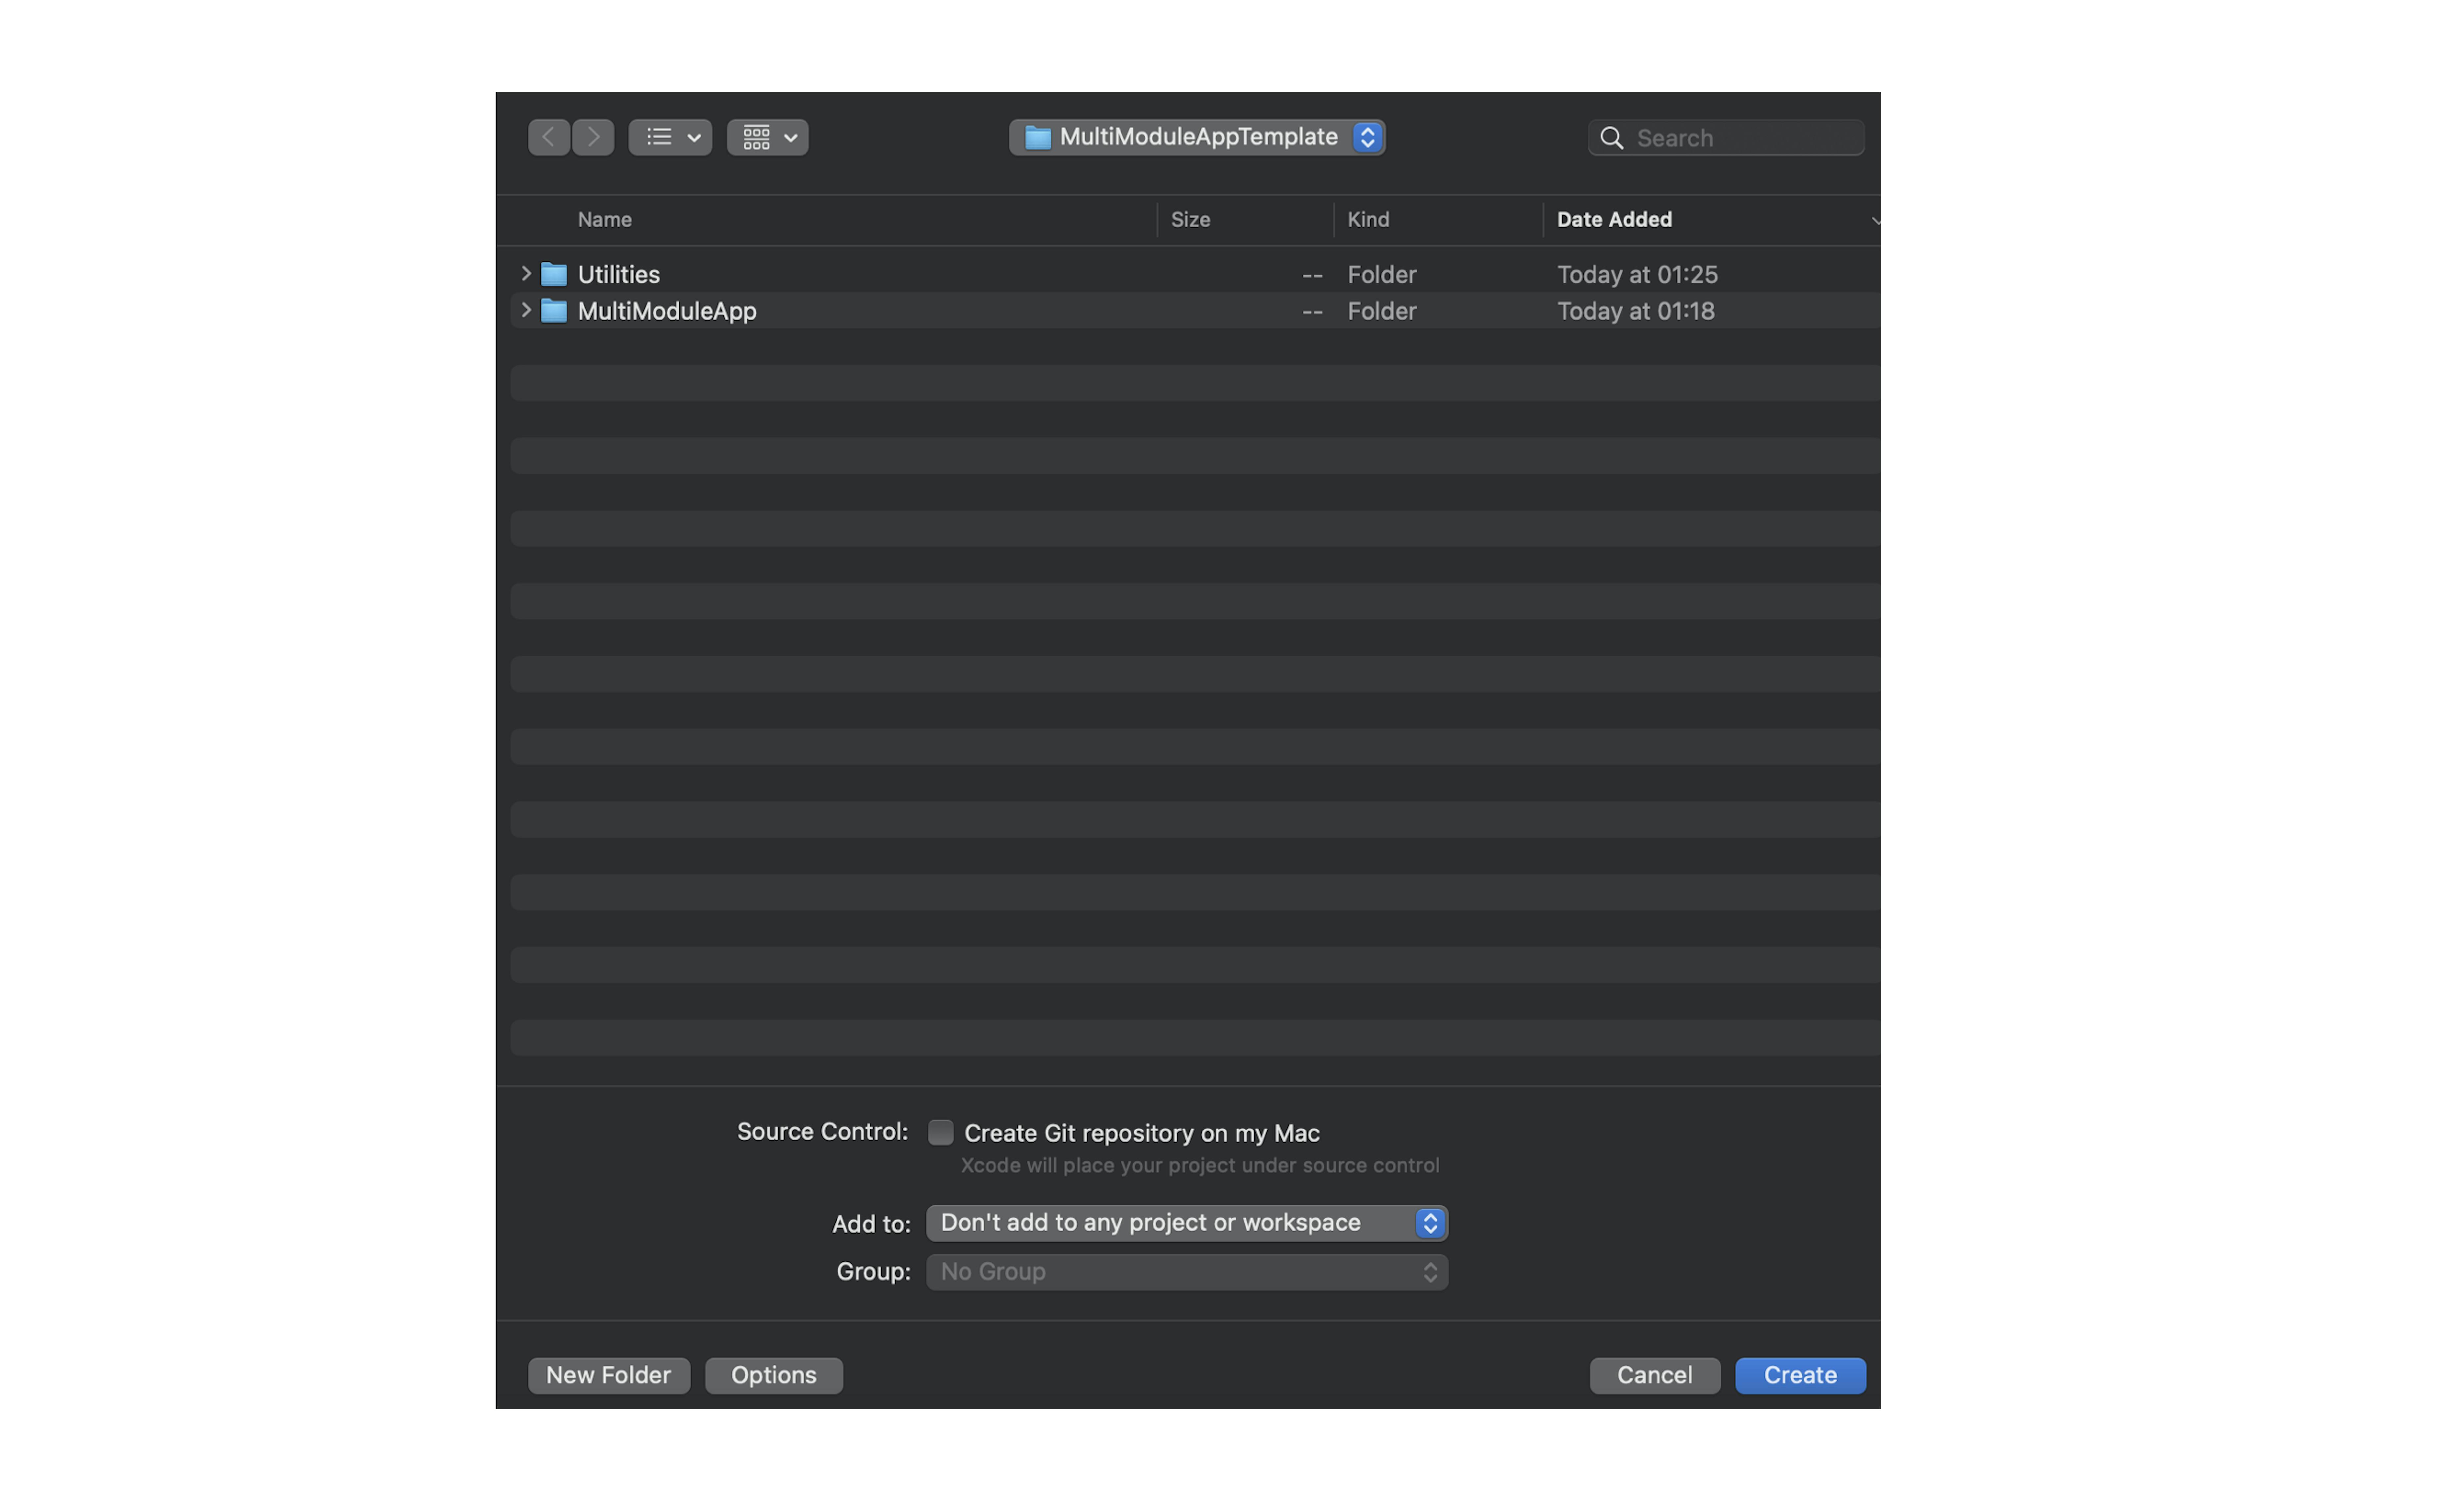
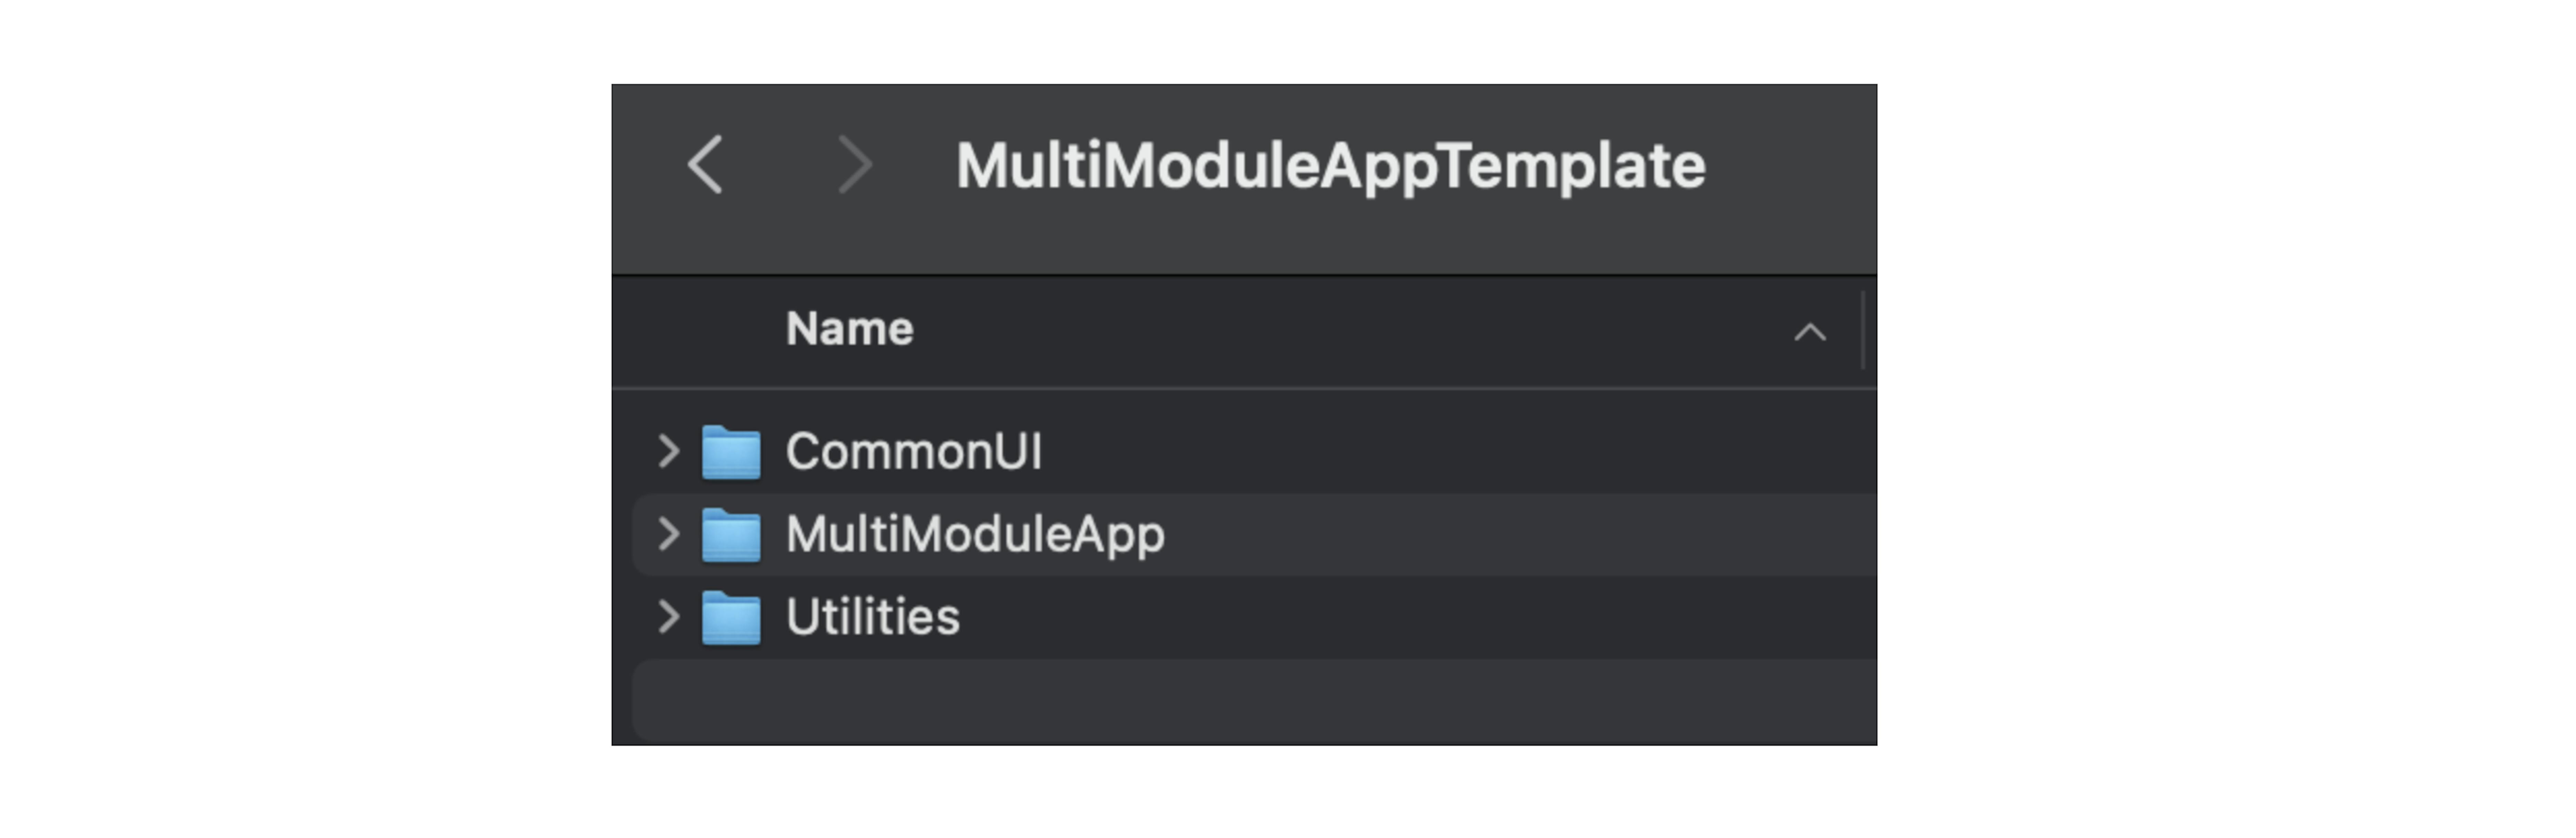
Now in the project directory, we have three modules, one main and two auxiliaries:
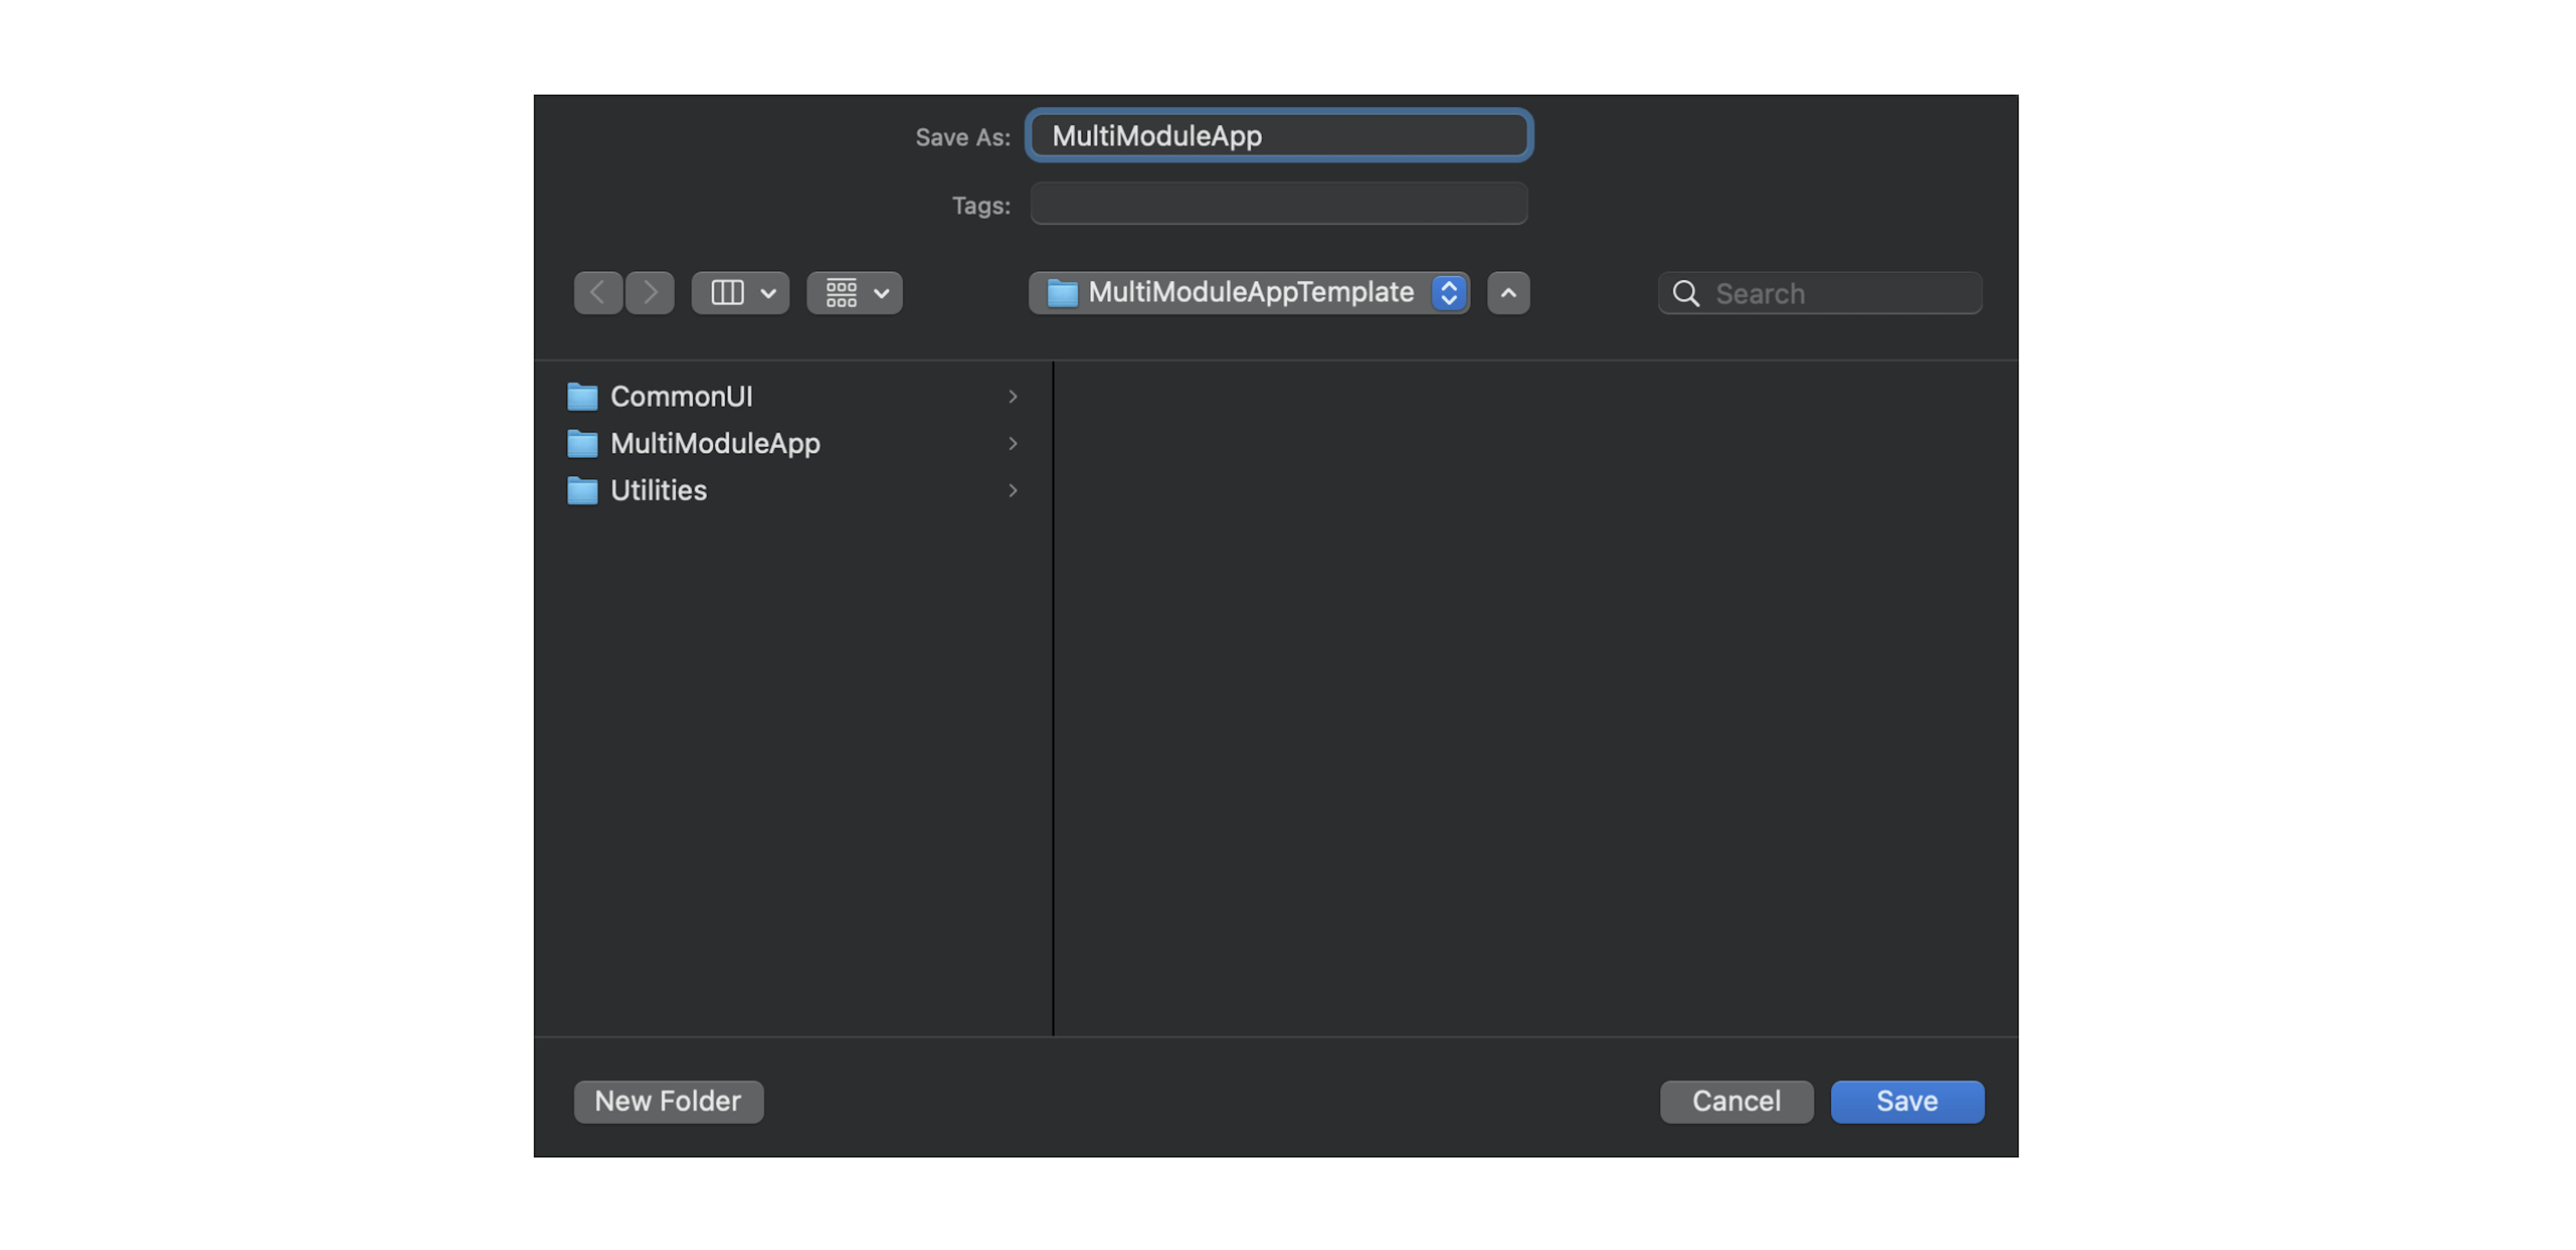
It's time to combine all the modules into one WorkSpace.

Save WorkSpace in the project directory:
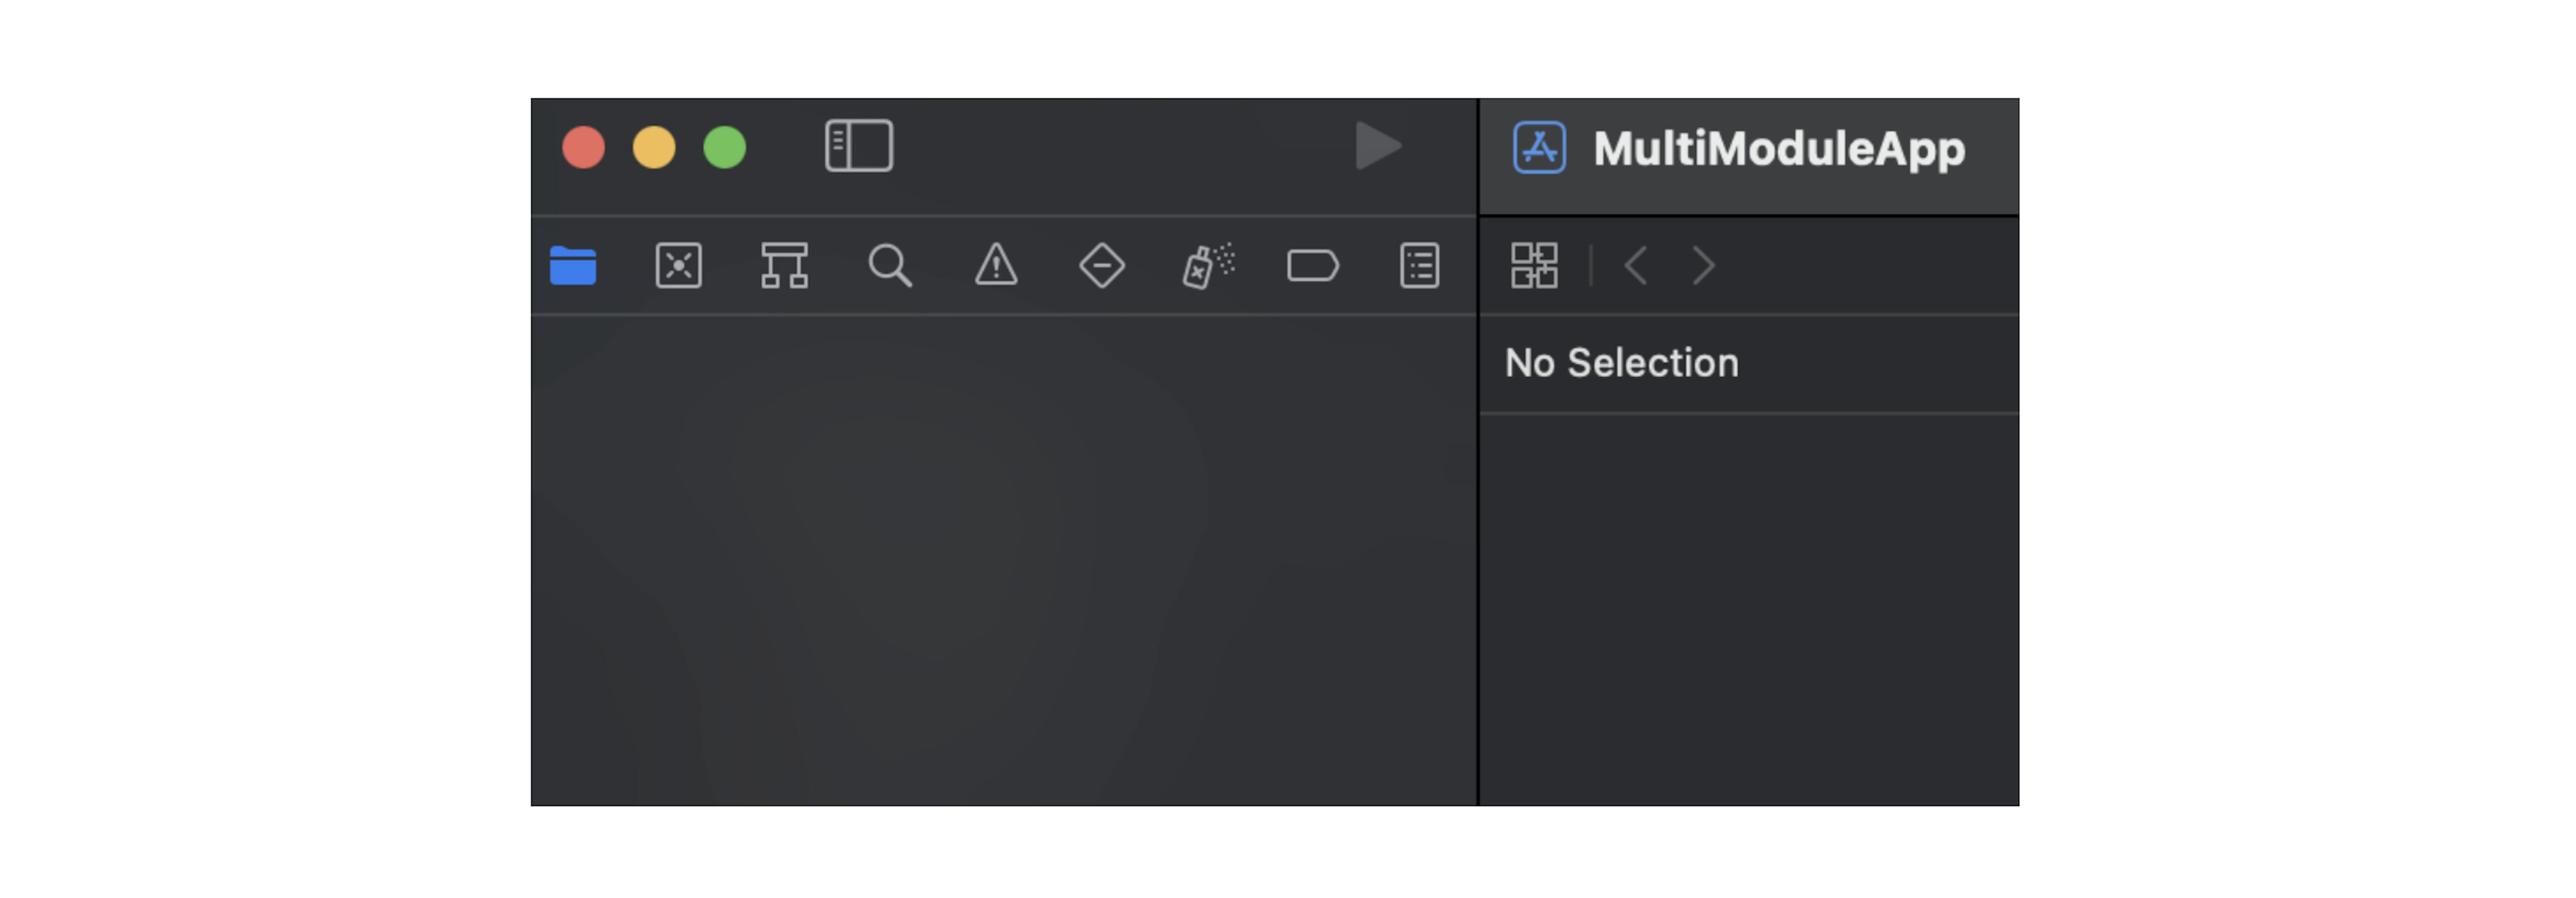
Now you need to drag all the modules into this WorkSpace:
Drag the main module to WorkSpace:

Drag and drop two auxiliary modules:

The location of the modules matters. The upstream module will be built first. This means that the first module should be located, which does not depend on other modules, i.e. Utilities. Next will be CommonUI, then other auxiliary modules. After auxiliary modules, modules of other teams can be added if, for example, several teams are working on the same application, but on different functionality. And lastly, the main module should be located.
How to establish links between modules
The next step is to establish links between modules.
Let's establish links between CommonUI and Utilities helper modules. And Utilities should join CommonUI.
In turn, the main module will include both auxiliary modules.
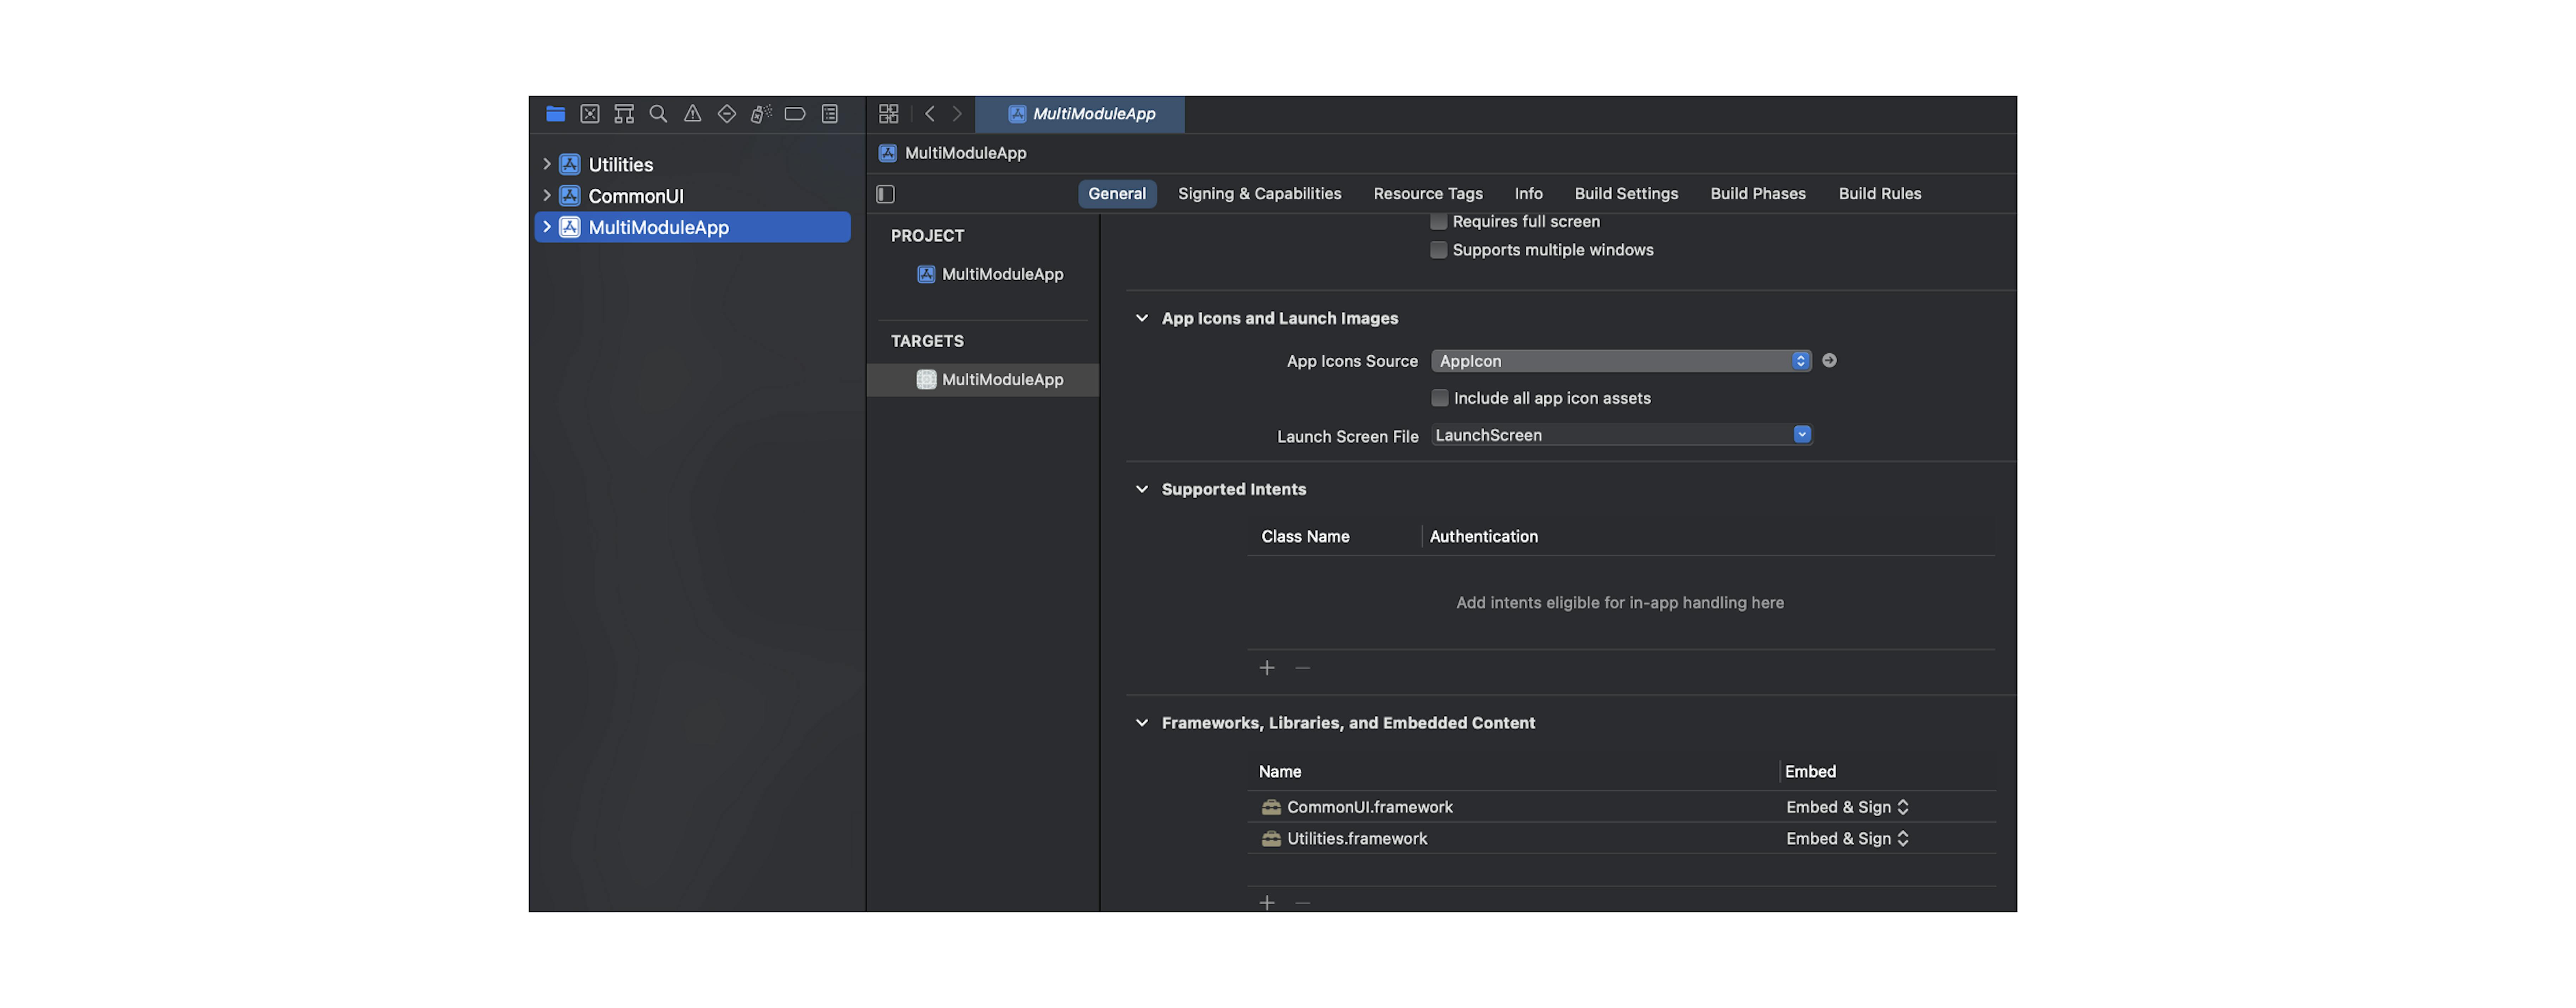
Great, now we have a multi-module application template. Libraries can be connected in such a module through auxiliary modules. For example, we can use the SnapKit library for layout.
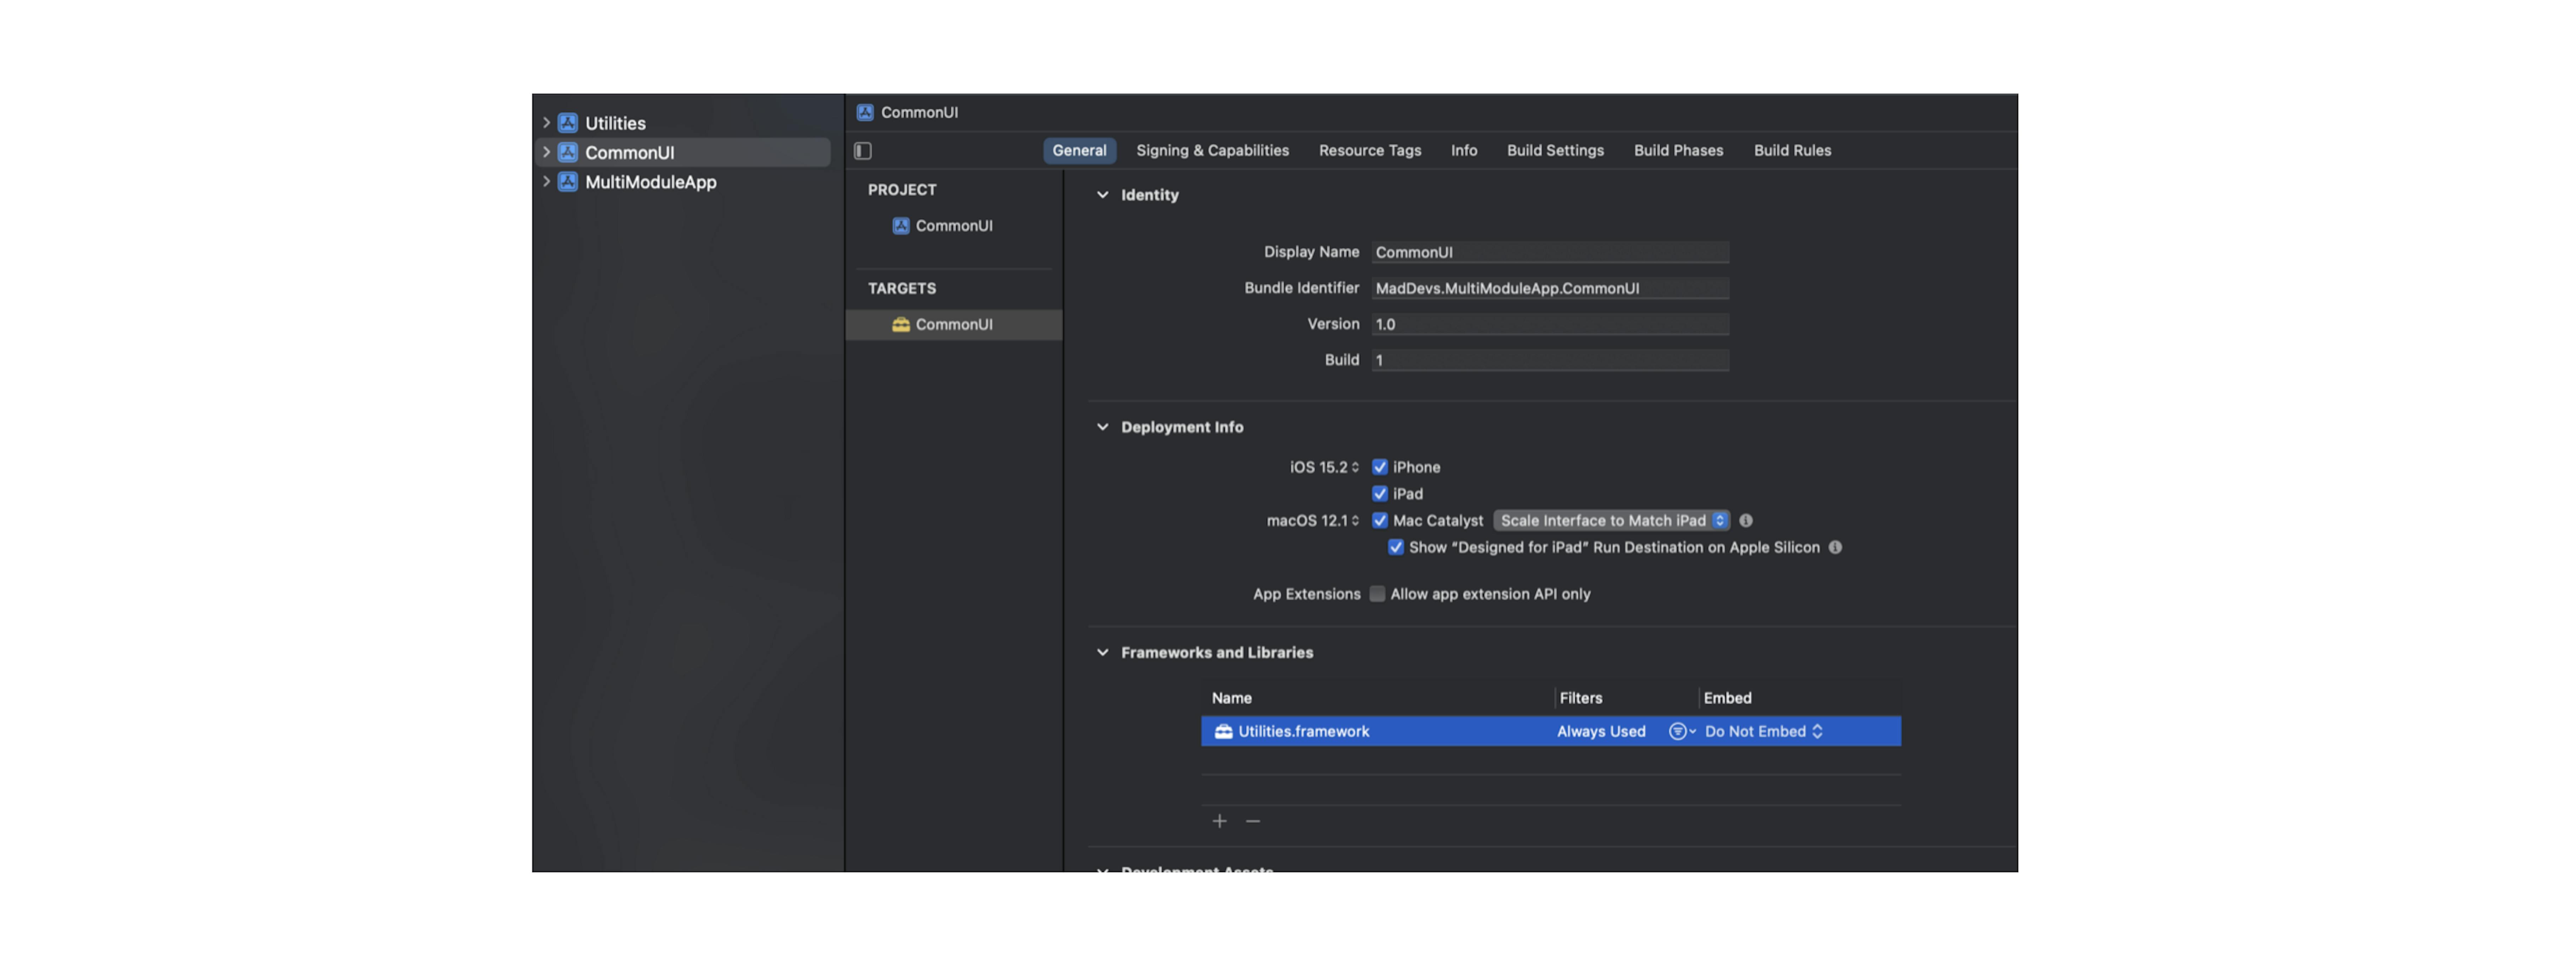
Let's connect SnapKit to the CommonUI module:
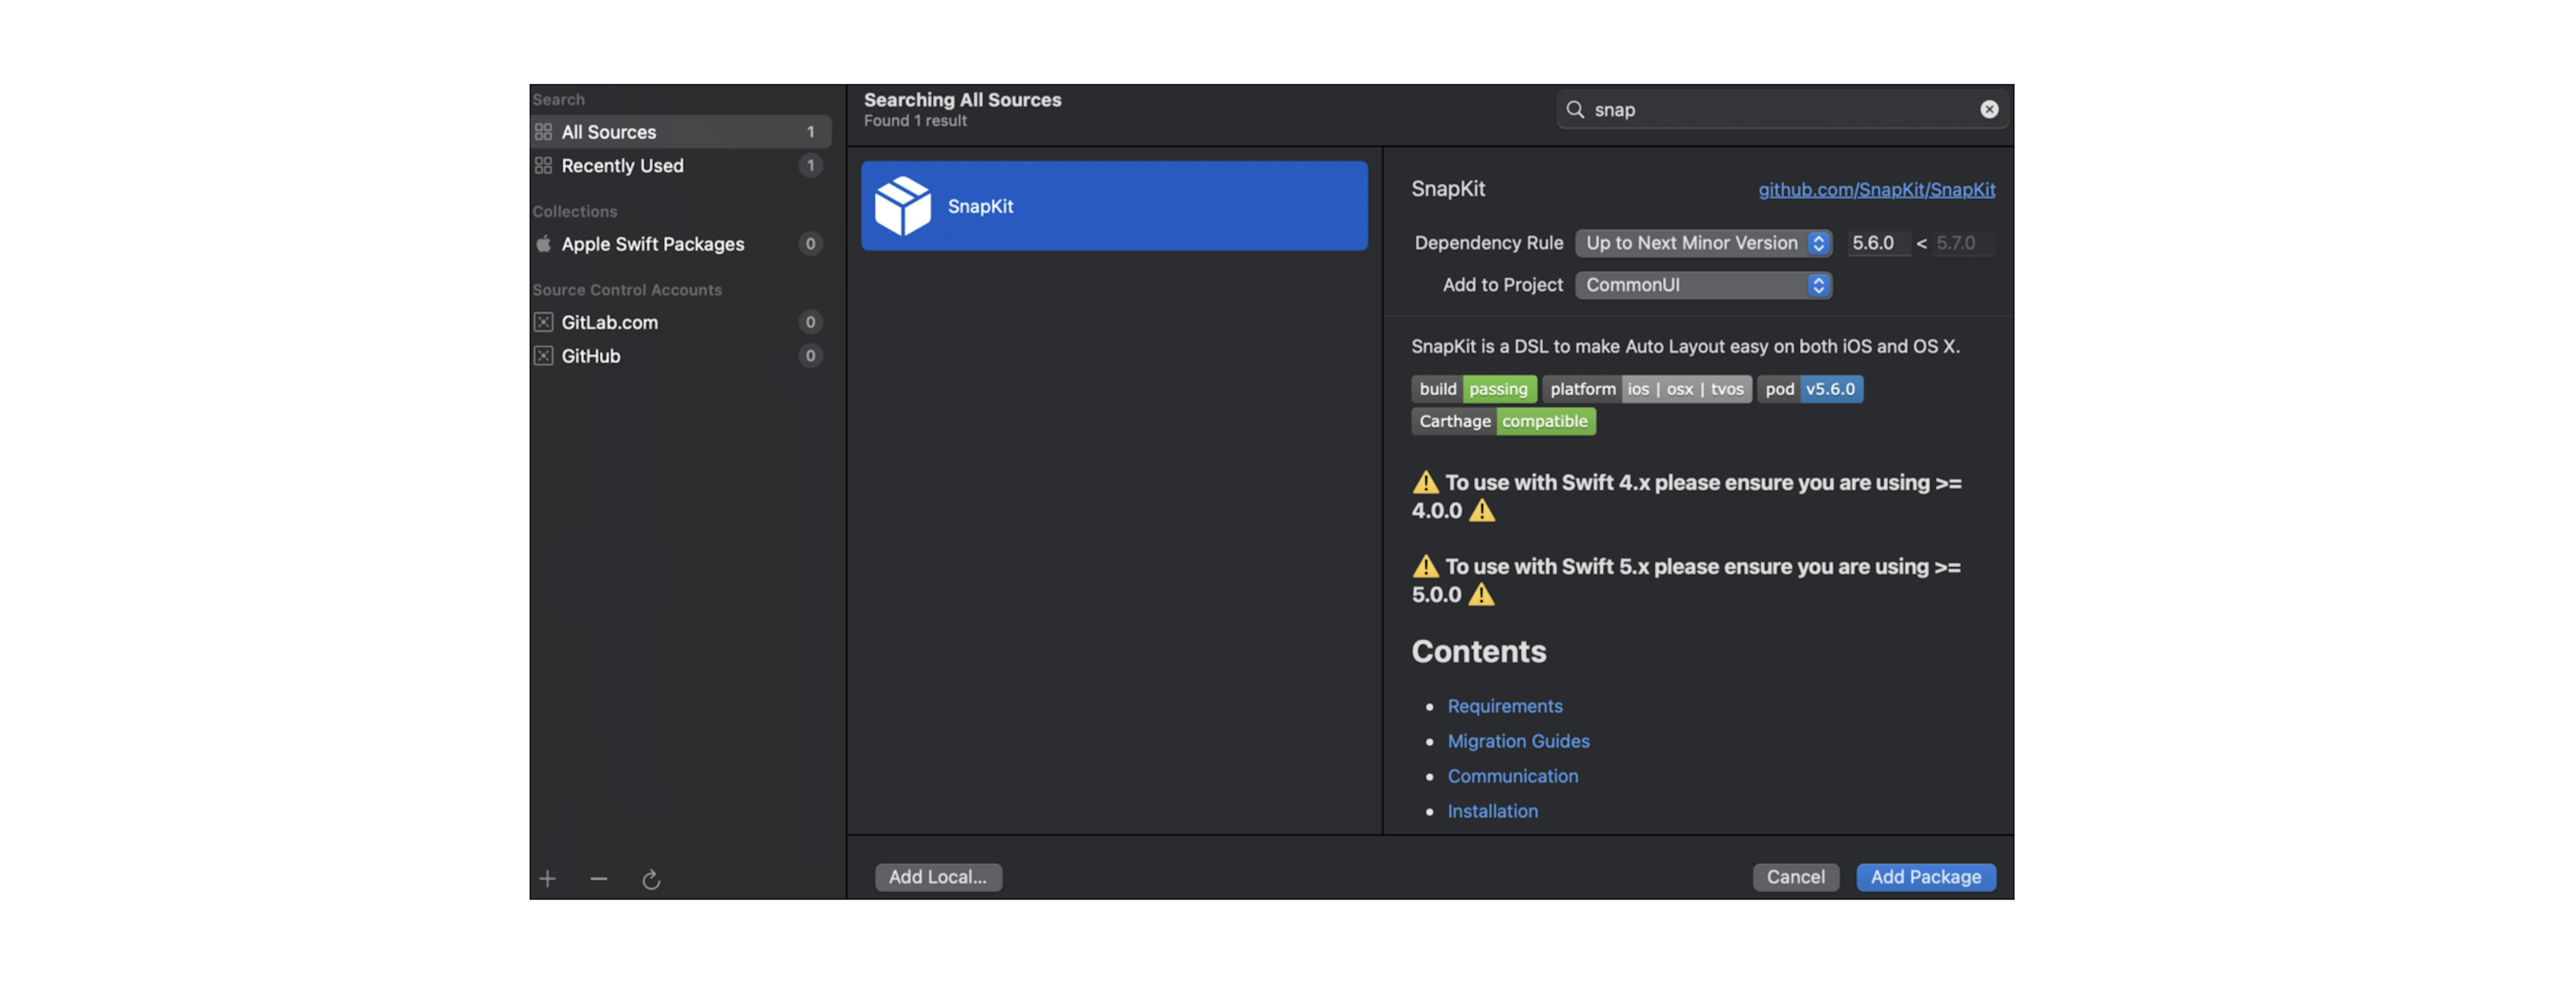
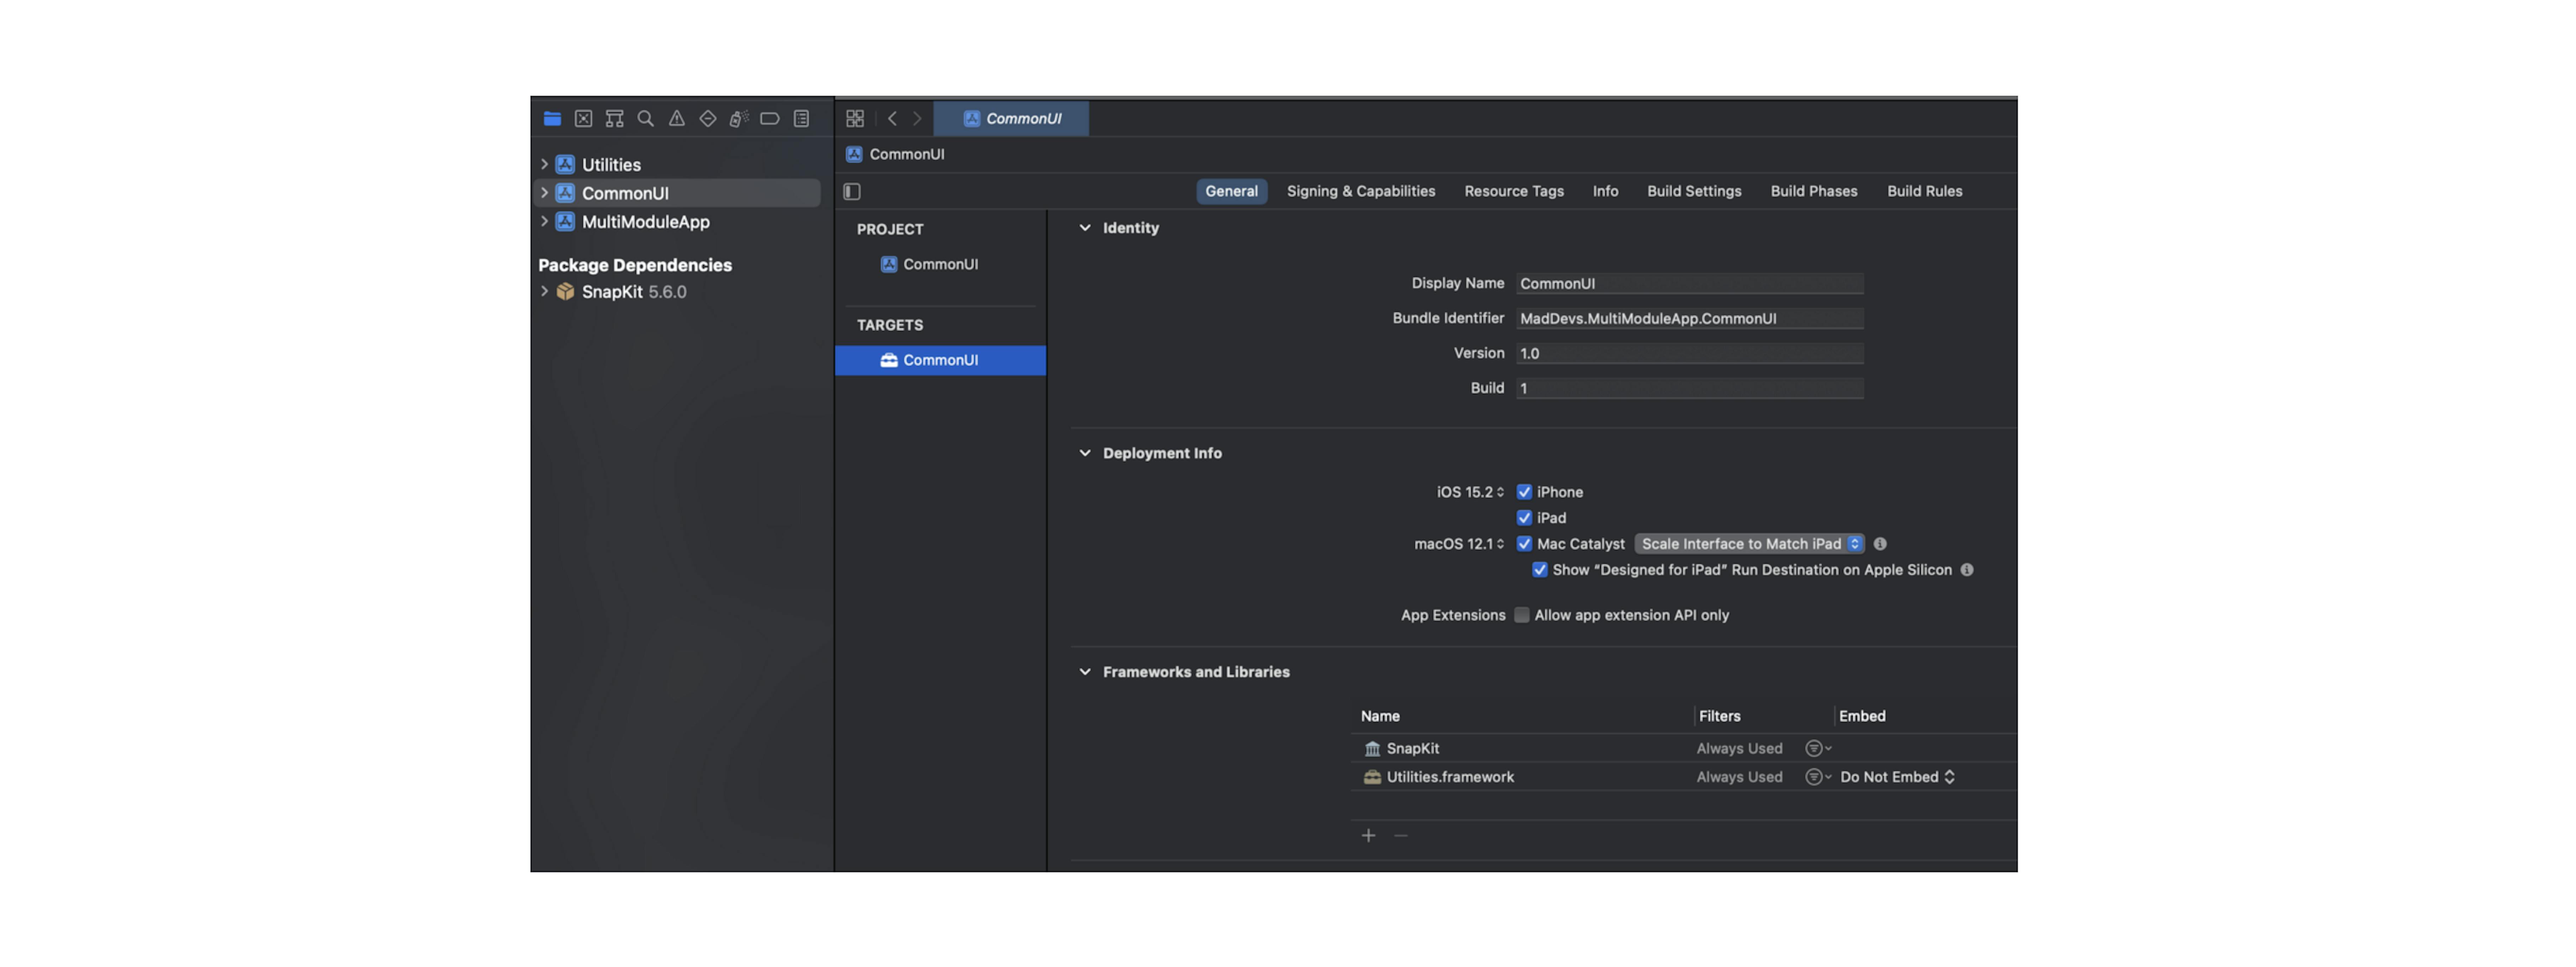
The library was connected via the Swift Package Manager (SPM) to the CommonUI module only. It is worth making a reservation here, libraries need to be connected to only one module, in order to avoid repeated dependencies. Therefore, if you plan to use SnapKit in other modules, for example, in MultiModuleApp, then you need to add the library to that auxiliary module, which will be used by all modules where there is a need for this library.
Let's create a UI element in CommonUI, for example, MainLabel:
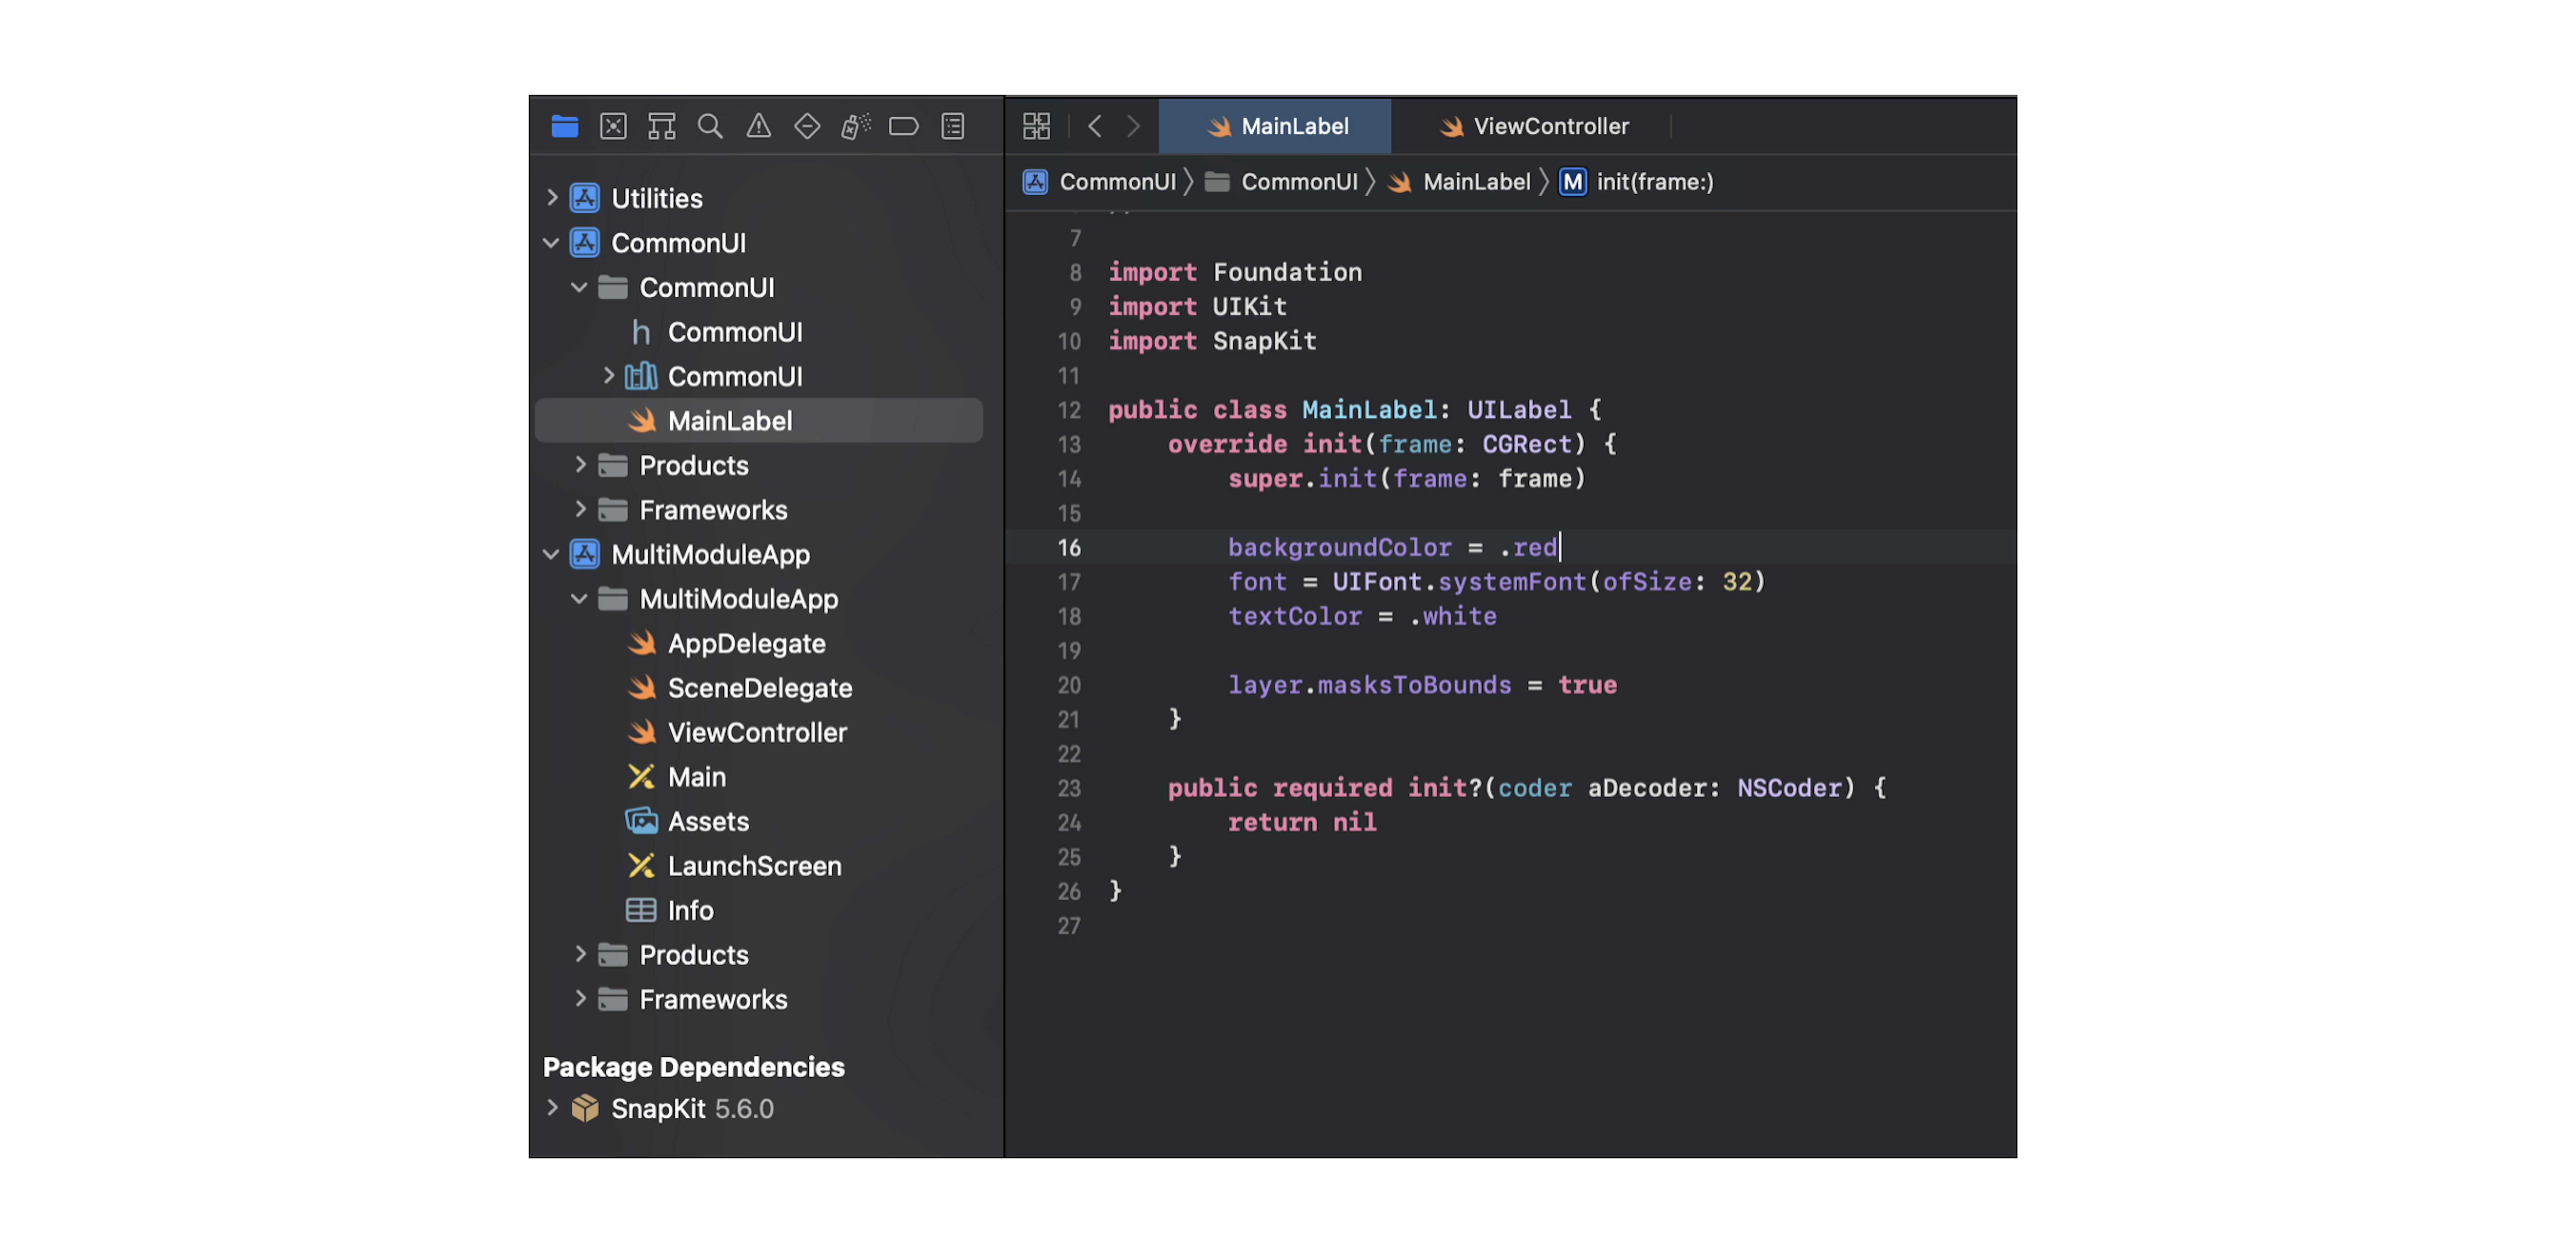
SnapKit import is available — all right.
Now let's create an instance of the MainLabel class in the main module and add it to the screen.

The SnapKit library is available in the main module through the CommonUI helper module, which allows us to use SnapKit's functionality.

Our multi-module application template is up and running.
The advantages that modularization of the application gives us
- Scaling development — increasing the number of developers without much effort, each group of developers works in isolation in their module and is responsible only for their module;
- Reducing the number of conflicts during pull requests — should be attributed to the first paragraph, but I decided to single it out separately, since this is a huge headache in teams of more than 2 members, and when there are 25 or more of developers, you can start howling even without the Moon;
- Specialization of modules and their weak interconnection with each other — the quality of the code and its maintainability increase;
- Ability to reuse individual modules in other applications — usually refers to auxiliary modules that save a ton of time when developing new applications;
- Acceleration of project build time — when working in one module, the next project build will take less time, since other modules that have not been changed will not be rebuilt;
- Track module launch time — Since the codebase is divided into modules, this allows you to measure the build time of each individual module and identify problem areas.
Want to accelerate the pace and scale of development? Use modularization.


Latest articles here