

Analyze with AI
Get AI-powered insights from this Mad Devs article:
This has never happened before, and here again …
Here is a story about the benefits of automation and the disadvantages of manual work that a computer should do. If you are too lazy to read or you had to provide the finished CI yesterday, then you can find all the necessary files in our repository.
The story started with the fact that users (!!!) began complaining that the application was crashing. The update was 2 weeks ago so What a Terrible Failure why then we do not know anything about the crashes? Crashlytics were set up and we expected to be notified about all errors and quickly respond to them, but this time all the notifications (Slack, mail) were treacherously silent. What went wrong? Nothing special — we forgot to upload the dSYM file and it was impossible to get readable information about the failure. This is not entirely true, of course. You can find out about the fact of an error, the number of crashes, etc. But it's extremely difficult to analyze the reason without debug symbols.
I must say that before this situation we have been releasing applications manually for a long time. This was usually done by a developer who manually launches (if he does not forget) UNIT / UI tests, then builds the application, signs it, does some other black magic, and uploads the build to Testflight. And after that, the same person updates dSYM files for Сrashlytics service. This could no longer go on and we decided to fully automate the entire process. What follows is a simple description of what was done and why.
Requirements
- Working Mac. In our case, OS Darwin Kernel Version 18.5.0 — MacOS Catalina is used. The Mac may even be with a broken display or damaged in some way. We just need to use it as a CI server. So that the testing/build process does not turn into torture, the processor must be powerful enough. Running a build with tests on i5 takes about 40 minutes; on i7 already 10 minutes, not as bad.
- Apple APP ID created on both the Developer Portal and iTunes Connect.
- Xcode 11.1 (at the time of writing, using 11.2, some libraries were not yet built)
- Ruby 2.6.5
- And plenty of patience.
GitLab CI
GitLab is a site and code repository management system for git. It provides a lot of additional features: wiki, issue tracker, and much more. Among them is its own CI, which simplifies the life of a developer a lot. Most importantly, you don't have to set up it yourself. Everything was done by smart guys from GitLab, you just need to read the documentation, configure .gitlab-ci.yml and install (optionally) GitLab-runner.
Here in the GitLab CI settings you can store environment variables. For example, we store there the version of Xcode with which we want to build the application

Environment variables for project
Gitlab-runner
For iOS app development, you need to use your specific runner, which allows you to execute any scripts on the server. Actually GitLab-runner is a thing that will execute the code defined in the .gitlab-ci.yml file. They are different (shared | specific, docker | shell … etc., all the details are in the documentation) and you can install it on your server so that, firstly, you have full control over the environment (especially if it's a shell runner) and, secondly, do not pay for GitLab :).
Not everything went smoothly with it on macOS, but it could be worse. It is not recommended to install it through brew, although there was not much difference in the work between the brew version and the recommended one. After installation, you need to run gitlab-runner install to add it to the startup. This is where my adventures began, because I ran this command as my user, and someone before me as root. The difference is that if executed from your user, the configuration file will appear in the ~/Library/LaunchAgents folder and if from the root, it will appear in the /Library/LaunchDaemons folder. If both runners start simultaneously, then there will be all sorts of interesting effects. For example, rbenv is configured for the user and not for root. In general, do not mix these 2 runners.
If you are using a runner starting from LaunchAgents, then you need to configure an automatic login to the system for this user, so that when the computer restarts unexpectedly, the server will normally start. This happened once when by mistake they put the monitor on the Mac and it overheated 😐
Also for convenience, it's worth editing the gitlab-runner.plist file, the working-directory section. By default, there is just the user's home directory, and during the build, all sorts of artifacts can litter it, which is not very good.
After you have made sure that 1 GitLab-runner starts, you need to register it and configure the project to use it. To do this, go to GitLab -> Your project -> Settings -> CI/CD -> Runners. Follow the instructions in the "Set up a specific Runner manually" section. The result should be something like this:
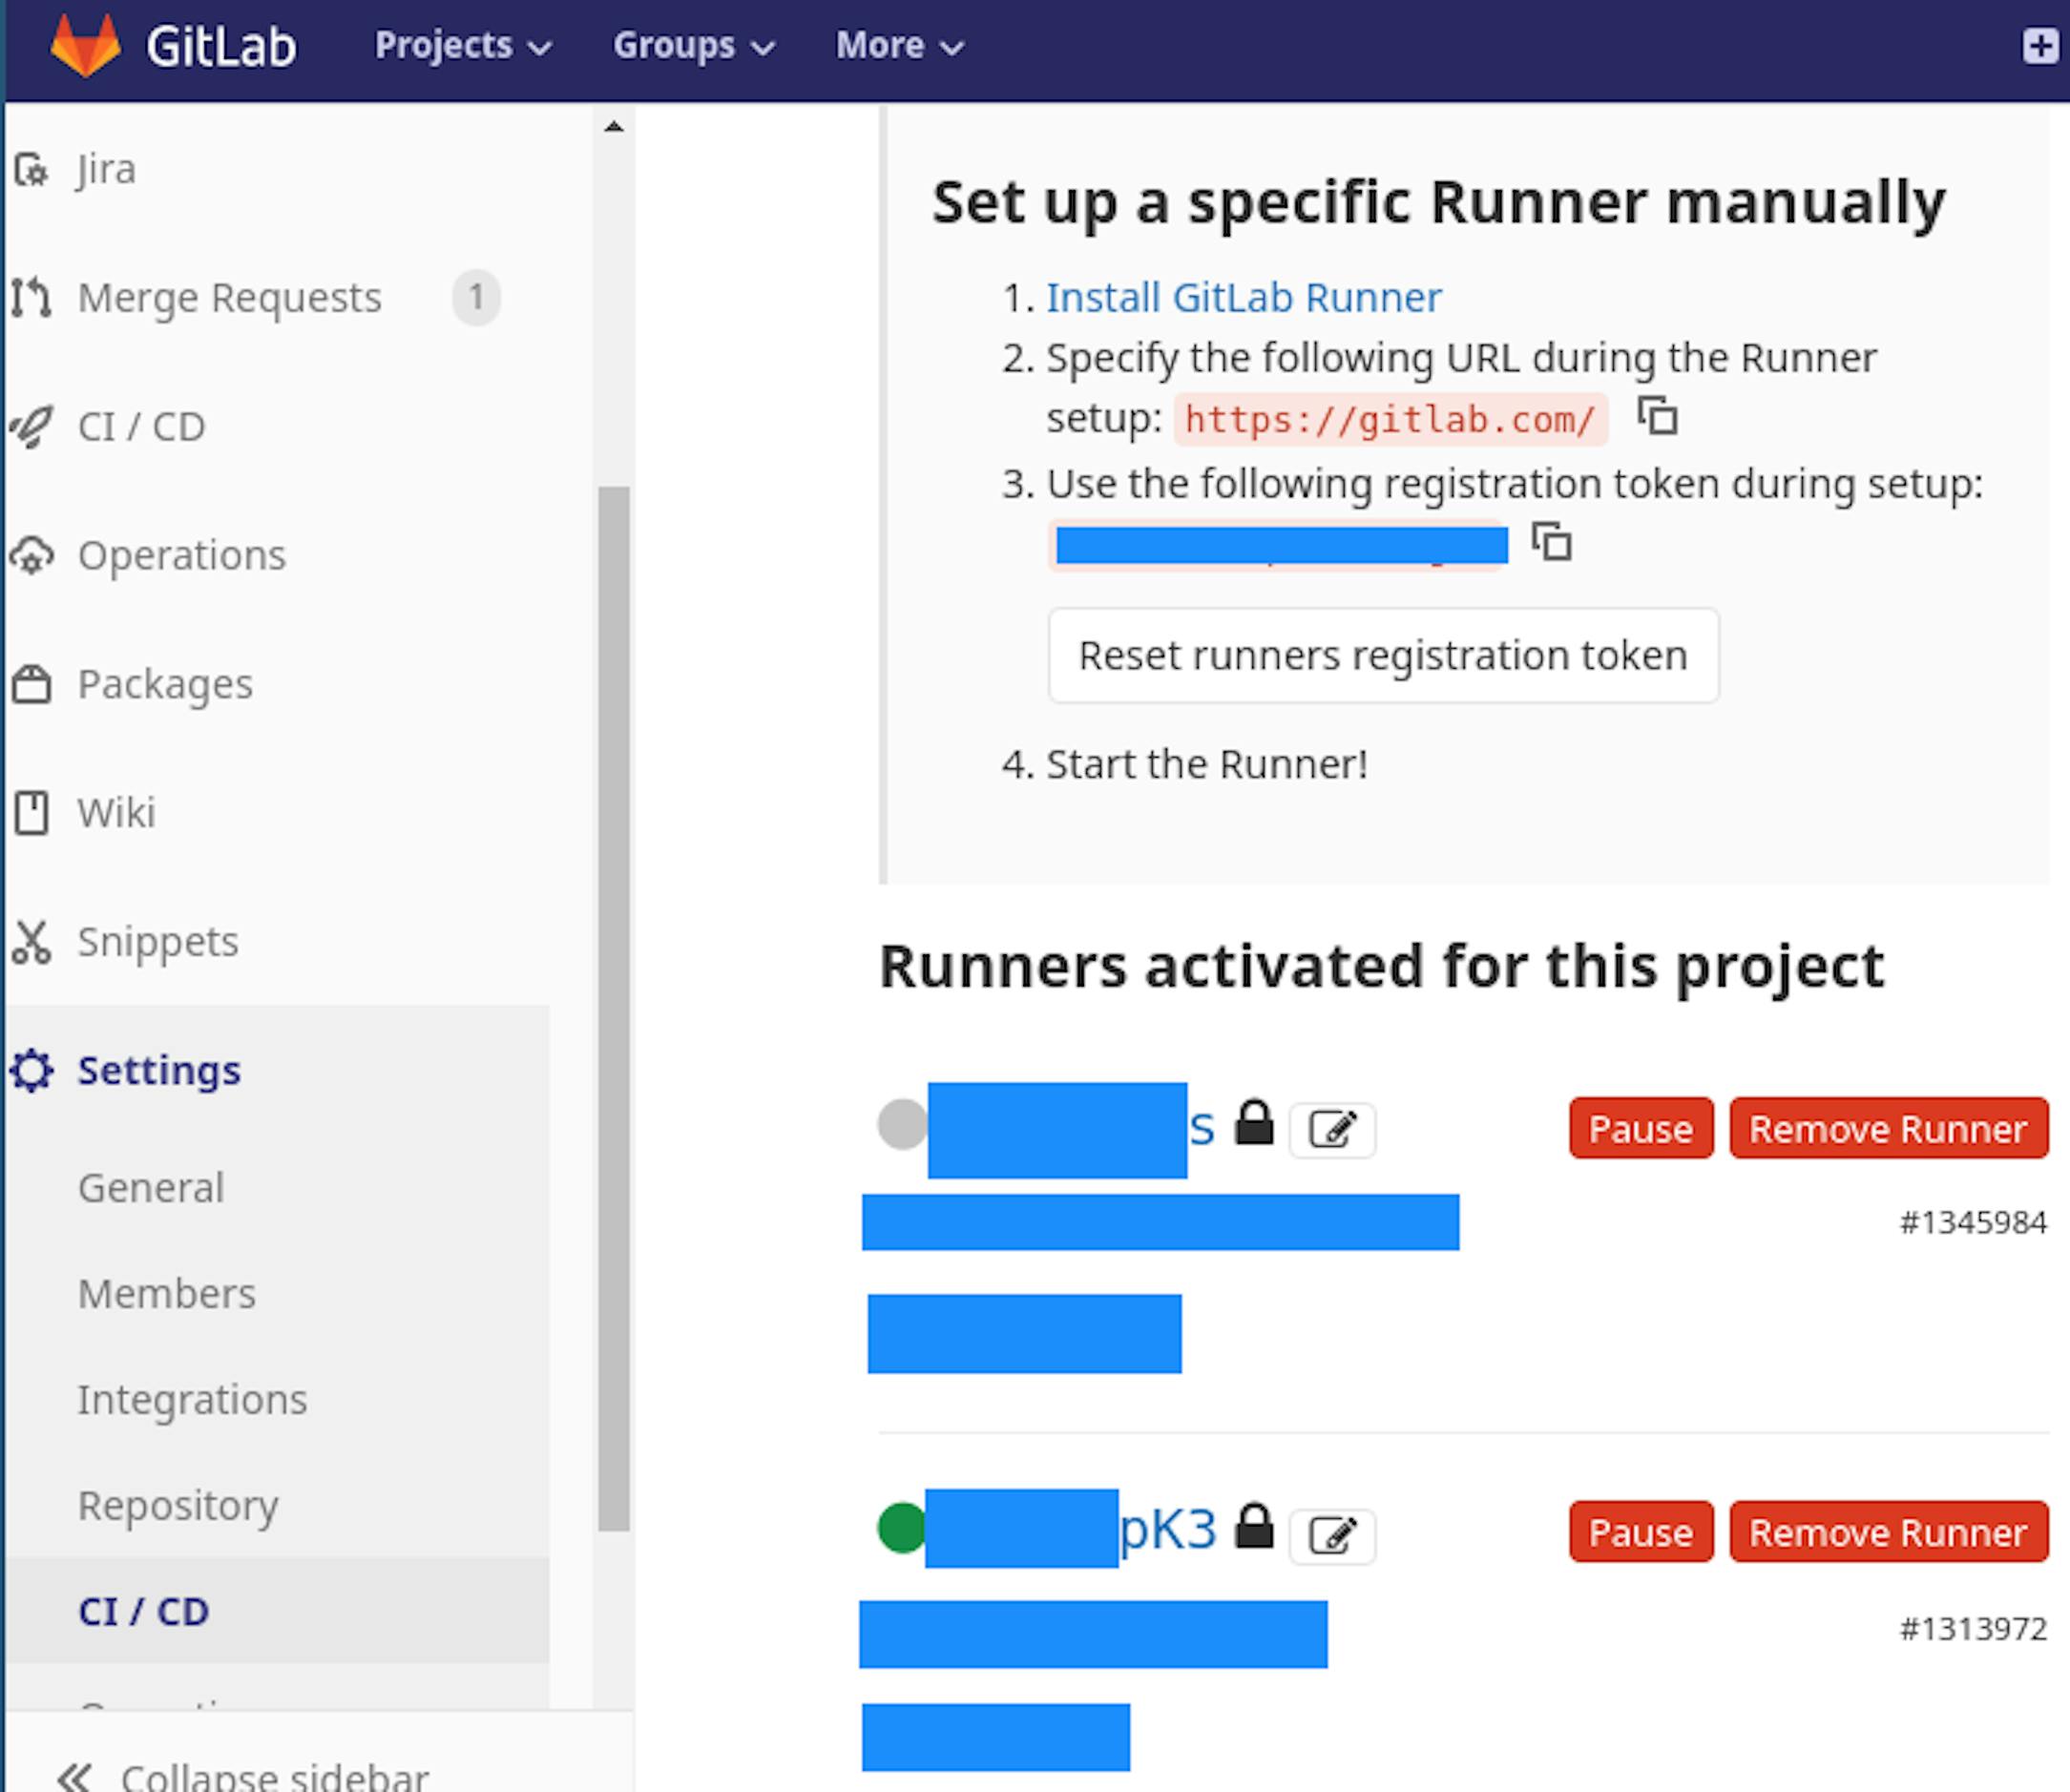
Working gitlab-runner

You need to disable Shared Runners. Now everything is ready from the GitLab CI side, and you need to configure the assembly of applications on the server.
Fastlane
All tasks related to delivery, testing, etc., were solved using Fastlane. Fastlane is a tool for automating the assembly and publishing processes of mobile applications, which also includes generating screenshots, running Unit / UI tests, connecting to Crashlytics, generating a Change Log, and many other useful things that make life easier.
Fastlane is a set of procedures (lanes) that can be called using the Fastlane lane_name arguments command. You can read more about syntax here.
The before_all procedure is used only for setting variables. In our case, it looks like this:
All this can be easily taken into the CI settings, but for local tests, it was more convenient to do it in a separate step + fewer variables in the GitLab CI settings.
There are 2 procedures further in the file for setting variables for staging and for prod versions of applications.
Then there are helper functions for installing pods and updating the path to the plist file. They are called almost everywhere, so most likely we will put them out before_all.
Next is work with certificates. WARNING! If you use your own private certificate repository, then you just need to add the CI servers' public ssh key to the deployment keys in the settings of this repository.
Actually running the tests suppress_xcode_output = true because the output can be very large. In our case, it takes 3 GB of logs. And so it will simply neatly put the file into the log.
For testing stage (scan) it is
/Users/<user>/Library/Logs/scan/<APP_NAME>.log, for build stage (gym):
/Users/<user>/Library/Logs/gym/<APP_NAME>.log
You can retrieve these paths from build logs:

In case of errors, you can always see what happened in the file (it was very useful for the first time).
The next phase is needed in order to wait for the build to be published on test flight, and only then to try to update the dSYM file. Generally, the build can be in the "waiting for review" stage for up to 48 hours, after loading. These items are checked during this stage. A task in GitLab CI might just crash with a timeout in this case. And in order not to load the same build, the following function is reused:
The next step is "build and upload". At first, these were different steps and the * .ipa file went through gitlab artifacts. This turned out to be much slower, so now these steps are combined. The only non-obvious place here is this check if Actions.lane_context [SharedValues :: LATEST_TESTFLIGHT_BUILD_NUMBER] .to_s == ENV ["CI_PIPELINE_ID"]. To_s. This check is necessary so as not to load the build that is already in testflight. We use CI_PIPELINE_ID as the version, because, in this case, we can see how the tests went, how the upload went, the build status, etc.
The next one is the lane that builds the application. Nothing unusual here, the application is going to be built and signed here.
And finally, updating the dSYM file. The interesting point here is that after loading the application into TestFlight, dSYM files are not immediately available, but some time later. This is because Apple is reassembling applications (actually, therefore, you cannot take and download a dSYM file from the local machine if bitcode is used). A new dSYM file is generated, and it can already be loaded into Crashlytics. Therefore, this function has a check that the download of the dSYM file was successful. If this is not so, then the pipeline crashes and a notification arrives in Slack:

The only serious problem arose at the first start — cocoa pods were setting up for so long that the pipeline failed with a timeout several times. It could be solved the following way: git clone https://github.com/CocoaPods/Specs.git ~/.cocoapods/repos/master on the Mac. After everything is cloned, you can run fastlane install_pods. Again, it starts manually (not from CI), because it takes a lot of time for the first time.
After we tested this script locally, it was possible to configure GitLab CI.
.gitlab-ci.yml
Gitlab CI pipeline consists of 3 stages:
- Testing. It is launched at the merge request, in dev, in master. It is made to prevent broken tests in the dev and master branches.
- Building and loading the application in TestFlight.
- Updating the dSYM file.
In this case, steps 2 and 3 are separated for staging and production applications — production is collected from the master branch, staging is from dev.
Failures

gudim.anton
- I worked with macOS via SSH. Unknown errors appeared while trying to build and sign the application. It turned out that without a personal presence near the computer and authorization through the login screen, this can not be done. When I went to the server and started working with it directly, all the errors disappeared.
- Installed GitLab-runner as the root user. As a result, I immediately had 2 runners registered, and it was generally unclear which one worked and where.
- I forgot to add an SSH key to the certificates repository and waited 2 hours before I realized that CI was asking for my password. Could be solved like this: go to
gitlab->your_project->settings->repository->deploy keysand add your CI server's public ssh key. Usually it is~/.ssh/id_rsa.pub, a file. If there is no such file, you can generate it withssh-keygencommand. - Configured rbenv for the user through .zshrc. It was necessary to explicitly register it in the before_all script.
- We used the default iTMSTransporter protocol to load the application into TestFlight. It is very slow; the process took 40 minutes or more. After the selection, it was found that the filling according to the Aspera protocol is sometimes performed 10 times, but on average, 5–8 times faster. To use the desired protocol, it is necessary to declare a variable in the
ENV ["DELIVER_ITMSTRANSPORTER_ADDITIONAL_UPLOAD_PARAMETERS"] = "- t Aspera".
Result
We have got the CI, which we now use in all mobile development projects. Of course, at first, it was hard to get used to the fact that all MRs run tests, and that the application takes longer than before. Build time has increased because CI builds the application from scratch, while only changes from the last build run are rebuilt on the developer's machine.
But, firstly, the developers began to test applications more thoroughly locally and more seriously write unit/ui tests. Secondly, at least some confidence appeared that the dSYM file would be downloaded. And if it doesn't, then we will be notified about it. Thirdly, developers continue to solve problems and do not wait for the application to load in TestFlight, etc. (all steps after testing).
Files are available in our repository. Comments and concerns in the form of issues are welcome.


Latest articles here