

The quality of a product always depends on how alert the developer is. The better this skill is, the fewer bugs and unsatisfied customers there will be.
Sometimes I have problems with this. But fortunately, there is a solution, and this solution is called autotests. Automated testing allows you to arrange continuous checks of the product's quality and rids you of this task.
Today, I will tell you how to set up automated tests in a Vue project. You'll be able to test entire pages and individual components, mock server requests, and run it all in Docker.

Let's imagine that we have a Vue project that has been under development for a thousand years and the only tests it has are unit tests. That is, functional ones that feature out-of-the-box, ill-considered settings.
First, we will open the documentation of the Cypress framework. We will use it to write integration tests. It's pretty well-developed and has a lot of features, plugins, and other supporting things.
Be sure to read the documentation to understand what it is and how it works.
Now let's install the necessary packages.
Open the console at the project root and insert the command below:
npm i -D cypress @cypress/vue @vue/cli-plugin-e2e-cypress vue-cli-plugin-cypress-experimental
After successfully installing the packages, let's add the main settings file cypress.json. You need to create it in the project root and insert the code below:
{
  "baseUrl": "http://localhost:3000",
  "chromeWebSecurity": false,
  "pluginsFile": "tests/e2e/plugins/index.js",
  "supportFile": "tests/e2e/support/index.js",
  "fixturesFolder": "tests/e2e/fixtures",
  "integrationFolder": "tests/e2e/integrations",
  "testFiles": "**/*.spec.js*",
  "experimentalComponentTesting": true,
  "componentFolder": "tests/e2e/components",
  "nodeVersion":"system",
  "video": false,
  "viewportWidth": 1366,
  "viewportHeight": 768
}
A few words about what these parameters mean
baseUrl— the URL where cypress browser will startchromeWebSecurity— allows you to open non-secure pages, give access to iframes, etc.pluginsFile— the path where files with plugins for cypress are keptsupportFile— the path where support files are keptfixturesFolder— the path where mock files are kept to swap API dataintegrationFolder— the path where files with integration tests are kepttestFiles— the path where all test files are keptcomponentFolder— the path where files with tests for components are storedexperimentalComponentTesting— this flag is required if you want to test componentsnodeVersion— specify node.js versionvideo— turn on/off video recording of the testsviewportWidth— browser window widthviewportHeight— browser window height
In the settings, you can already see a list of files and folders you need to create.
In Vue, the folder for tests is located in the project root and is usually called tests. It should already have a unit folder, next to which we will create another one for our tests.
Let's call this new folder e2e. In it, we will add some more files and folders. The final result should look like this:
tests
  e2e
    components
      - HelloWorld.spec.js
      - ...
    fixtures
      - example.json
      - ...
    integrations
      - Home.spec.js
      - ...
    plugins
        - index.js
    support
      - commands.js
      - index.js
To save you the hassle, I prepared a repo with the project already set up. So you can copy everything from there and not bother.
Next, in the package.json file, in the scripts block, add the command to run the tests
"scripts": {
    "test:e2e": "vue-cli-service test:e2e --mode test"
}
We have completed the basic steps; now, we can start.
npm run test:e2e
If everything was done correctly, the browser will open with a list of our tests.
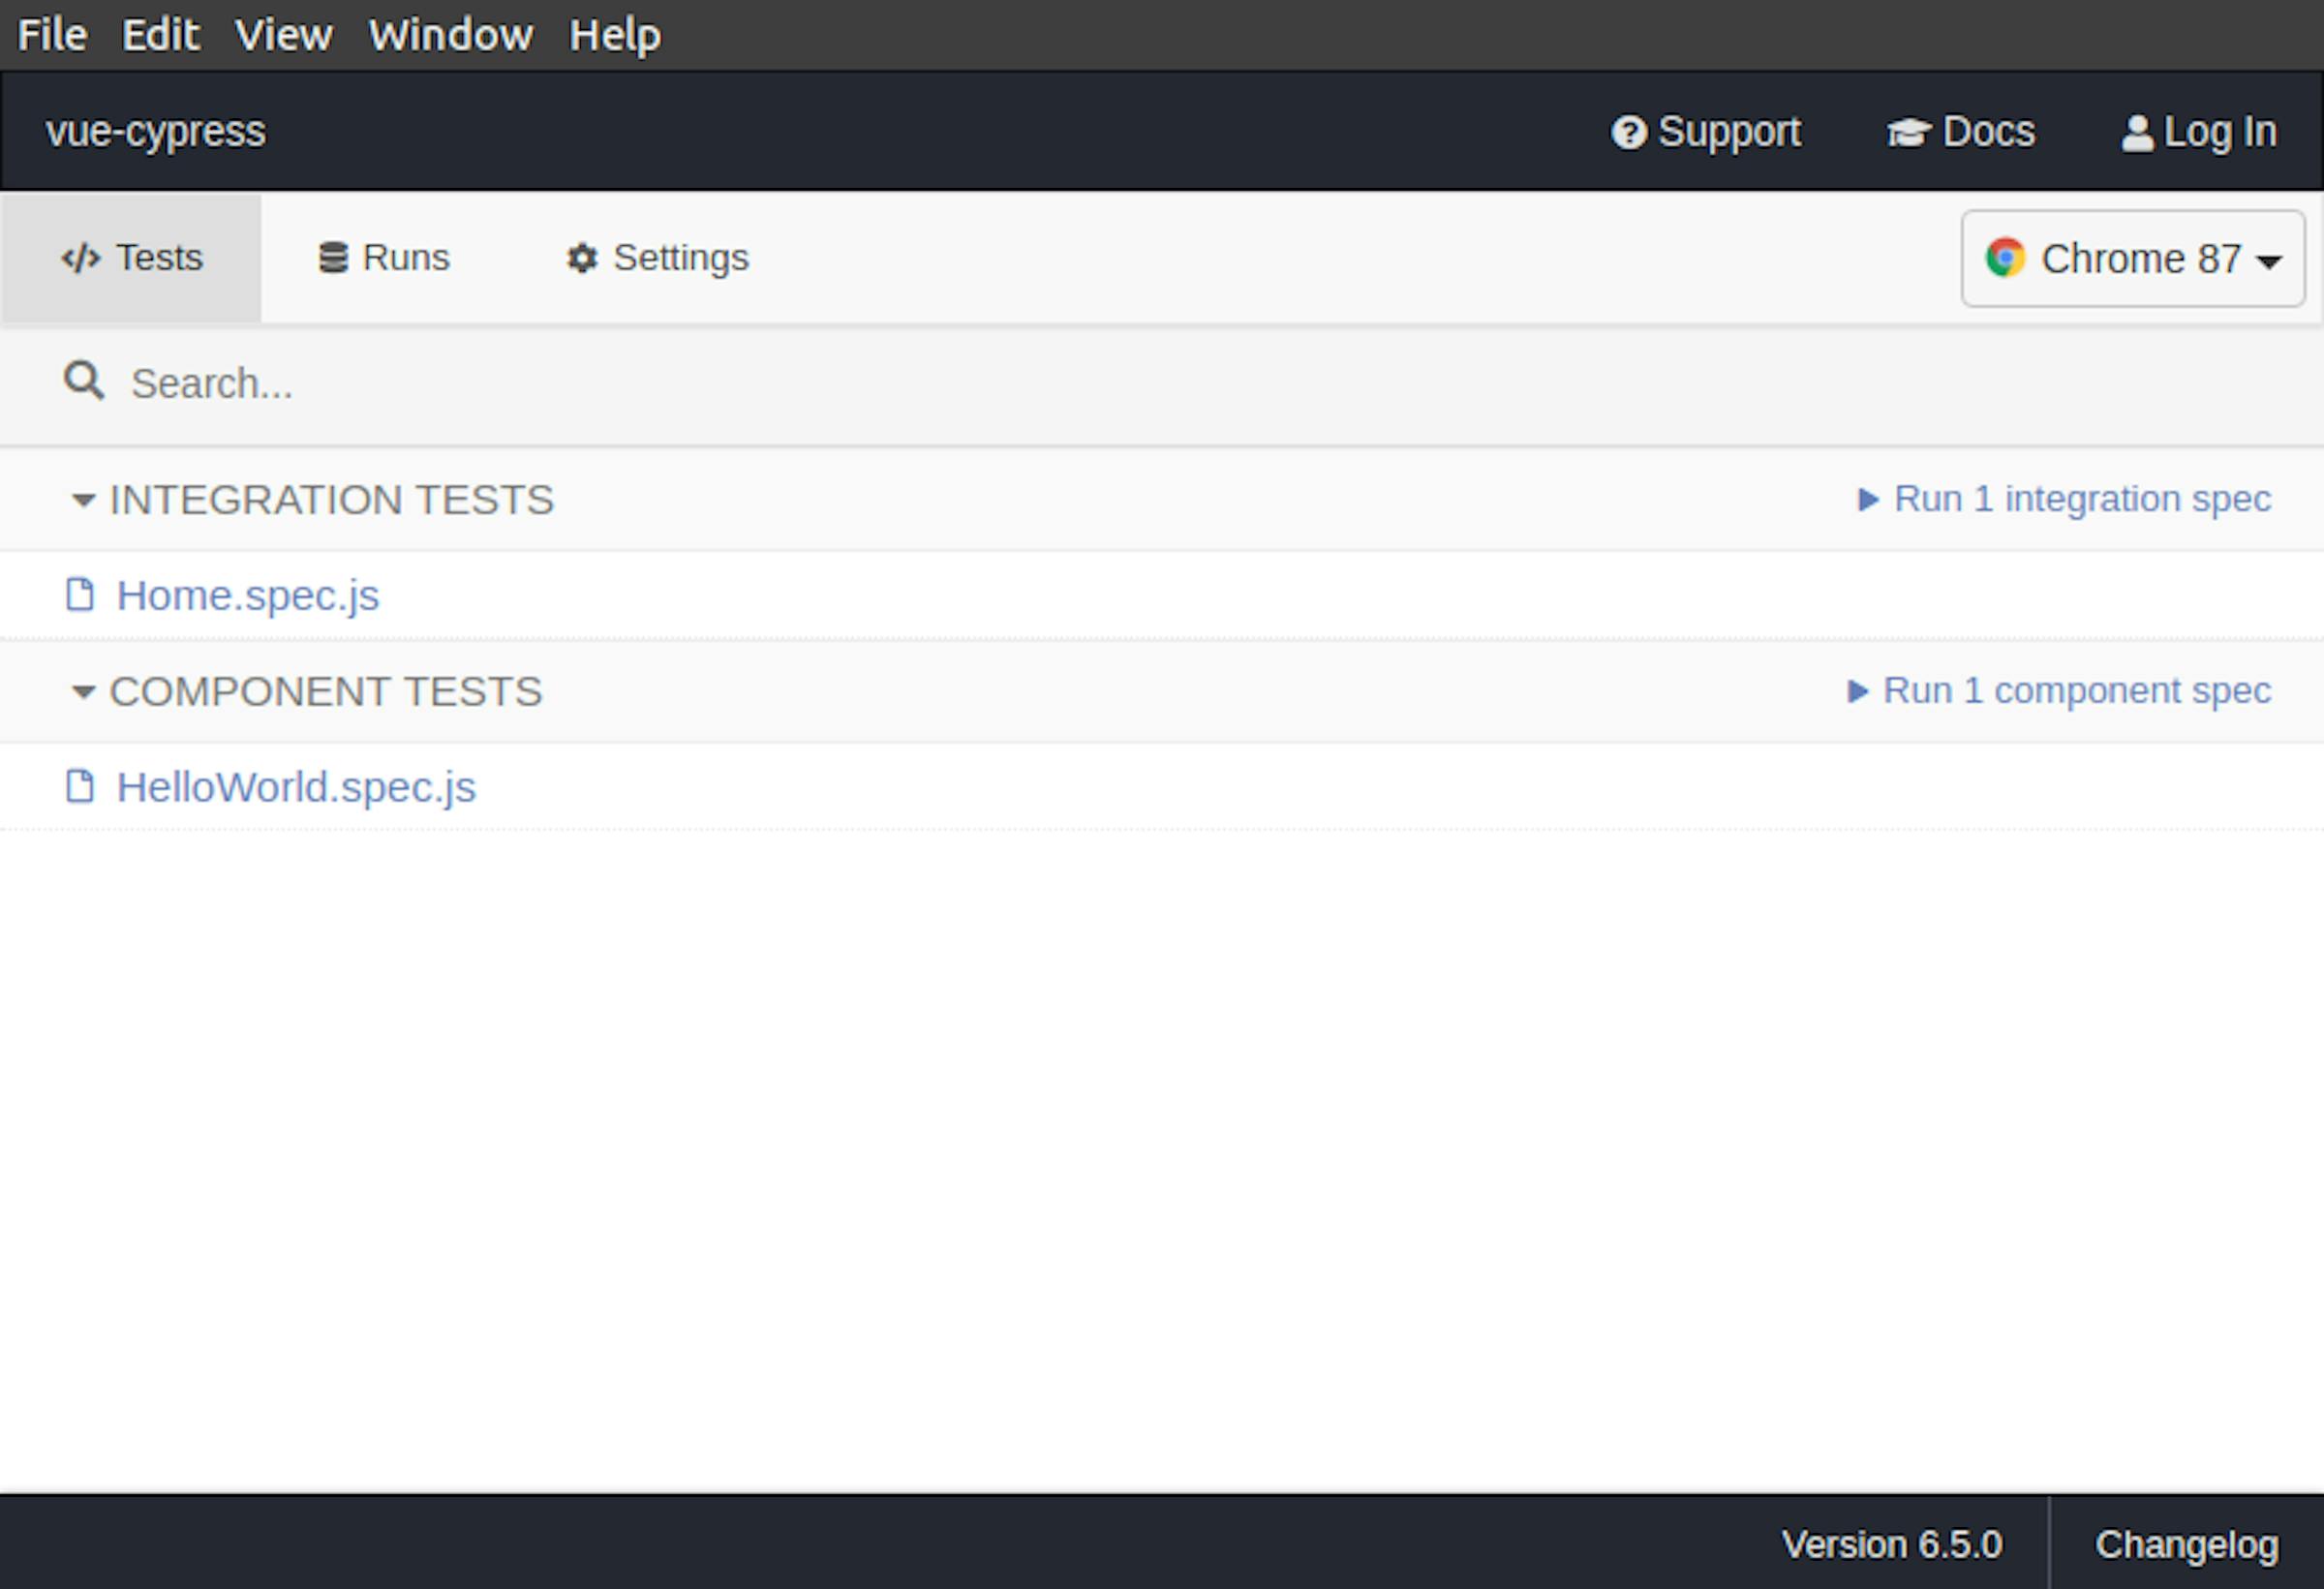
Cypress Integration & component tests
And the console will show this result
DONE  Compiled successfully in 3572ms

App running at:
  - Local:   http://localhost:8080/
  - Network: http://192.168.88.241:8080/

Note that the development build is not optimized.
  To create a production build, run npm run build.

It looks like this is your first time using Cypress: 6.5.0

✔  Verified Cypress! /home/denisoed/.cache/Cypress/6.5.0/Cypress

Opening Cypress...
It can be called a victory, but we shouldn't relax, cause we're not done yet.

Setting up a server to mock API requests
As a mock server, we will use the JSON server library. It’s based on Express.js, so you shouldn’t have any problems setting it up or extending it.
Let's install the package
npm i json-server
While you're at it, add a command to run in package.json, so you can update the command to run tests. Now, the server will start first, and then cypress will launch.
"scripts": {
    "test:e2e": "npm run test:server & vue-cli-service test:e2e --mode test",
    "test:server": "node ./tests/server/server.js"
}
Next, add a new folder in the tests folder for our server. Let's call it server.
Let's repeat the process that we did with the files and folders for the tests — just copy them from the ready-made project.
tests
  server
    data
      - users.js
    config.js
server.jsserver.jsfile — the main file for starting the serverconfig.jsfile— server optionsdatafolder — stores files with test data that will be returned by the json server
I will now briefly tell you how to mock API requests.
Suppose your application requests a list of users from the backend.
For example, the URL is https://backend.com/users
First of all, go to the server.js file and turn to the block below
// ---- Сustom routes ---- \\
server.get('/users', (req, res) => {
  res.jsonp(users);
});
In it, you can see that if you request something using the /users URL, it will return the data from the users variable. I think it's clear. If your application makes requests for some more URLs, just copy the block above and change it as needed.
I have prepared the data in advance, too; you can find them in the data folder. They look like this
module.exports = [
  {
    name: 'Bob',
    age: 32
  },
  {
    name: 'Alice',
    age: 19
  }
];
We've changed the URL and prepared the data. This is enough to mock the API. This way, we can mock all requests by describing different cases in tests.
Let's summarize.
When your application makes a request to the backend, our mock server will intercept it and return the data we need. Simple as that!
"But how will it intercept requests?" you may ask. There's nothing complicated about that either.
Usually, projects create an .env file that is to store variables. That's where they store the link to the API backend server. If you change this link, your application will rely on it. That's what we will do.
You need to create an .env file in the project root or replace a variable in it if the file already exists. From https://backend.com to localhost:8888
VUE_APP_API_URL=http://localhost:8888
localhost:8888 is the address of our mock server. You can change the port in the config.js file if this one is already taken.
Let's try to start the server by running the command
npm run test:server
If there are no errors, we will see this result
> node ./tests/server/server.js
JSON Server is running on port: 8888
The mock server for tests has been successfully established.
And to finish this part of the article, I would like to repeat the basic idea.
When we test our application, all requests that were previously routed to the real API server will be intercepted by our mock server. And we won't have to worry about the backend not working, or no Internet, or anything else.
Your tests will be independent — and that's very important.
Running tests in Docker
All you need to do is install Docker and Docker Compose.
Let's start copying the necessary files. Following the same pattern, we will take them from a ready-made project.
We need three files: cy-open.yml, docker-compose.e2e.yml, Dockerfile.e2e
They should be placed in the project root.
Dockerfile.e2e— will install everything you need for the container to run tests in.docker-compose.e2e.yml— settings for the container.cy-open.yml— this file is to launch the browser from Docker.
Update the package.json file
"scripts": {
    "test:e2e": "npm run test:server & vue-cli-service test:e2e --mode test",
    "test:server": "node ./tests/server/server.js",
    "docker:test:e2e": "docker-compose -f docker-compose.e2e.yml -f cy-open.yml up --exit-code-from cypress"
}
On startup, you may get an error like this
cypress_1  | ----------
cypress_1  |
cypress_1  | No protocol specified
cypress_1  | [101:0208/050449.746174:ERROR:browser_main_loop.cc(1434)] Unable to open X display.
cypress_1  | The futex facility returned an unexpected error code.
cypress_1  | No protocol specified
cypress_1  | [115:0208/050450.882329:ERROR:browser_main_loop.cc(1434)] Unable to open X display.
cypress_1  |
cypress_1  | undefined:0
cypress_1  |
cypress_1  |
cypress_1  | illegal access
cypress_1  | (Use `Cypress --trace-uncaught ...` to show where the exception was thrown)
cypress_1  |
cypress_1  | ----------
To solve it, run this command in the console
xhost +si:localuser:root
The result should be
localuser:root being added to access control list
The launch should be successful after this
npm run docker:test:e2e
Docker will start installing and unpacking packages; it will usually take 2 to 5 minutes. After that, it will run a container with tests and a container to launch the browser. It will launch the browser.
That's it. All you have to do now is to write tests and enjoy the fact that the project is a little more stable, so your sleep is stronger.
Conclusion
Everything I wrote above is just a setup, preparation for a project. Next, you will spend hours searching for information on how to write tests correctly, mock data, mock plugins, etc. There's so much out there, it's crazy.
But what's still the most important thing in achieving any goal? Of course, it's continuous progress. Now, you have a manual at your fingertips on where to start to not only stabilize the project but also improve your professional skills.
Stay alert!

Latest articles here