Gone are the days when we used spreadsheets to make project plans and manage projects. Now there are plenty of project management tools. At Mad Devs, we have chosen Atlassian’s Jira for efficient and transparent project management. However, not many project managers know that Jira is not just an efficient project management tool. It can be integrated with many other tools and services. It makes Jira unbeatable, indeed.

One of the main reasons our team relies on Jira is the extensive functionality of the tool. Every project is unique and requires a special approach and a specific toolset for effective software project management with Jira. Jira provides us with an opportunity to choose the needed stack to plan, track, and release even the most complex projects. While there is not a single right way to organize a project in Jira (everything depends on a project), there are some best practices, and we want to share them with you.
Here, we will check not only some common features (you might already know them anyway) but we will share with you some practices that we at Mad Devs use internally. They help our project management processes be clear, transparent, and efficient.
Scrum or Kanban? Choose depending on a project
Jira offers the smooth utilization of the extensive functionality of Scrum and Kanban boards. Scrum and Kanban can be used separately or we combine them if we see that it is better for the project.
Kanban is used to visualize the workflow
Kanban boards are used when a team prefers to start working on a project without a detailed plan or when we need to visualize the workflow.
A Kanban board is basically a To-Do, Doing, and Done board. A Kanban workflow organizes tasks in a way to ensure the work moves on. Team members just move the tasks from one status into another while working on them.

In Jira, you can add layers for specific clients, deliverables, and products. In other words, you can customize it and make it as detailed as you need.
Scrum is used to plan the work in detail
We use Scrum boards for projects where we need to plan everything in detail. A scrum takes place over a specific time period. This time period is called a sprint. One sprint might take 1 or 2 weeks, depending on the project.
The team checks daily the progress to ensure the tasks within the sprint are completed and identify possible bottlenecks and issues.

How do we use scrum?
When a project in Scrum is created, we need to arrange some things there. At this stage, your backlog is empty. There, we create user stories, or tasks, or bug issues. Just to make sure: user stories are used to describe tasks or work items. You do it in non-technical language, from a user’s perspective. For example, it can sound like this:
I want to be able to create an account.
If we observe patterns in user stories or there are too many of them, we create epics. In epics, we show all the dependencies between the tasks, or user stories. Without creating epics, a project manager would arrange all the tasks into a roadmap manually. Guess how much time it might take? Well, a lot… That’s why we use epics. It allows to display all the tasks in a beautiful roadmap, just like this one:

Click on Epic to expand it and see all tasks and stories related to it. And also, if your manager knows how to handle connections, real magic will happen, and you will see relationships between tasks and possible blockers:

We can connect tasks in the same epic or within several epics. It allows us to find faster tasks related to their field, tasks assigned to a specific person, priority, and whatever else you want to highlight. With it, we provide the team with the needed information right away by saving their time.
Sprint planning
A sprint is a period of time within which we need to complete a predetermined set of tasks. A sprint can be one, two, three, or even four weeks long. We prefer two-week sprints because they aren’t too short and allow us to manage a good part of the work. They also allow us to regularly control the processes and check whether we are moving in the right direction. Though we don’t exclude the other periods for sprints, too, depending on the project specifics.
When a sprint starts, we organize sprint planning meetings with our team. During the meeting, we discuss the sprint goals and stories that are prioritized in the backlog. The development team creates the tasks they need to complete. Then, we commit to complete a specific number of tasks within the sprint.
Here, we would mention one important thing to focus on:
We use the estimate of tasks for all the above purposes, but we never use them to judge people or measure a team's productivity. We use them to understand how big the work volume is and how to prioritize it correctly.
Once everything is prepared, a sprint starts. We have our own practices of organizing standups, retrospective meetings, and following all other stages needed to handle the tasks within a sprint. You can read about them in our article here. And here, we move to other important aspects of Jira project management with Mad Devs.
Backlog grooming is easy with Jira
We make sure to review, prioritize, and update the backlog regularly, and remove the tasks that are outdated. This process is called backlog grooming, and with it, we ensure that:
- We keep the backlog clean to make it easier for team members to navigate through the backlog items and contribute efficiently.
- We keep the backlog relevant, well-documented, and prioritized in accordance with the project requirements and team needs.
- The backlog provides the team an opportunity to be aligned when we are working on new features, fixing bugs, or performing some other product-related activities.
Only if the backlog grooming is performed constantly and appropriately, we can prioritize our tasks properly.
The best practices from Mad Devs on workflow management
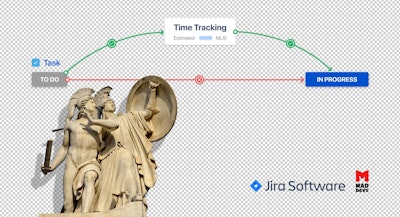
A standard workflow in Jira looks like this:
- To Do (work that hasn’t started yet)
- In Progress (work that is being looked at by the team)
- Code Review (work that is done and waiting for review)
- Done (work that is done).
Jira is a highly customizable tool. Workflows can be customized depending on a project, the stack used by a team, or the way the team is used to work.
We can change the names of the processes or add additional processes such as Awaiting for QA, Tested, or just whatever we need. Our aim here is to make the workflows easy to use for every team member, transparent, and clear. Working processes are different from project to project. We describe all our working processes in case studies which are published on our website.
We also consider such factors as metrics to be reported in the worklog. We have developed some practices to make our working processes smooth, improve the productivity of each team member, and make the processes transparent and traceable. Wanna learn more about how we do it? Read on!

We break down big tasks into smaller subtasks
Here, I would start with an example.
Imagine you are a developer. A project manager is asking you how much time you need to develop a website page. You, after thinking for a while, give an estimate of approximately two days.
Do you think it is the right approach? And if not, who is not right here?
Well, the approach is not correct. Without subdividing the task and checking its components, it is impossible to assess what time it might take. Also, if it appears later that there were some blockers, some details that cannot be done without the help or participation of other team members, the time needed to complete the task will be much higher than the initial estimate. So, a developer is making a mistake by giving an assessment without subdividing the task into subtasks and checking details.
The project manager also shouldn't have trusted such an assessment.
What do we do to avoid incorrect assessments and mistakes or at least eliminate them?
From the example, you could have guessed it already: we divide big tasks into smaller subtasks. With it, we pursue two goals:
- We can assess more accurately how much time we need for a small task and thus, provide a more exact estimate for the entire task.
- We can discover all black boxes and check whether somebody else’s participation is needed to complete the task.
Along with these purely practical reasons, dividing a big task into smaller chunks has one more purpose. When we see a huge task, we might become worried. It leads to the loss of focus, and in worst cases, to a complete confusion and even to a depression (yes, in the very direct sense). However, when we divide this huge task into small chunks, we see how we can handle those small chunks one by one. So, the task doesn’t look so scary anymore. Along with huge psychological relief, we get one more benefit: a detailed plan on how to work on the task.
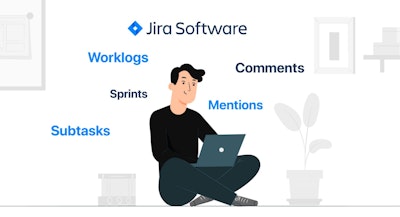
Worklogs are the proof of what you have done
Another must-to-be process is writing worklogs. In worklogs, we write the result of a piece of work. We note the time we spent and describe what we have been during the time. Our task is to write a worklog as clear as possible for a reader who may not be a technical expert. In clearly formulated, understandable sentences, we describe what we managed to do in the time spent. At the same time, writing a worklog that is too large in the form of an essay is also not worth it. It is worth remembering that links to documents, code, and whatever is confidential, in worklogs are NOT mentioned. Yeah, security is above all, as long as we work with confidential information.
How often do we write worklogs? Optimally, they shall be written as frequently as possible. We recommend writing them at least every 2 hours. We understand that sometimes, people are busy with a task and any interruption causes delays. That’s why we log time every 2 hours and not every 30 minutes, for example. After 2 hours of hard work, people tend to start procrastinating or switch to activities not connected to work. So, this frequency of time logging allows them not to get distracted.
You might be wondering how one can log time every two hours if there is a meeting with a client, for example. We have it in writing. Yes, this principle: what is not written down - never happened, we apply it to everything. So, we have a clear explanation in what cases we may not write worklogs as frequently as indicated. But after the meeting is over, a worklog is needed.
We write comments
You might be thinking now: why shall I write comments if I write worklogs??!! However, comments are needed, and we write them constantly.
Comments are one of the main communication tools in a team. Every team member who is working on the same task or whose task is connected with yours, can open your task, and find all the needed information from your comments. So, instead of contacting you and asking for one or another detail, they can just open the task and see everything there. It saves time both yours and theirs.
What do we comment on? We comment on everything we are doing. What does it give us? It allows us to benefit in many different ways:
- We get a lot of information that can be used for feature documentation.
- We liberate our brains from excessive information by writing it down. It also helps us to keep track of our activities and focus on the needed direction.
- We document all that we discuss with somebody when we ask for something or during a meeting. If we have tried to solve an issue in several ways and haven’t found a solution, we also note it in a respective ticket.
- Imagine that you have made a feature, and after some years of use, it broke down. You do not remember what you have been doing there. But when you open the comments, you can check the entire process step by step.
- Properly written comments are your safety. If you write down everything you are doing and later, a conflict arises, you can show the ticket with your comments to prove that you have been doing something. What is not written down - never happened.
- Finally, by writing comments, you make the process clearer not only to the team but also to yourself.
We use the extensive range of Jira integrations
Have you ever thought that it would be so cool to have a tool that turns your ideas that you share in a team’s messenger into tasks?
We communicate with the team in Slack. And we have an opportunity to turn messages into trackable tasks in Jira. Yes, I am talking now about Jira integration with Slack. Messages in the chat create responses in Jira tickets, and comments in Jira tickets are displayed in Slack in a special thread. You can check all the processes without opening Jira, everything is available in Slack and is updated in real-time mode.
We are also alerted if somebody has a worklog that is bigger or smaller than needed, and if the tasks aren’t updated for too long (several days).
Jira integrations with GitLab and GitHub are precious
Jira integration with GitHub makes project management with Jira much simpler. It is not surprising that we use this option. It allows us to get updates and links about what is going on with our repositories in Jira tasks for:
- Pull requests
- Builds
- Commits
- Deployments.
So we can take actions in Jira directly, without leaving our development workflow. Integration with GitLab enables the synchronization of projects, workflows, issues, comments, and streamlining the collaboration across teams.
Jira webhooks
When a certain event on Jira occurs, a webhook delivers data as soon as it happens. It means that we get the data immediately. So, Jira webhooks provide us with a mechanism to let remote applications receive push notifications from Jira.
How do we use webhooks?
We can either give them access to activity across all the projects in Jira or customize them to give them access, say, to issue types or to issues of a specific project only. In the second case, we will get data about events in an indicated project only while ignoring those that occur in not-predetermined instances.
So, webhooks can be used for a range of purposes such as data parsing or creating custom Jira-oriented bots. We use them for your projects and we develop them for our clients, too.
Jira offers a toolset too extensive to describe all the features and integrations. We have described here just some of them, the tip of the iceberg, so to say. For every project, even the most unique and complex one, Jira can be configured in a way to help your specialists handle the project efficiently and without excessive stress. Does it sound too good to be true? At Mad Devs, our project managers can do it. So, if you are looking for a project manager who can handle any project in a perfect way, here is the right place to do so.
We use the extensive Jira features set
You know already that the toolset that Jira offers is immense. It is one of the reasons why we work with Jira. We can choose just any tools that we need to comply with project requirements and make project management as effortless and smooth as possible. While many of Jira’s integrations and features are free, there are also paid ones. Telling about every feature would take too much time, moreover, some of them are rarely used - only in specific projects. That’s why we have chosen one of them - our favourite.
BigPicture
BigPicture project management is not used extensively in our company. Why do we want to tell more about it?
While smaller projects can be easily managed with the most common functionality, things complicate when you have to manage complex projects with a lot of tasks and dependencies. Here is when BigPicture comes in handy. Even though we don’t use BigPicture on a daily basis, we use it for the most demanding projects - banking systems, security systems and other.
This feature allows us to create a global plan for some projects by creating a detailed plan of their realization regarding timelines and specialists. In detail, it allows us to:
- Structurize tasks depending on their deadlines, assessments, and dependencies.
- It provides us with a clear and precise portfolio view and allows us to monitor the processes of our undertakings at all levels.
- Builds a powerful Gantt diagram that allows us to plan and manage all our tasks in a single workspace (it displays Jira tasks on a timeline as coloured bars of different lengths. It also adds dependencies on the chart).

Example of BigPicture from Atlassian Marketplace
Managing a project without project management software
What if there were no Jira or other project management software? There were times when we used to do many things manually anyway. Would it be possible nowadays?
If you don’t have active project management software, the business will end up with:
Failing to meet the expectations and requirements of shareholders even with the best team
Without project management software, it is impossible to prioritize tasks, manage the available resources wisely, and change the business environment when required. It leads to failures to meet deadlines, the loss of trust in your team, and the loss of business in the long term.

The lack of visibility
How can you manage multiple tasks by using spreadsheets only? Without proper project management software, you cannot see the real-time schedule, and use a lot of time and energy to follow the workflow. The absence of a project management software means the absence of a proper tool to anticipate risks and plan measures to prevent them.
No credibility
If you don’t have a tool to upload tasks, allocate resources, produce reports, and complete other tasks, the business stops being credible. In turn, it means loss of clients and financial losses.
Bottom Line
Jira is an efficient project management tool for Agile teams. With an efficient working area, enhanced visibility into the project status, configurable workflows, and multiple integrations and additional features, it offers everything that is needed for efficient project management.