

So, this is the second part of my interaction with Glitch.com and in this part, we will talk about deployment methods, both standard and non-standard (which suits me better than the standard method). Here is the first part of the article.
A very cool feature that gives you a quick delivery method on glitch.com
You can also bind your repo from Tools -> Git, Import, and Export

Definitely a space opportunity
After all, every project on glitch.com is also a repository that can be downloaded.
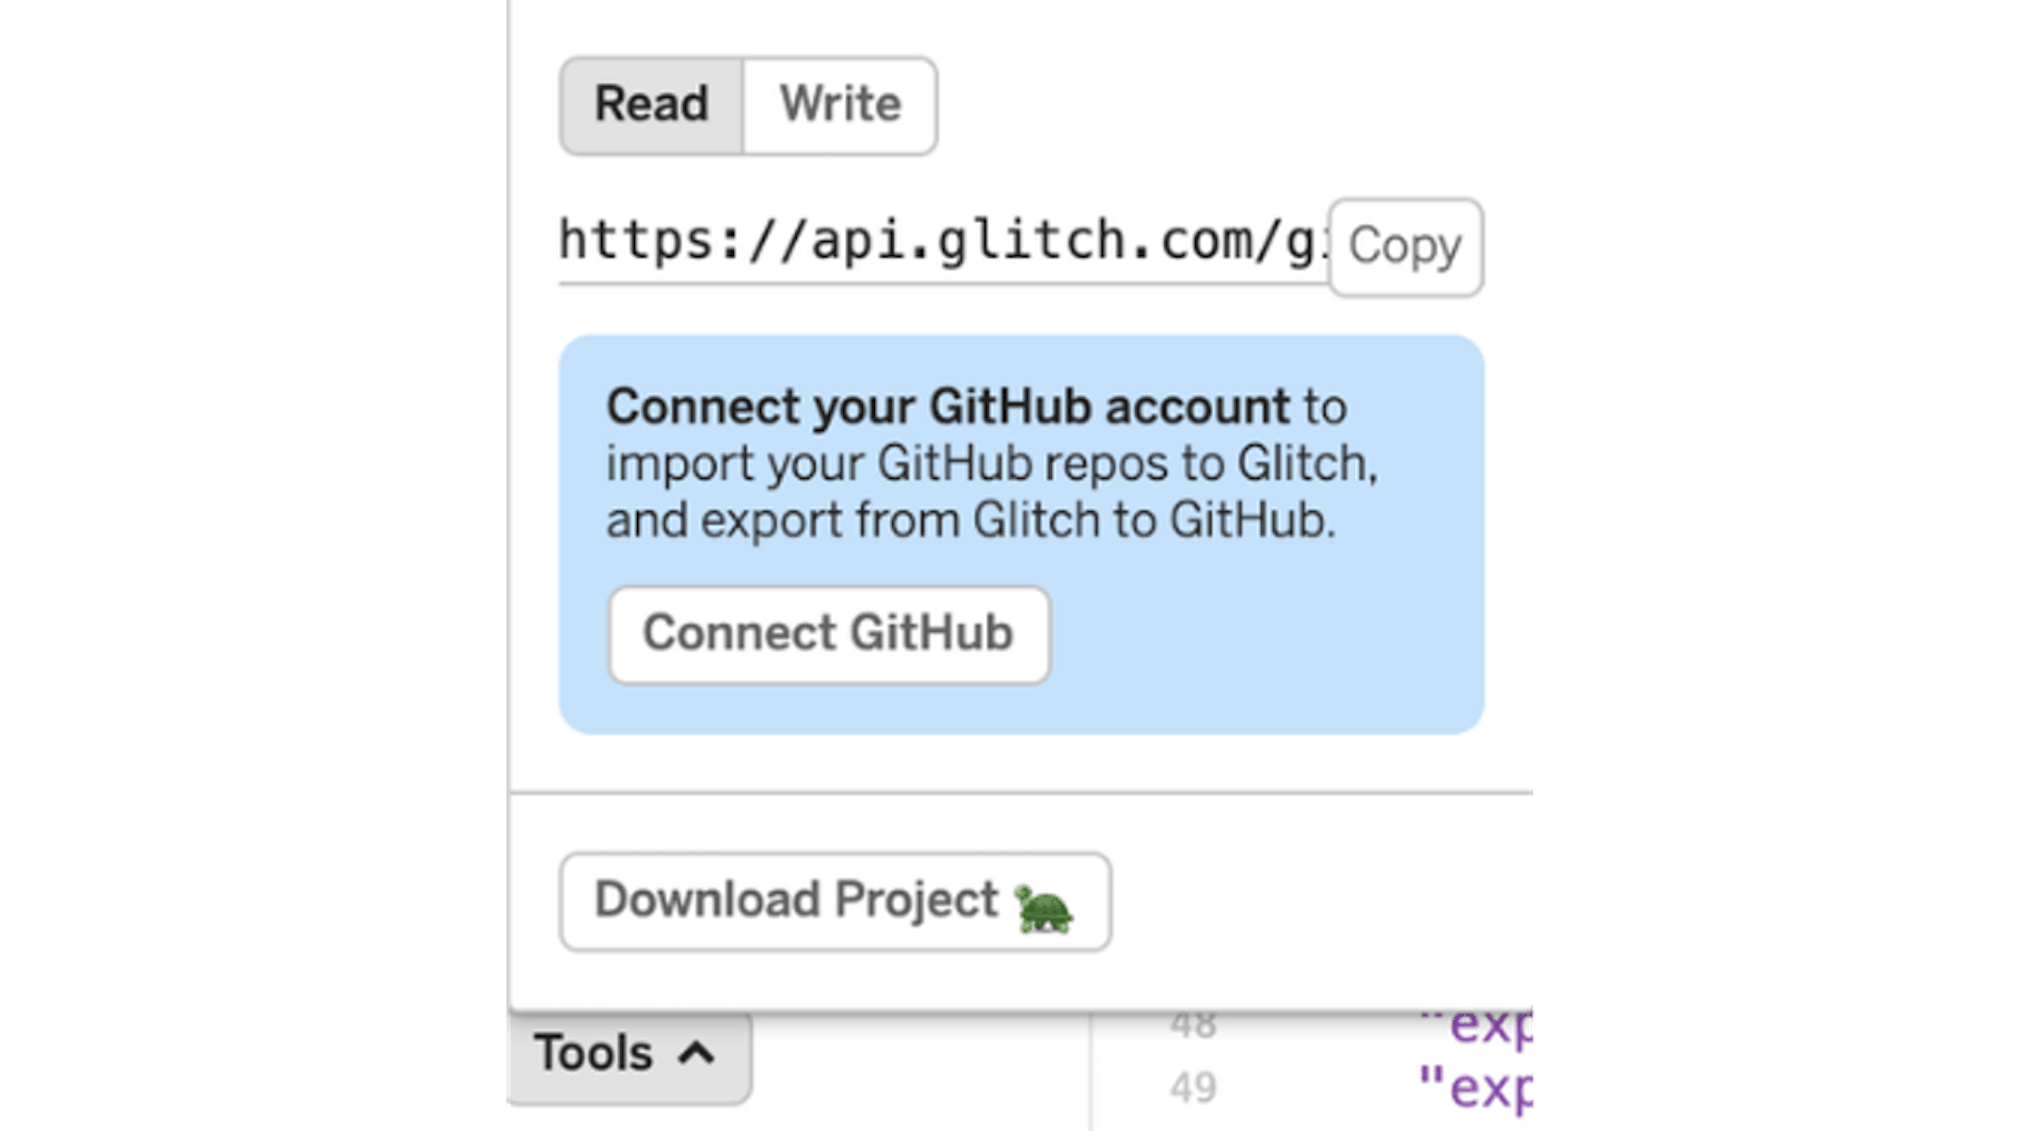
And also we see the opportunity to download the project in this menu. And access to the git repository is possible through the following url https://api.glitch.com/git/your-project-name
Also very convenient!
But in my case, this method does not work, since you need to set different settings and patch several files. As I organized a non-standard deployment on glitch.com- about this, I will talk further.
Custom deployment
In any non-standard environment, seemingly convenient features become useless. And in any case, it’s always worth writing a command for package.json. And here the question always arises — “What is this script to write on? Bash? Maybe a third-party library? Maybe make a file?”.
But the answer to this question is very simple. If a programming language allows you to write the script you need with satisfactory functionality, then always prefer to write a script in the programming language of your project. This will give you, first of all, the opportunity to understand the work of the script without studying additional material. And it is very convenient!
I actually did just that. I wrote a glitch.js script to create an archive with the necessary files for delivery. Collect only the necessary files, adjust the necessary settings, and create one archive, in my case zip. Zip is versatile and simple.
In the script, to build the delivery archive, I used the archiver library — which provides a convenient interface for manipulating data.
Below is the standard part for any script using archiver.
const fs = require('fs');const archiver = require('archiver');const output = fs.createWriteStream(`glitch_release_${+new Date()}.zip`);const archive = archiver('zip', {
   zlib: { level: 9 } // Sets the compression level.
});const DomainHost = 'your-project-host.glitch.me';output.on('close', () => {
  // eslint-disable-next-line no-console
  console.log(`${archive.pointer()} total bytes`);// eslint-disable-next-line no-console
  console.log('archiver has been finalized and the output file descriptor has closed.');
});output.on('end', () => {
  // eslint-disable-next-line no-console
  console.log('Data has been drained');
});archive.on('warning', (err) => {
  if (err.code === 'ENOENT') {
    // log warning
    // eslint-disable-next-line no-console
    console.warn(err);
  } else {
    // throw error
    throw err;
  }
});archive.on('error', (err) => {
   throw err;
});archive.pipe(output);
In this part of the script, the output of information about the archiving process and the file name are configured to redirect the stream generated by the archiver to this file. In order not to overwrite any previously created archive with the case, I added a time stamp in the name. What added uniqueness to each created archive.
Now let’s move on to the most interesting — to the possibilities of archiver, which I immediately took advantage of.
Archiver features
Now you can move on to the payload:
- Include
viewsfolder
archive.directory('views/', 'views') — this command makes it possible to add a folder with all its contents to the archive, and if necessary, also rename it in the second parameter. I did not rename and indicated the original name.
- Include db folder files with the exception of the
db/teams.jsonfile, since in it, you will need to make some tweaks.
archive.glob('db/**/*, { ignore: ['db/teams.json'] });In this case, I used no longer directory command but used glob, which allows me to specify without problems which files to exclude. All glob library options are supported.
- Include
publicfolder
archive.directory('public/', 'public')- Include
routesfolder
archive.directory('routes/', 'routes')- Include a bot file — so that you can run it along with the express server.
archive.file('examples/rtmbot/index.js', { name: 'bot.js' });To add a file, the file method is used, where the path to it is transferred, and if you need to rename it, then the options for the file, in this case {name:'bot.js'}. Accordingly, this trick transfers the index.js file from subfolders to the root of the archive.
Similarly include a few more files
archive.file('package-lock.json', { name: 'package-lock.json' });
archive.file('README.md', { name: 'README.md' });
archive.file('server.js', { name: 'server.js' });
archive.file('helpers.js', { name: 'helpers.js' });- Now you need to include the previously excluded
db/teams.jsonfile in the db folder. Why was this somersault made? All due to the nature of the archiver, I cannot replace a file already included in the archive. For this reason, you have to exclude the file from the initial addition and then separately process and drop it in the right place in the archive.
const teams = JSON.parse(fs.readFileSync('./db/teams.json', 'utf8'));
teams[0].domain = DomainHost;
teams[0].email_domain = DomainHost;
archive.append(JSON.stringify(teams, ' ', 2), { name: 'db/teams.json' });
And it turns out, I read the file, change the necessary values in memory and write the changes in text form to a file called {name:'db/teams.json'}. To write any text content, you must use the append method with parameters.
- Similarly, I fix the start command in
package.jsonso as not to add anything there.
const packageJson = JSON.parse(fs.readFileSync('package.json', 'utf8'));
packageJson.scripts.start = `URL_SCHEMA=https ${packageJson.scripts.start}`;
archive.append(JSON.stringify(packageJson, ' ', 2), { name: 'package.json' });- Indicate to the archiver that we have completed the formation of the contents of the archive.
archive.finalize();
Now our archive for delivery is ready and contains only the necessary files and nothing more.
The delivery process of the created archive
Now you need to use the script launch locally or in the docker and create an archive file for delivery.
- Add the appropriate commands to
package.json
"glitch:pack": "node ./scripts/glitch.js",
"glitch:unpack": "unzip -o glitch_release_*.zip -d . && rm glitch_release_*.zip && refresh",
- Run the
npm run glitch:packcommand
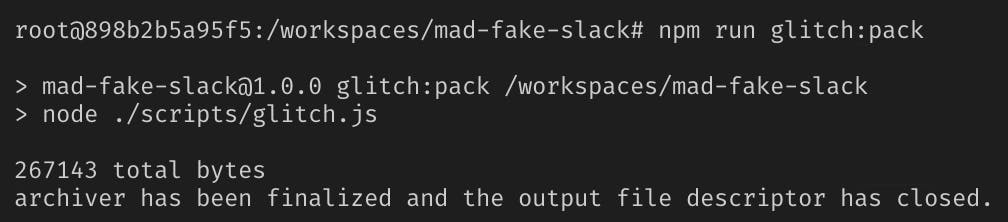
As a result, we will have an archive in the root of the project
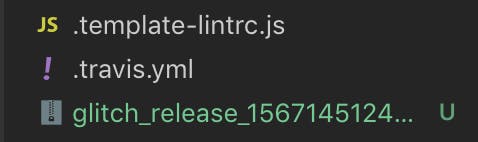
We have an archive for delivery and in order not to use intermediate hosting for the file, we will use the built-in opportunity glitch.com. And this is the assets folder.
Let’s go to our project page and drag the created archive into assets, which through drag-n-drop will allow you to upload the file.

Download archive after dran-n-drop
Now we can observe the archive in the assets folder

Archive in the assets folder
And now you need to go to the console, but before that, you need to copy the path for the archive to assets.
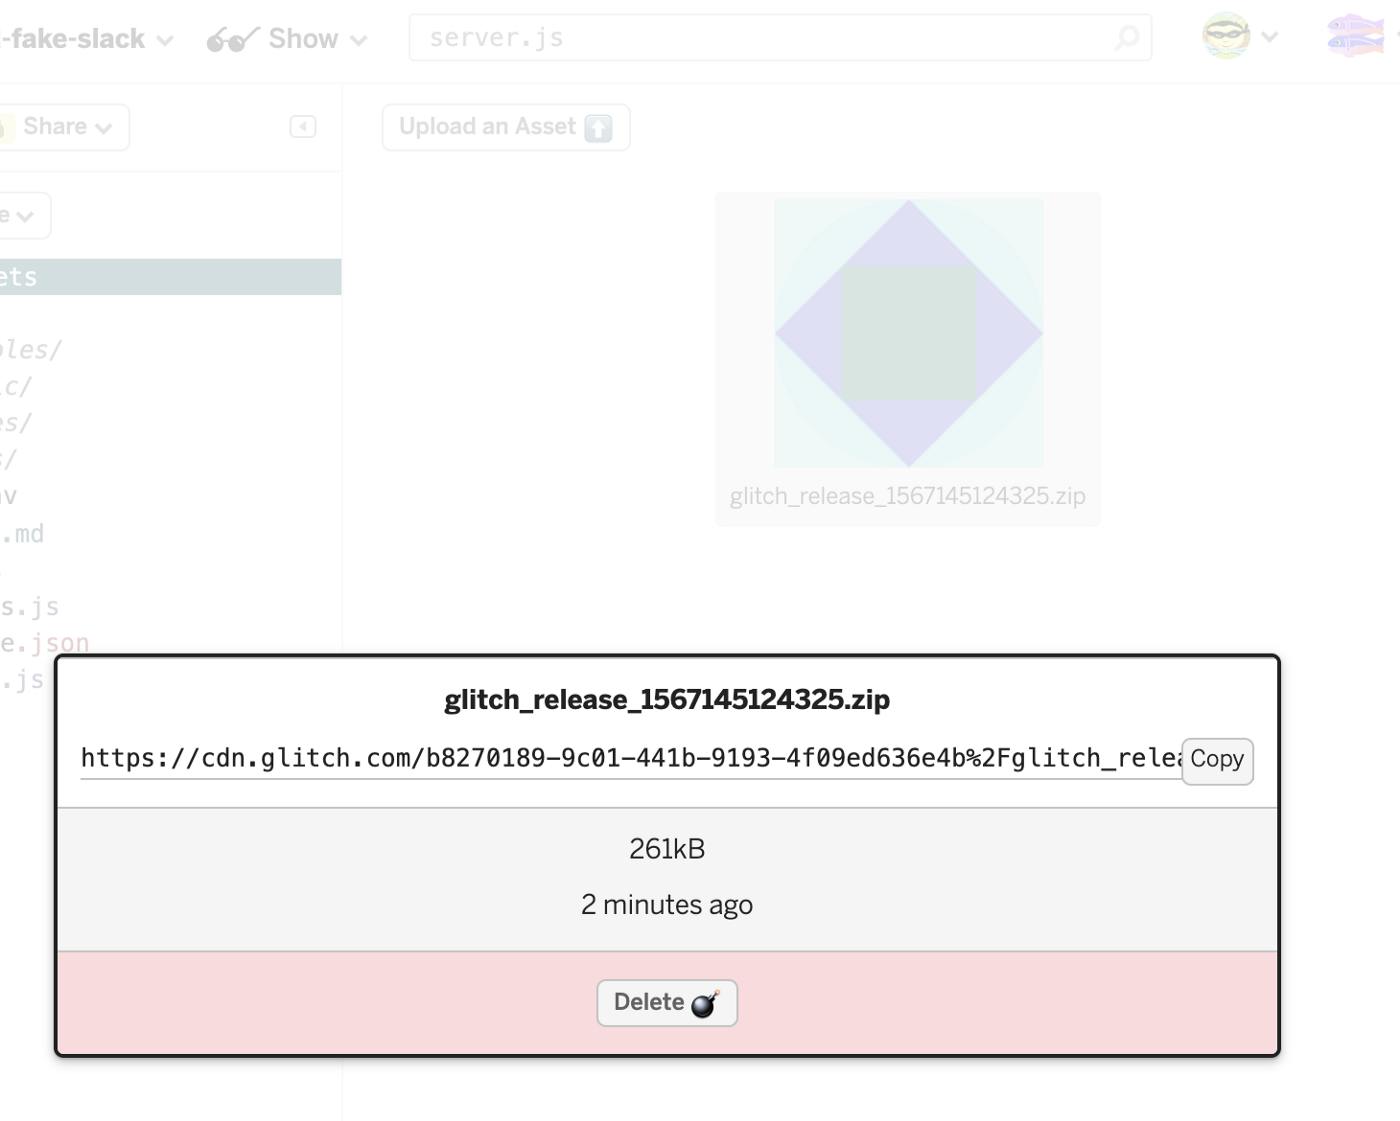
To copy the URL, click on the archive image and in the pop-up window click on the Copy button. Everything is now the URL to the archive in memory.
Go to the console!
Console Actions
We need wget to download the archive to the docker from the assets folder.
Go to Tools -> Full Page Console
The console opens and we enter the command
wget -O glitch_release_1567145124325.zip https://cdn.glitch.com/b8270189-9c01-441b-9193-4f09ed636e4b%2Fglitch_release_1567145124325.zip?v=1567145294956
What allows you to download the archive file inside the container
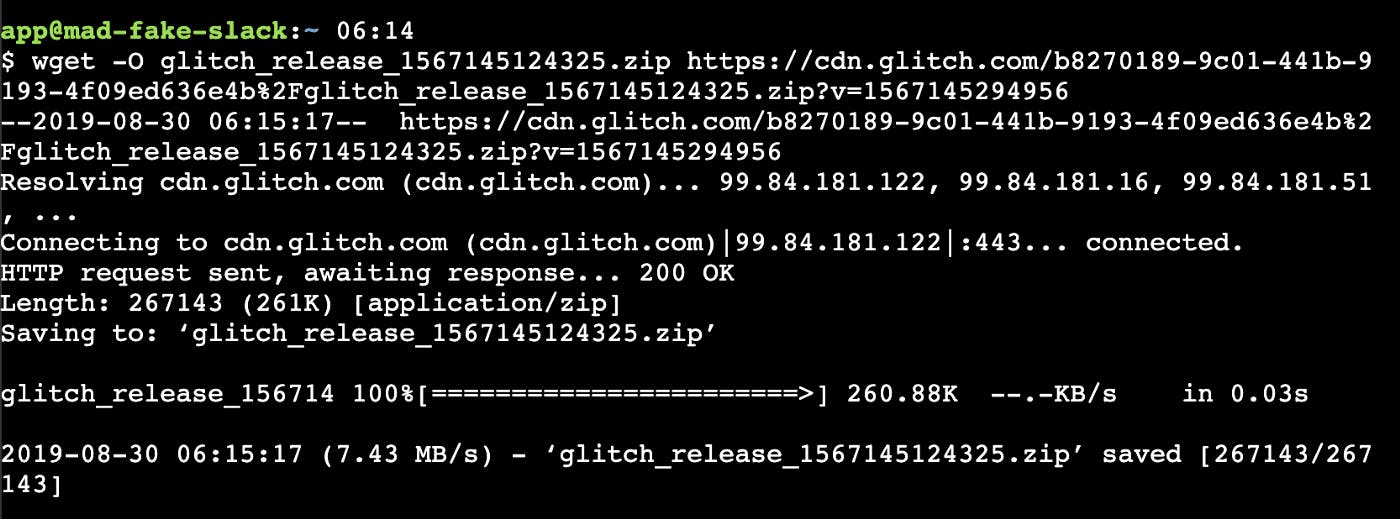
Downloading the archive file to the root of the current folder
And now we need to execute the command
unzip -o glitch_release_*.zip -d . && rm glitch_release_*.zip && refresh
In order to unzip the archive to the root of the project folder with replacing files, as well as deleting the downloaded archive and executing the refresh command so that the changes are reflected in the UI

But we need this large command only during the first scan of the archive. In subsequent times, the team will help us
npm run glitch:unpack
Which will execute the above command.
Thus, the delivery took place! Now you can use the menu Show -> In New Window or Show -> Next to The Code

Show menu to choose how to view your creation
Conclusion
In this simple way, you can create special delivery packages that, unlike exporting the repository, do not add extra files and allow you to change settings without affecting the source files. Since it is not always possible to change any settings through environment variables.
I hope in this article you will learn something new and useful for use in your work.


Strapi: Things to Keep in Mind Before Migrating to...
Strapi: Things to Keep in Mind Before...
Strapi: Things to Keep in Mind Before Migrating to This CMS
When it comes to CMS, the modern market has already stepped so much that the choice is becoming increasingly difficult. There are so many options for...
